
Overview
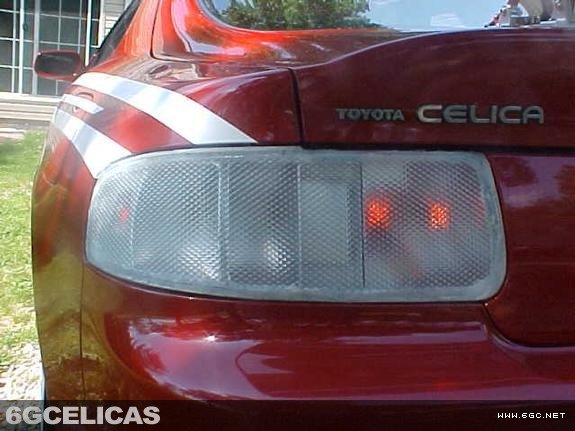
Create custom clear tail lights using office lighting material to achieve an Altezza-inspired appearance when no aftermarket options were available for North American 6th generation Celicas. This historical modification technique involves removing the factory colored lenses and replacing them with clear office ceiling light material. The process works for hatchback, coupe, and convertible models.
🕒 Time Required: 2 Days (including drying time)
💰 Cost: $25-35 (materials)
🔧 Tools: Basic hand tools, office lighting material
🚨 Important Historical Context
- Irreversible modification: This process destroys the original tail light lenses permanently
- Historical technique: This represents early 2000s DIY methods before aftermarket options existed
- Safety considerations: Office lighting material may not meet automotive safety standards
- Legal compliance: Check local regulations before modifying safety equipment
- Alternative recommendation: Modern aftermarket clear tail lights are now readily available
Required Tools & Materials
🔧 Tools
- 10mm socket and ratchet
- Hammer for lens removal
- Hand sander or sandpaper
- Clamps for securing
- Cutting tool (soldering iron or knife)
📦 Materials
- 1 sheet of office lighting material (ceiling light cover)
- 1 tube of outdoor clear silicone adhesive
- Chrome spray paint (4-5 cans)
- Paper for templates
- Paint for edge finishing
Installation Steps
Step 1: Remove Tail Light Assemblies
Remove your tail lights by accessing the three nuts on the inside of the hatch (or trunk area for coupe/convertible). Use your 10mm socket to remove all mounting nuts and carefully disconnect electrical connectors. Remove the assemblies and place them on a protected work surface.
Step 2: Remove Colored Lens Material
Carefully break out all red and yellow plastic lens material from the tail light housing. Use appropriate safety equipment as this will create sharp fragments. This step permanently destroys the original lenses, so ensure you're committed to the modification before proceeding.
Step 3: Clean and Prepare Housing
Use a hand sander to smooth down all rough edges left from lens removal. Ensure all edges are flush with the tail light housing to provide a proper mounting surface for the new clear material. Clean the housing thoroughly to remove all debris and plastic fragments.
Step 4: Paint Housing Interior
Apply chrome spray paint to the inner tail light housing in 4-5 light coats, waiting between each application for proper adhesion. This chrome finish will enhance light reflection and create the signature bright appearance. Allow paint to dry completely between coats and cure overnight.
Step 5: Create Clear Lens Template
Once the housing is completely dry, trace the outline of the tail light opening onto paper to create cutting templates. Transfer these templates to the office lighting material and cut out the clear lens pieces. Work carefully as the lighting material can crack and break easily during cutting.
Step 6: Test Fit Clear Material
Perform a dry fit to ensure the lighting material is cut correctly and will provide the desired appearance. Check alignment and coverage before proceeding with permanent installation. Make any necessary adjustments to the cut pieces at this stage.
Step 7: Permanent Installation
Apply a bead of clear silicone adhesive around the edge of the tail light housing. Position the office lighting material on the housing and secure with clamps to maintain proper alignment. Ensure even pressure distribution and allow to cure overnight for maximum bond strength.
Step 8: Finish and Reinstall
Once the adhesive has fully cured, paint the edges to cover any visible glue lines for a clean, finished appearance. After the edge paint has dried completely, reinstall the tail lights in your vehicle by reversing the removal process. Test all lighting functions before regular use.
Expected Results
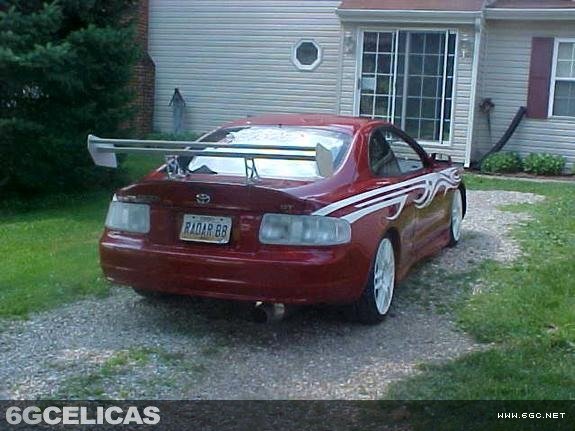
This modification creates a unique clear tail light appearance with the distinctive diamond pattern texture of office lighting material. The chrome-painted housing provides bright light reflection similar to Altezza-style tail lights. The result is a custom one-off appearance that was popular in the early 2000s tuning scene when aftermarket options were limited.
💡 Lighting: Chrome interior enhances bulb brightness
🕰️ Historical Value: Represents early DIY modification techniques
💡 Pro Tips
- Material Selection: Choose the thickest office lighting material available for durability and easier handling during cutting.
- Chrome Paint Quality: Use automotive-grade chrome paint for better durability and light reflection properties.
- Edge Finishing: Take time with edge painting as visible glue lines will detract from the overall professional appearance.
- Modern Alternative: Consider that quality aftermarket clear tail lights are now widely available and may be safer.
- Template Accuracy: Make templates slightly oversized rather than undersized - you can trim excess material but can't add it back.
📜 Historical Context
This modification technique represents the ingenuity of early 2000s car enthusiasts who wanted Altezza-style clear tail lights before aftermarket manufacturers produced options for the 6th generation Celica. While the method achieves the desired visual effect, modern enthusiasts should consider that professional aftermarket alternatives now exist that maintain safety standards and allow for easy reversal.