
Overview
Transform damaged, scratched, or curb-rashed wheels back to like-new condition through professional-quality refurbishment techniques. This comprehensive restoration process addresses everything from deep gouges and curb damage to complete refinishing, resulting in wheels that look better than factory fresh. Perfect for salvaging expensive aftermarket wheels or refreshing worn factory equipment.
🕒 Time Required: 1 full day per wheel
💰 Cost: $50-75 (supplies for 4 wheels)
🔧 Tools: Files, sandpaper, specialized wheel paint
Required Tools & Materials
🔧 Shaping Tools
- Coarse metal files (for major damage removal)
- Fine metal files (for scratch refinement)
- Wood files (for delicate finishing work)
📜 Abrasives
- 80 grit sandpaper/sponge (coarse smoothing)
- 150 grit sandpaper (surface refinement)
- 320 grit sandpaper (paint preparation)
🎨 Finishing Supplies
- Specialized wheel paint (color and clear coat)
- Wax and grease remover
- Masking tape and paper
Refurbishment Process
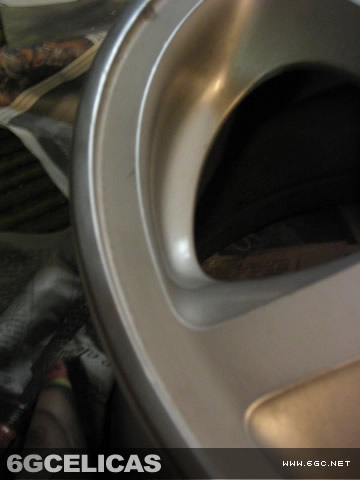
Step 1: Assess and Remove Major Damage
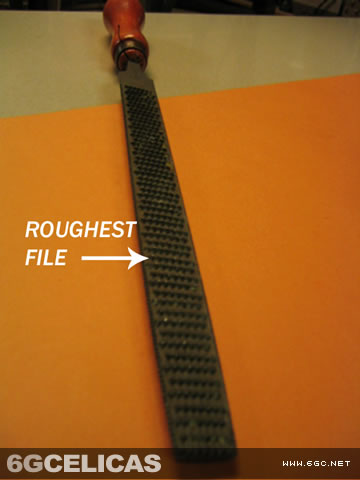
Start with the roughest file to remove deep curb rash and major gouges on the wheel lip. Use steady, controlled strokes - let the file do the work rather than applying excessive pressure. Focus on eliminating the deepest damage while preserving the wheel's original contours. This aggressive filing will create new scratches, but don't worry - these will be removed in subsequent steps.
Step 2: Refine with Progressive Filing
Switch to finer files to remove scratches created by the coarse file. Work systematically over the damaged areas, maintaining consistent pressure and stroke direction. Critical: preserve the wheel lip's original curve and profile - avoid creating flat spots or irregular contours. The goal is smooth, continuous surfaces that follow the wheel's designed shape.
Step 3: Initial Sanding - 80 Grit

Begin the sanding progression with 80 grit sandpaper or sanding sponges. This aggressive grit removes file marks and begins smoothing the repaired areas. You'll see dramatic improvement at this stage as the coarse scratches disappear. Work systematically, ensuring complete coverage of all filed areas.
Step 4: Surface Refinement - 150 Grit
Progress to 150 grit sandpaper for surface refinement. This step creates the smooth, shiny finish that approaches the final result. Take your time here - the quality of this sanding directly affects the final paint finish. If deep scratches remain visible, return to coarser grits before proceeding.
Step 5: Paint Preparation - 320 Grit
Complete the damaged area preparation with 320 grit sandpaper. This fine grit removes all sanding swirls and creates the optimal surface for paint adhesion. Important: Your arm should be fatigued after this step - if not, you haven't sanded enough. Repeat previous steps if any scratches remain visible.
Step 6: Full Wheel Surface Preparation
Sand the entire wheel surface with 320 grit sandpaper to create uniform paint adhesion. This critical step ensures the new paint bonds properly to both repaired and original areas. If tires are mounted: mask them thoroughly at this stage to prevent overspray damage.
Step 7: Final Cleaning and Degreasing
Clean the wheel meticulously with wax and grease remover to eliminate all contaminants that could affect paint adhesion. Remove all sanding dust, fingerprints, oils, and residues. This step is critical - any contamination will cause paint defects, poor adhesion, or finish irregularities.
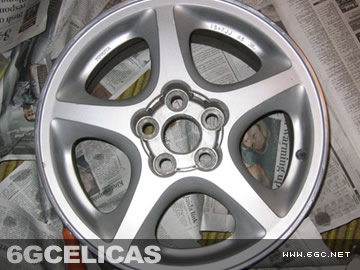
Step 8: Color Coat Application
Position wheels at an angle (not parallel to ground) for easier, more even paint application. Apply 2-3 thin, even coats using specialized wheel paint like Duplicolor. Never apply one thick coat - multiple thin coats provide superior durability and finish quality. Paint the wheel face first, then carefully flip and paint the back after several hours of drying.
Step 9: Clear Coat Protection
Apply clear coat according to manufacturer specifications - timing is critical for proper adhesion between color and clear coats. Some products require clear coat within a specific window, others need extended curing time. Read instructions carefully and apply light, even coats for maximum durability and gloss.
Step 10: Curing and Installation
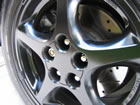
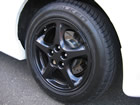
Allow complete curing according to paint manufacturer recommendations before handling or mounting tires. Proper curing ensures maximum durability and prevents damage during installation. The result: professionally refurbished wheels that look better than new at a fraction of replacement cost.
Expected Results
Properly executed wheel refurbishment produces results that exceed factory quality. Even severely damaged wheels with deep curb rash can be restored to perfect condition. The process eliminates all visible damage while creating a durable, long-lasting finish that withstands daily driving conditions. This technique saves hundreds of dollars compared to wheel replacement while achieving superior cosmetic results.
💪 Damage Recovery: Complete restoration of even severely damaged wheels
💰 Cost Effectiveness: Fraction of replacement wheel costs
🛡️ Durability: Long-lasting finish resistant to chips and scratches
Additional Reference
💡 Pro Tips
- Progressive Approach: Don't rush the filing stages - conservative approach prevents removing too much material and maintains wheel integrity.
- Contour Preservation: Constantly check wheel profile during filing to maintain original curves and prevent creating flat spots.
- Sanding Persistence: If scratches remain after 320 grit, restart the sanding progression - shortcuts result in visible defects under paint.
- Paint Selection: Use only specialized wheel paints designed for high-heat, brake dust, and impact resistance.
- Environmental Control: Paint in dust-free conditions with optimal temperature and humidity for professional results.