
Overview
Restore faded and weathered window trim to like-new condition using specialized plastic and rubber paint. Over time, UV exposure and weather conditions cause black trim pieces around windows to fade to gray or develop a chalky appearance. This cost-effective restoration technique brings back the deep black finish without expensive replacement parts.
🕒 Time Required: 2 hours
💰 Cost: $15-25 (paint and supplies)
🔧 Tools: Masking supplies, specialized paint
Required Tools & Materials
🎨 Paint & Supplies
- Spray paint formulated for plastic/rubber
- Wax and grease remover or rubbing alcohol
- Soap and water for cleaning
🛡️ Masking Materials
- High-quality masking tape (automotive grade)
- Masking paper or plastic sheeting
- Newspaper (backup coverage)
Installation Steps
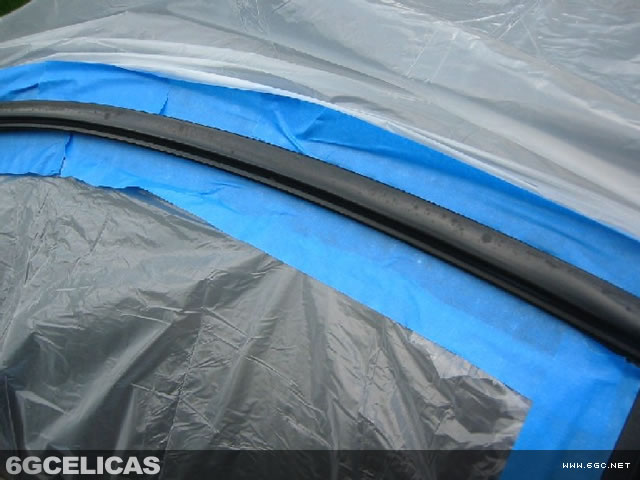
Step 1: Deep Clean Window Trim
Begin with thorough cleaning using soap and water to remove surface dirt and debris. For better paint adhesion, follow up with rubbing alcohol or automotive wax and grease remover to eliminate any remaining contaminants, wax residue, or oils that could prevent proper paint bonding. Allow trim to dry completely before proceeding.
Step 2: Extensive Masking Process
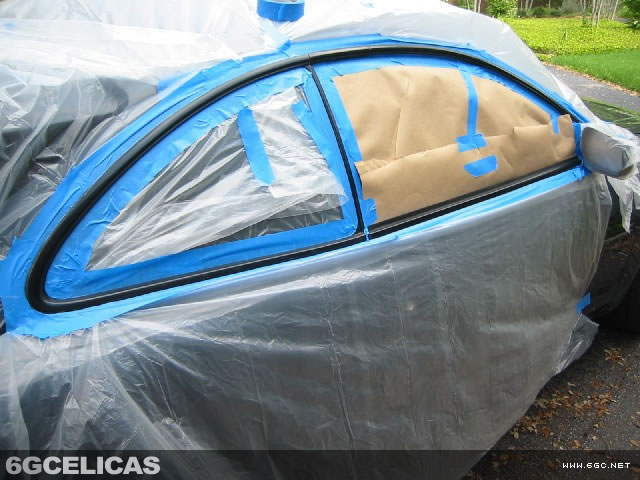
Critical step: Mask off the entire vehicle meticulously to prevent overspray damage. Use high-quality automotive masking tape and cover large areas of the car with plastic or paper. Overspray can travel several feet and adhere to paint, glass, and other surfaces. Take your time with this step - quality masking saves hours of cleanup work.
Step 3: Final Surface Preparation
With masking complete, perform final surface preparation by wiping the trim with wax and grease remover or rubbing alcohol. This removes any fingerprints, dust, or contaminants introduced during the masking process. Clean surfaces ensure optimal paint adhesion and professional results.
Step 4: Apply Paint in Light Coats
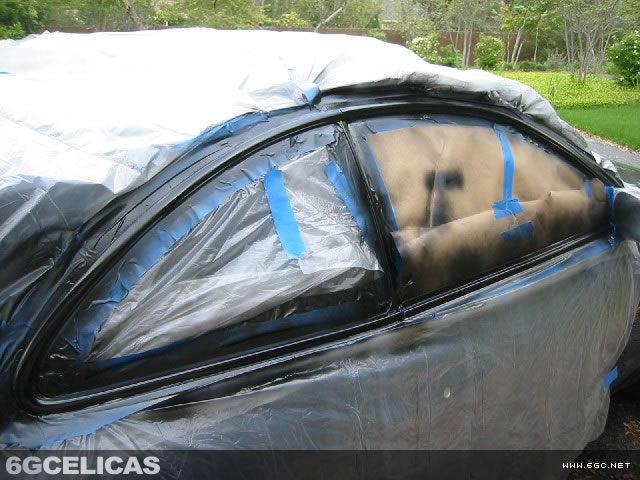
Apply paint using the manufacturer's specifications for distance, timing between coats, and environmental conditions. Start with light, even coats rather than attempting full coverage in one pass. Follow the specific instructions on your paint can regarding drying time between coats and optimal painting temperature range.
Step 5: Build Coverage with Additional Coats
Evaluate coverage after the initial two coats have dried. If the finish appears uneven or the original faded color shows through, apply additional light coats until achieving uniform, deep black coverage. Multiple thin coats provide better durability and appearance than fewer thick coats that may run or sag.
Step 6: Careful Masking Removal
Once the final coat has dried sufficiently, carefully remove masking tape and protective covering. Remove tape while the paint is still slightly tacky to prevent peeling along the edges. Work slowly and at a low angle to the surface to ensure clean paint lines without damage to the fresh finish.
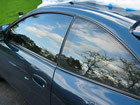
Expected Results
The completed restoration transforms weathered, gray window trim back to deep, rich black that matches or exceeds the original factory appearance. Properly executed, this modification provides a cost-effective alternative to expensive trim replacement while significantly enhancing the vehicle's overall aesthetic appeal. The refreshed trim creates a clean, well-maintained appearance that complements other restoration efforts.
💰 Cost Savings: Fraction of replacement part costs
🛡️ UV Protection: Fresh paint provides renewed weather resistance
⏱️ Longevity: Proper application extends trim life significantly
Additional Reference
💡 Pro Tips
- Paint Selection: Use only paints specifically formulated for plastic and rubber - regular paint will not adhere properly and may flake off.
- Weather Conditions: Paint on calm days with moderate temperatures and low humidity for optimal results and minimal dust contamination.
- Masking Quality: Invest in high-quality automotive masking tape that removes cleanly without leaving residue or lifting paint.
- Surface Temperature: Ensure trim is not hot from sun exposure before painting - warm surfaces can cause paint to flash dry with poor results.
- Practice Technique: Practice spray technique on scrap material first to perfect your distance and motion for even coverage.