
Overview
A cold air intake can be fabricated fairly easily for ST Celicas. This comprehensive guide shows you how to build a custom cold air intake system using readily available parts.
🕒 Time Required: 2-4 hours
💰 Cost Range: $80-120
Required Parts
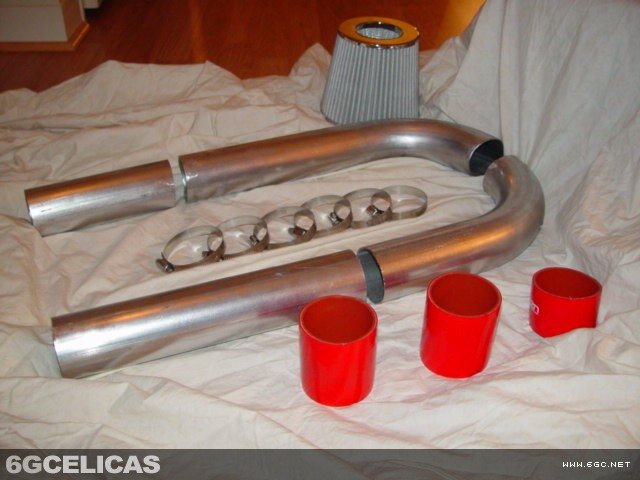
- Three 2.5" hose couplings (rubber or silicone)
- One 180° mandrel bent aluminum pipe, 2.5" diameter
- Six 2.5" hose clamps
- Air intake filter with 2.5" inlet (K&N recommended)
- AEM intake bypass valve (optional but recommended)
• Hose couplings: Lowes, Home Depot, or online
• Aluminum pipe: JC Whitney (~$30)
• Clamps: AutoZone, Advance Auto Parts ($0.78 each)
• Filter: K&N ($30-40) or budget option ($10)
Step 1: Remove Stock Intake System
Remove your old intake box and the black resonator box on the driver's side fender. Loosen all clamps and unscrew the bolts inside the box under the filter, then remove the bolts holding the intake box together. For the fender resonator box, remove the three 10mm bolts and pull firmly to remove it.
Step 2: Cut and Prepare Pipes
Cut the U-shaped mandrel bent pipe into three pieces:
- Cut in half at the middle of the curve
- Cut one half again to create a short curved piece
- Cut 18" off the other half to create a long curved piece
You'll end up with four pieces total but only need three: short curved pipe, long curved pipe, and small straight pipe.

Step 3: Install IAT Sensor
Drill a hole in one of the pipes for the intake air temperature (IAT) sensor. Make the hole the same diameter as the sensor. If it's loose, wrap a few pieces of masking tape around the sensor for a snug fit.
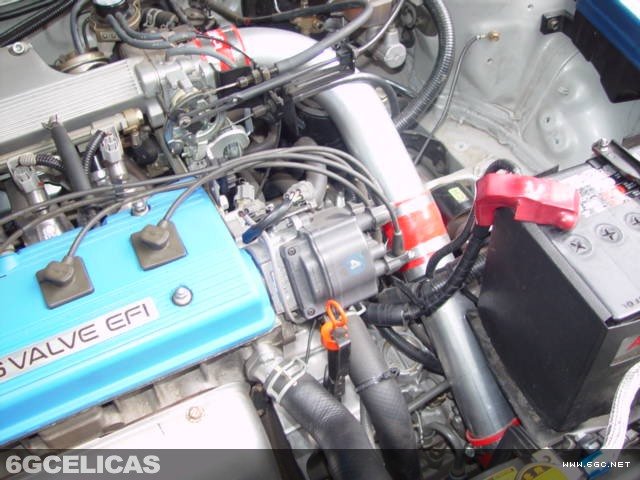
Step 4: Assemble the Intake System
- Install IAT sensor in the prepared pipe
- Connect small curved pipe to intake manifold using hose coupling
- Connect small straight pipe to curved pipe
- Connect long curved pipe from fender to straight pipe
- Attach intake filter to end of long curved pipe
- Tighten all clamps securely
Step 5: Final Steps and Testing
Reinstall the splash guard to protect the filter from road debris and water. Consider installing an AEM intake bypass valve (~$30) for hydrolock protection. Double-check all connections, start the engine, and check for air leaks.
Additional Photos


⚠️ Important Notes
- Always disconnect the battery before starting work
- Use proper safety equipment when cutting pipes
- Avoid driving through deep water with a low-mounted filter
- Consider a bypass valve for hydrolock protection
- Check local emissions regulations before installation