
this is for removing the front bumper from a 94-99 Celica ST,GT,GT-Four
Manny and I did this with his car (beautiful st205 front conversion) and I assure you the process is the exact same with the at200 (ST) and st204 (GT)
Tools needed :
flathead screwdriver
phillips head screwdriver
10mm socket, rachet, a few extensions, swivel
Time :
30min-45min depending on skill level
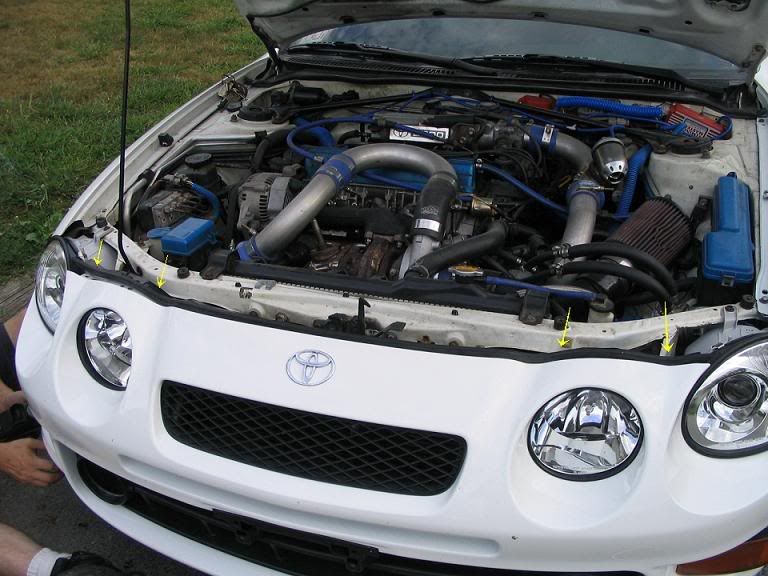
first, open your hood and prop open - and remove registration plate (if applicable)
1 - remove 4 bolts (10mm) on the top of the bumper (the retainer) and put retainer aside
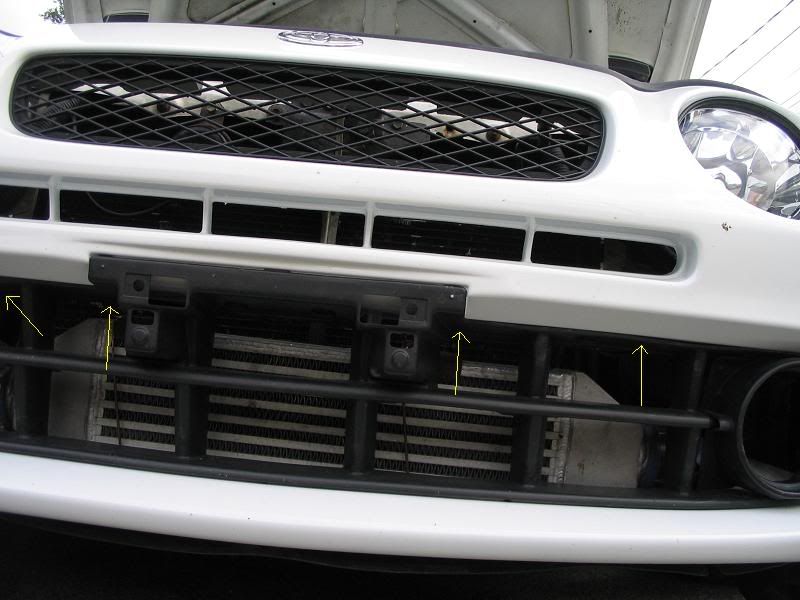
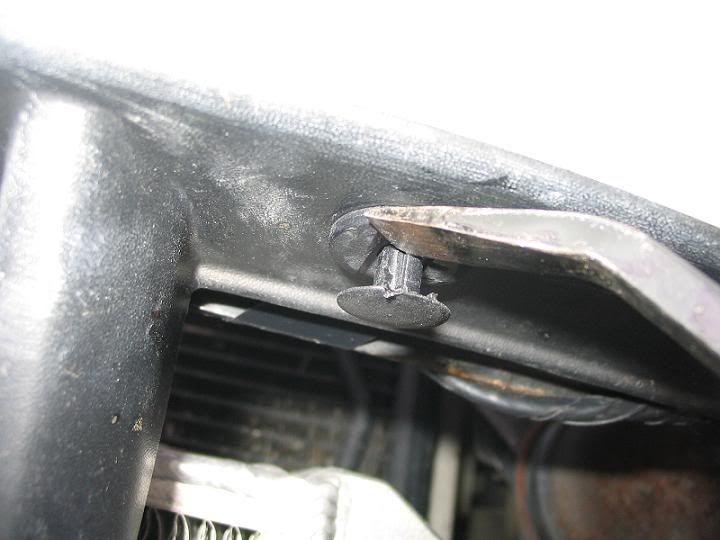
2 - remove 4 plastic drivers holding the bumper onto the re-bar (crash bar) with a flathead screwdriver
detailed view
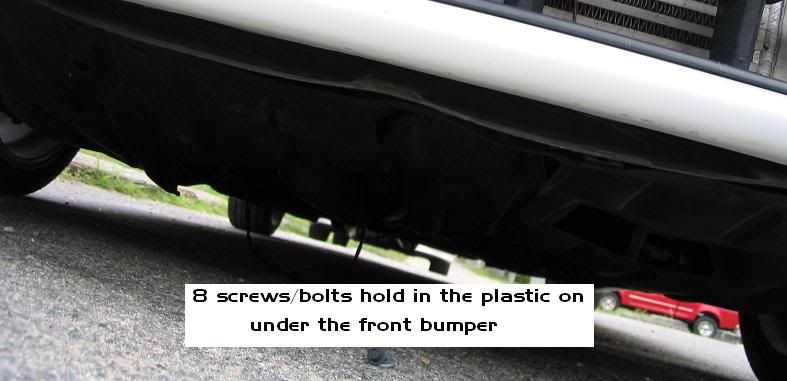
3 - remove 8 screws/bolts holding the bottom of the bumper to the under plastics
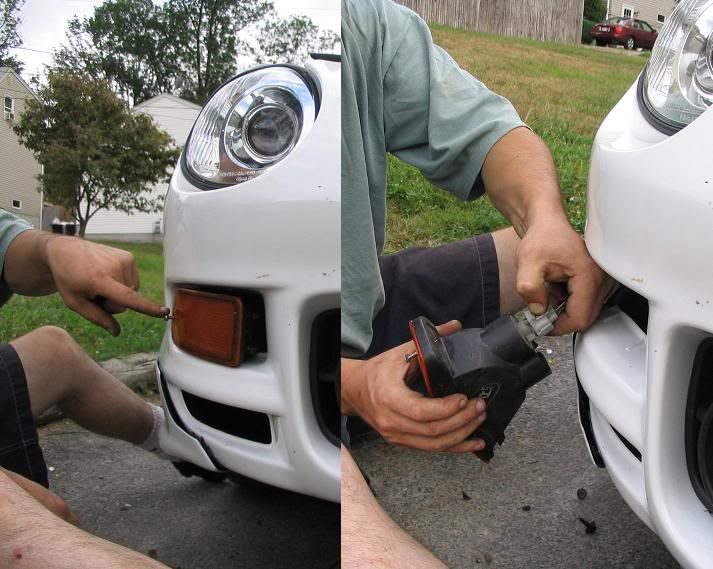
4 - unscrew turn signals (phillips head screw driver) and remove/disconnect housings (both sides)
5 - next is the tricky part. There are 3 nuts (10mm) holding the bumper to the fender (on each side) - located here
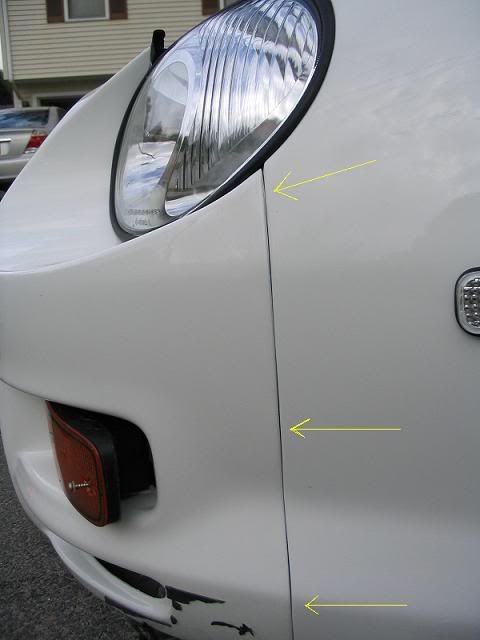
what I did was I pushed the wheel well plastic aside and stuck my hand/arm in to remove nuts
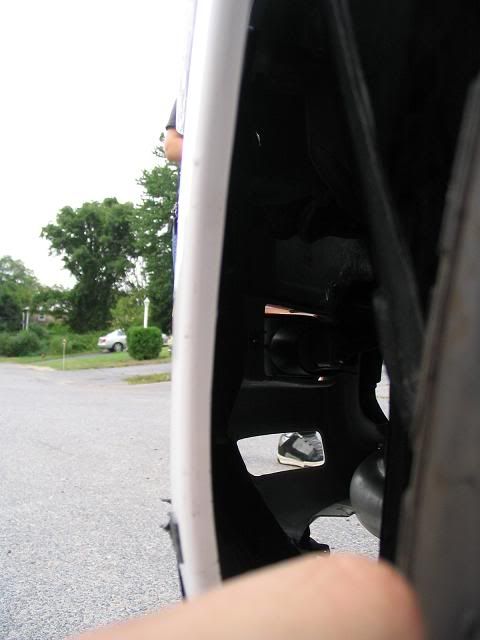
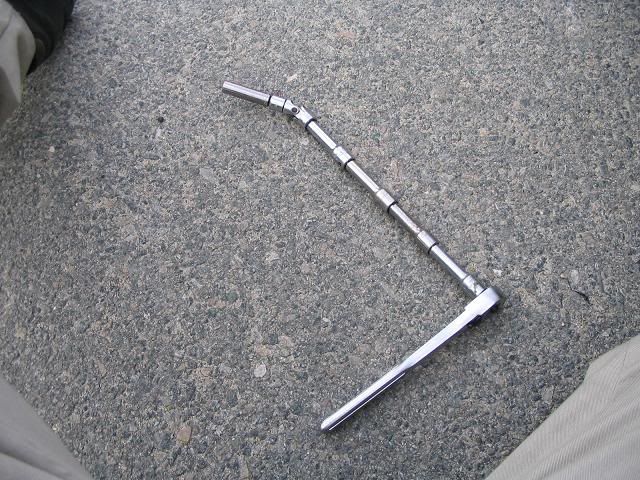
the bottom and the middle nuts are easy, the top nut is more difficult. To remove all 3 I used this
the top one is located right at the top of the inside of the fender close to the headlight, it is tight in there, I recommend you use a 10mm DEEP socket for more reach.
6 - once all 6 nuts (3 each side) are removed, pull the front bumper strait off toward the front of the car. You may need to wiggle it a little bit (it is easier to have someone help, one person on each side of the bumper)
complete. To put the bumper back on, just reverse the directions > >
>
Notes/hints :
make sure to keep all bolts/nuts ect clean and organized. You will need these again to put the bumper back on. I recommend putting them into baggies and labeling.
> >
>
Manny and I did this with his car (beautiful st205 front conversion) and I assure you the process is the exact same with the at200 (ST) and st204 (GT)
Tools needed :
flathead screwdriver
phillips head screwdriver
10mm socket, rachet, a few extensions, swivel
Time :
30min-45min depending on skill level
first, open your hood and prop open - and remove registration plate (if applicable)
1 - remove 4 bolts (10mm) on the top of the bumper (the retainer) and put retainer aside
2 - remove 4 plastic drivers holding the bumper onto the re-bar (crash bar) with a flathead screwdriver
detailed view
3 - remove 8 screws/bolts holding the bottom of the bumper to the under plastics
4 - unscrew turn signals (phillips head screw driver) and remove/disconnect housings (both sides)
5 - next is the tricky part. There are 3 nuts (10mm) holding the bumper to the fender (on each side) - located here
what I did was I pushed the wheel well plastic aside and stuck my hand/arm in to remove nuts
the bottom and the middle nuts are easy, the top nut is more difficult. To remove all 3 I used this
the top one is located right at the top of the inside of the fender close to the headlight, it is tight in there, I recommend you use a 10mm DEEP socket for more reach.
6 - once all 6 nuts (3 each side) are removed, pull the front bumper strait off toward the front of the car. You may need to wiggle it a little bit (it is easier to have someone help, one person on each side of the bumper)
complete. To put the bumper back on, just reverse the directions >
> Notes/hints :
make sure to keep all bolts/nuts ect clean and organized. You will need these again to put the bumper back on. I recommend putting them into baggies and labeling.
>
> my st205 swapandour Beams swap
 >
>
 thanks for the help bud!! i can now modify my lights
