Over 1M Posts • 84K Topics • 9K Authors

RHD BEAMS Progression/Build Thread - 6G Celicas Forums

Topic #81373 371 posts Started by ricochet1490
welding didn't go as planned. wrong setup on the welder for sheet metal. .045 wire on a 220V machine, not good for firewall. Had some success, but limited.
Trying again tomorrow with a different machine that we ahve set up with .025 wire. Just have to move the gas bottle over as the one currently attached is pure argon instead of the 75/25 argon c02 mix.

Also gotta find some brass or something to help prevent burn through lol


Any luck on the welds yet?

This post has been edited by richee3: Aug 3, 2012 - 4:32 PM

"Employ your time in improving yourself by other men's writings, so that you shall gain easily what others labored hard for." -Socrates. Even Socrates told us touse the search button!2006 Aston Martin V8 Vantage.1998 Celica GT-BEAMSSwapped.2022 4Runner TRD Off Road Prenium.2021 GMC Sierra AT4.
They freaking suck.....

It's just too dirty with paint primer, and remnants of seam sealer. I thought I had it pretty clean...
My usual skill.... Not bad


What this firewall is looking like


I'm gonna turn the heat up and slow the wire feed and go back over them I think

This post has been edited by ricochet1490: Aug 3, 2012 - 7:44 PM
Not lookin so good lol
Keep tryin man you'll get it

95 gt coupe, v6 swap weekend toy99 gt hatch beams swapped wife's94 st hatch my daily driverhttp://www.6gc.net/forums/index.php?showtopic=82235n
It's just too dirty. I'm just welding the sure **** out of it now to make sure it sticks....
They are looking better after I turned the heat up, but I burn through now if I'm not careful

This post has been edited by ricochet1490: Aug 3, 2012 - 8:23 PM
Welded it up some more, ground it down, welded it up....
Welded the inside with "tabs" of weld if that makes sense. A bunch of big tack welds basically after I tried doing what I could to seam weld everything together on the inside as well.


Just some pics. I'm sure it's not coming out anytime soon lol


word of advice if ANYONE else decides to do this..... take off all the paint and primer in the area. Even if you think it'll be fine, that was my biggest problem. I had to put those crappy welds in there to get the paint to burn off and give me more metal to flow too. That's all I did for nearly 6 hours was try to weld this thing in..... and the welds suck! but they'll be hidden so no biggie I guess.


Taking out bolts tomorrow and applying seam sealer VERY HEAVILY to cover all holes, cracks, nooks, crannys, and then gotta paint the engine bay cause I dinged it more than once during spot weld removal.

Got a job and start work officially on wednesday, so I gotta hustle lol

This post has been edited by ricochet1490: Aug 3, 2012 - 11:08 PM
Given that I referenced wire feed, def MIG welding.
If the surfaces were pristine, either welding would work. But it's got more than enough on there. If you knew how hard it was to get out....

It continues
keep up the work, and the pics!

I need to weld some sheet metal to do a repair in the rear quarter on my car, but I'm nervous about welding such thin metal on the skin of the car. Looks like its not too easy. Can't wait to see this coming together though!
no bigger than .030 size wire.... smaller if you can get it. .023 they make.
The settings on the welder are suggestion only in my opinion. Look at the settings and if they suggest something like 15V and 130in/min of wire feed, set the welder to like 16.4V and 120 in/min.... basically, hotter and slower.

But most importantly make sure you clean the surface good with a wire wheel on a side grinder and then wipe it down with something... acetone is good, gasoline, just make sure you give it time to evaporate... and then weld.....

If it's not going to be seen, I'd actually reccomend poprivet and then do your body work like youd have too anyway.....

but just get it clean.


And I'm trying to keep everything updated... don't wanna make it look easy lol
Gotta keep my threads at the top wink.gif

This post has been edited by ricochet1490: Aug 4, 2012 - 1:10 PM
Today I decided that in the engine bay, with everything on it, and with my time constraints of having MOST everything done by tuesday because I start work on wednesday....
That the blue and the black actually look very very similar and I'm not gonna worry about paint right now. The seam sealer isn't 100% hard so I can't sand it yet, but it could begin the pivotal reassembly.

Moved over the harness that goes on the nose of the car, all appropriate mount points etc.
Moved over the A/C lines that go in the engine bay.
Moved the P/S lines into the car and got them mostly installed
90% installed the brake / ABS stuff into the car, didn't do final hookups incase something had to come out because of poor order
Installed the A/C condensor
90% installed the brake booster - all mounting points for pedal on the inside aren't done yet, so gotta work that out

And pics to make the post useful


Little more done on the car. Washer fluid bottle, radiator overflow, removed old shifter cables, drilled off dash mounts, fixed power steering . Some other things
Got the dash mounts on. All but one.... get that tomorrow. Then interior things like pedals, dash, hvac etc can be installed.....
Home stretch now.
I'm jelly that you'll have auto climate control.

"Employ your time in improving yourself by other men's writings, so that you shall gain easily what others labored hard for." -Socrates. Even Socrates told us touse the search button!2006 Aston Martin V8 Vantage.1998 Celica GT-BEAMSSwapped.2022 4Runner TRD Off Road Prenium.2021 GMC Sierra AT4.
what about the windshield wipers, are you turning them around too?

Learned a lot in 10 years...I hardly log in anymore, last loginToday Sept 6 2019, and I was forced just to clarify a post. LOLIf you PM me and I dont respond, dont fret or cry. Im alive, better post your questions in the thread below, maybe I log back in2grfe Swapped...Why I chose the 2GR, before you ask read here...A great civilization is not conquered from without until it has destroyed itself from within.@llamaraxing in Instagram is the best way to find me. I hardly log here anymore.
>
QUOTE (njccmd2002 @ Aug 10, 2012 - 10:33 PM) *
>what about the windshield wipers, are you turning them around too?

yep... gotta drill that hole for sure.... wiring harness is on that side, pretty much no choice lol
Finished up the Hvac/dash/etc mounts today, then painted black to prevent surface rust


In the st202 body, the sound deadening "wrap" that goes onto the firewall underneath all of the HVAC stuff came off in CHUNKS when I initially took it off. So I have no sound deadening in RHD.... BUT I decided I try to make a frankenstine layer out of a LHD firewall cover. So I folded it in half and began to cut the holes that mirrored one another so that the big stuff like the dash mounts I just welded on and the sttering column and brake pedal assembly etc would go through the sound deadening. After I cut what I could I placed it on the wall and custom cut all the holes, one at a time, in order to access the holes and studs that I needed. So I don't know if this will end up beng a solution, but I'm giving it a shot.


Here I have mounted the gas and brake pedal and was cutting the hole for the clutch cylinder arm...


Started to test fit my HVAC by hooking up the air conditioning stuff, finding I need to weld a stud on the bottom for the evaporator, and that there is a "plate" where the fan gets its "vent" to access outside air that is in the way that also needs moved. So I'll likely have to remove everything you see below to remove the LHD plate and the RHD plate and then weld the RHD plate back in. The hole that the plate covers provides access to the cowel for it's fresh air....just wish I'd seen it before I started mounting everything in... but I needed to start mounting to see what all I had missed I guess

>
QUOTE (richee3 @ Aug 11, 2012 - 2:57 PM) *
>I'm jelly that you'll have auto climate control.


I bet if you ripped apart your interior and did the conversion you would be very disappoint.

the auto climate control works alot better in my 1988 honda civic than it does in any 6th gen celica or st205 gtfour ive ever driven lol

I'd probably preffer the manual heater dial as the automatic one seems to decide my cabin is up to temp and shut off my heat when im still freezing, or decide its colder than i am and blast me with heat when im on my favourite setting - 26

Mike W1996 Toyota Celica ST205 GT-FOURGT2860RS turbine, TiAL mvr44, JE 86.5φ piston, Clutchmasters FX400, APEX P-FC269awhp / 273ft-lbs
>
QUOTE (ricochet1490 @ Aug 4, 2012 - 2:57 PM) *
>Sealed


Holy $hit - whats happend here with the sealant???? You could have spent more time - and did it the right way... Atleast on the outside - engine bay.... Hope you do sealed under the welding place, and from inside - sealed the place where firewall meets the top? Cuz if not - you will have lots of water pretty soon....

If done right - here how it should look (This is the oposite swap - RHD to LHD)


Ex celica owner - just a guy from other side of the pond...Full custom Projects from restoration to performance builds<<<<<< DCw / JDMart >>>>>>>
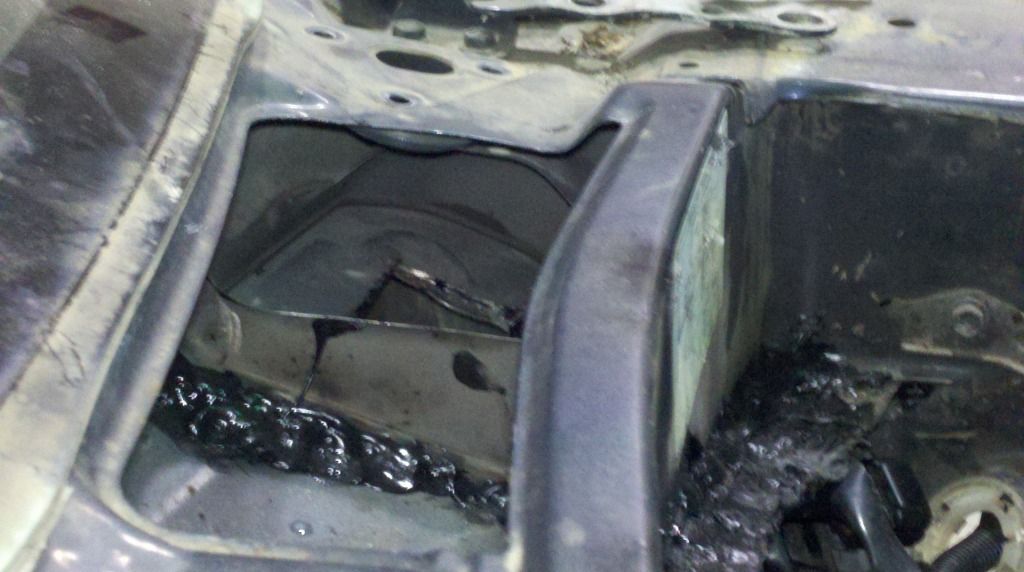
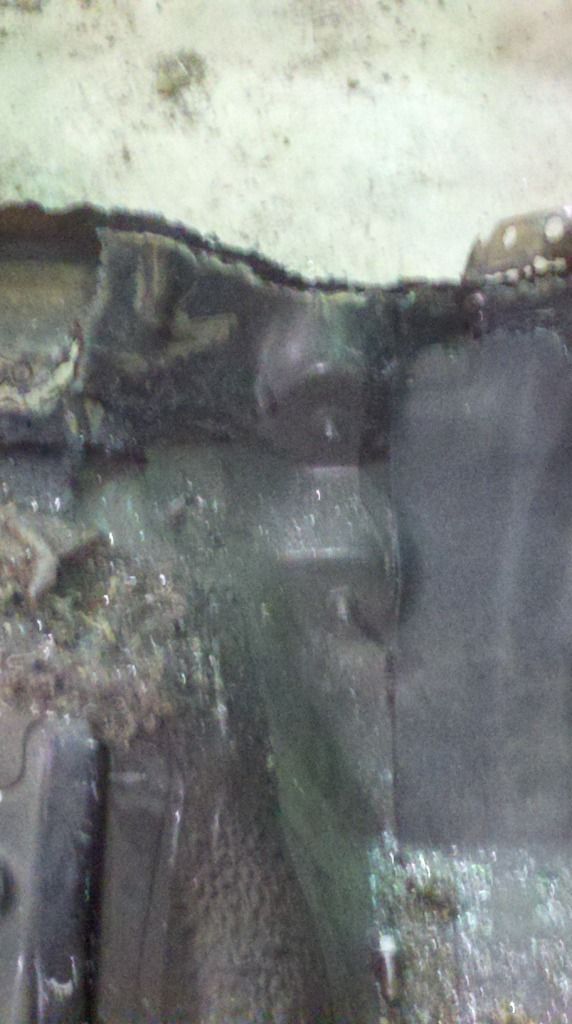
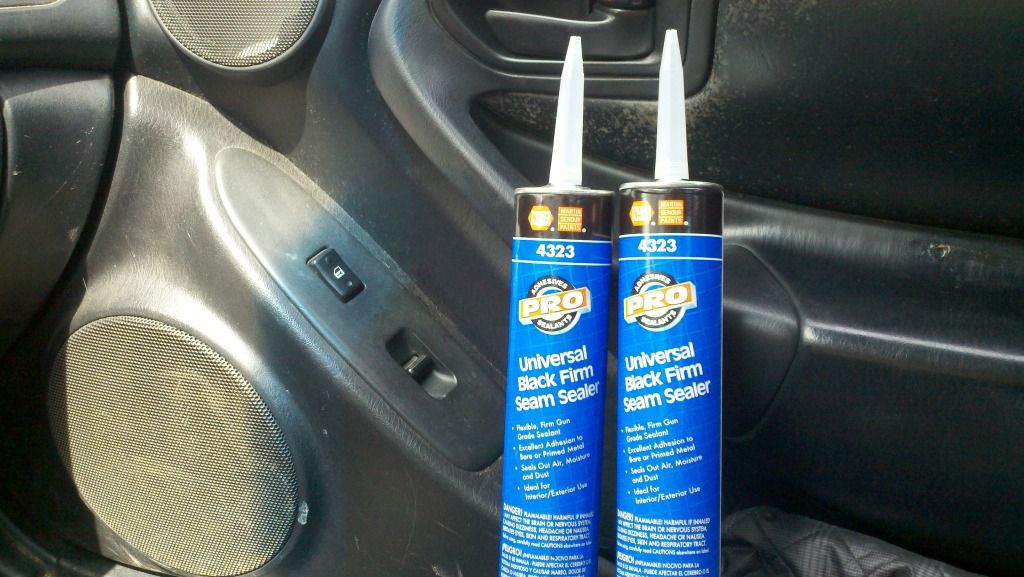
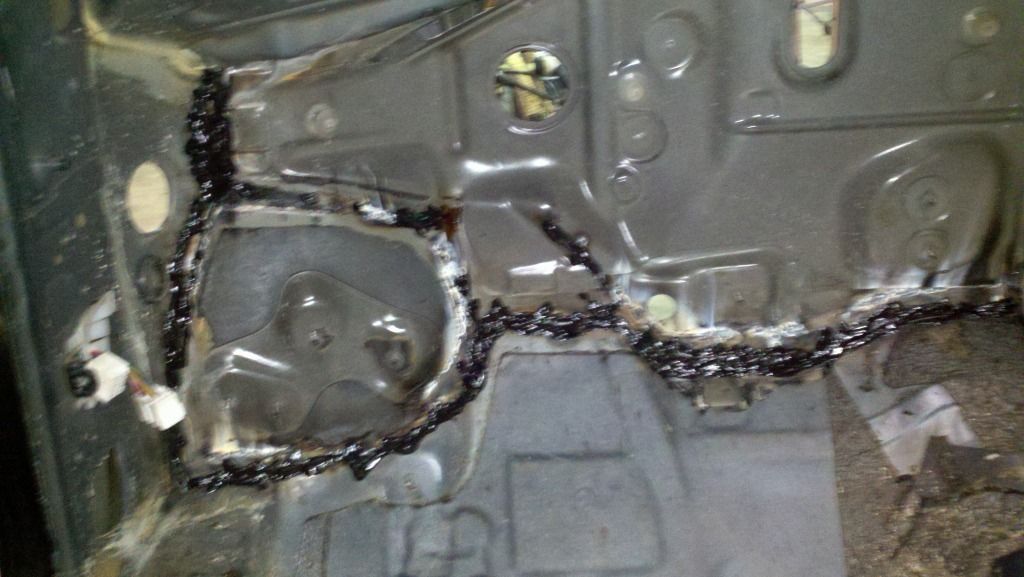
had to do it with a caulking gun and a finger? I promise you I sealed it inside and out..... I don't want any water either.

I had no idea how to get it to look like that. I was having a hard enough time getting it on there even kind of smooth, let alone in all the little cracks and holes without falling through. I know it looks ugly, but in the wheel wells I'll be covering all of that with underbody sealer/spray, so that'll look fine. And I promise I covered all the cracks and seams as well as I could.... but again, I used a caulking gun and a finger because that's all I had.....


In other news...

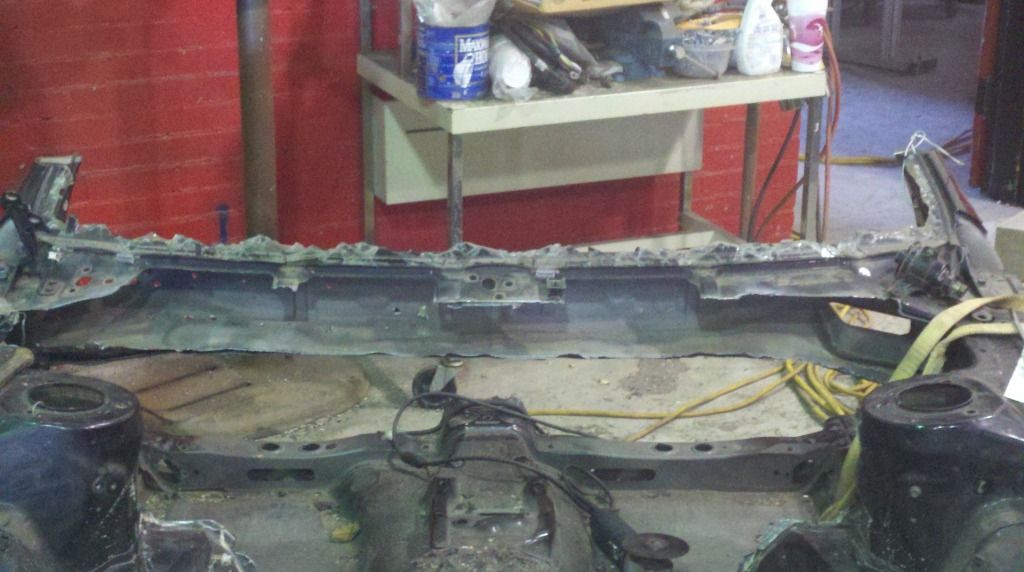
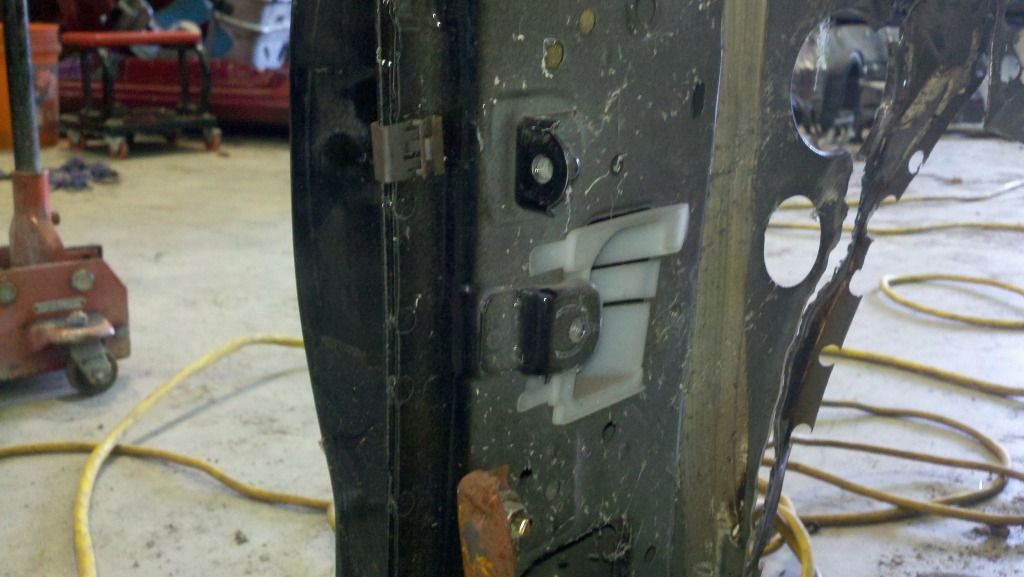
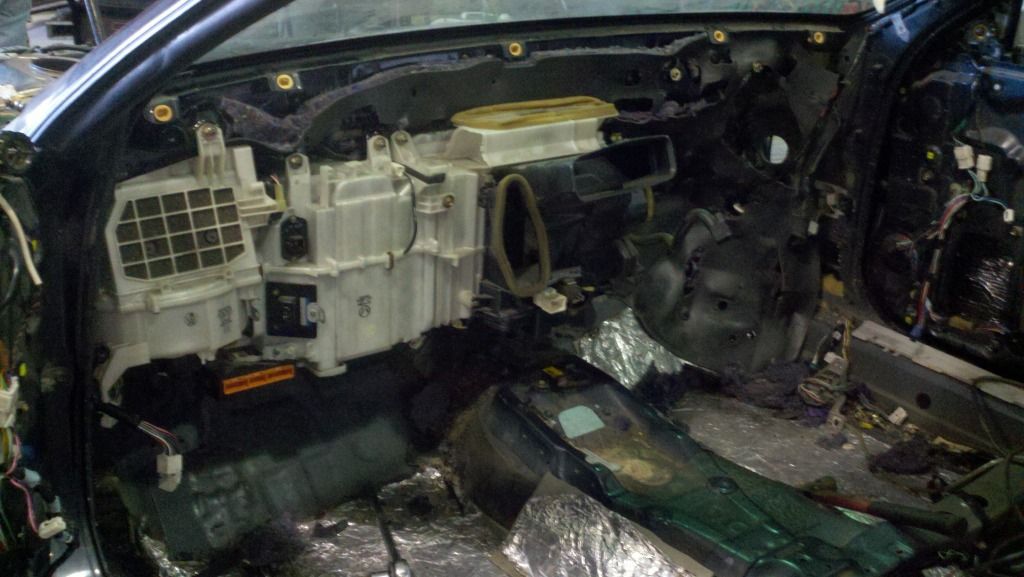
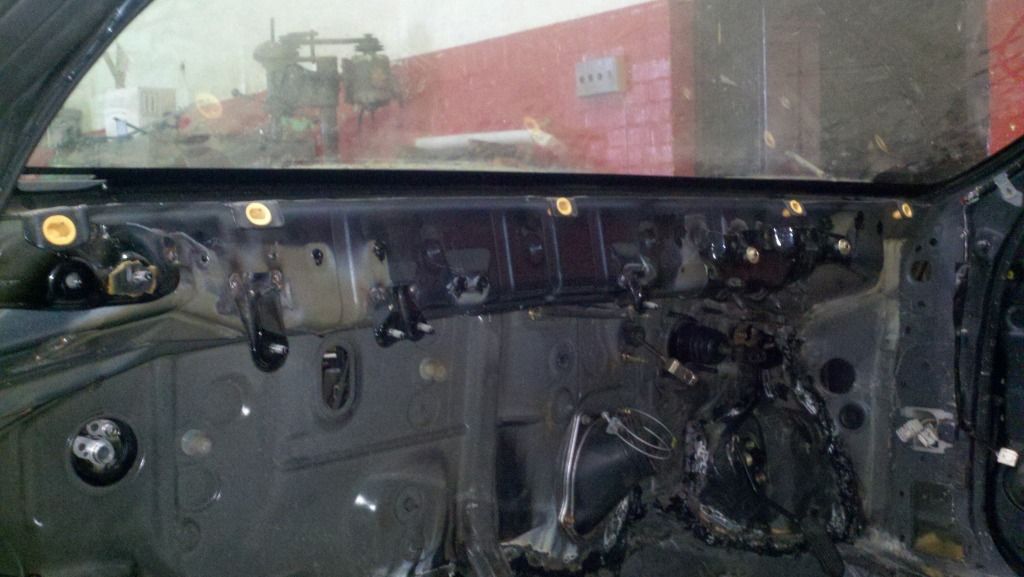
Started where I left off yesteday, knowing I had to do something with the vent access for the blower motor...

As it turns out, the bulkheads are TOTALLY different. the RHD bulkhead, cut up. notice the hole on the right side, and lack of hole on the left..


Similarly, on the right side of of the LHD bulkhead, form inside the bulkhead, you'll notice no such hole


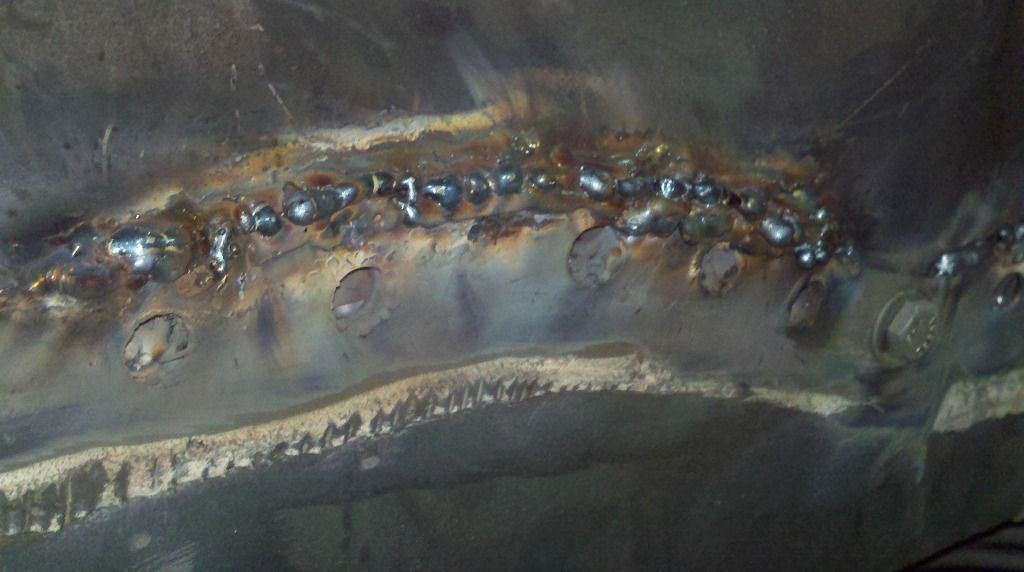
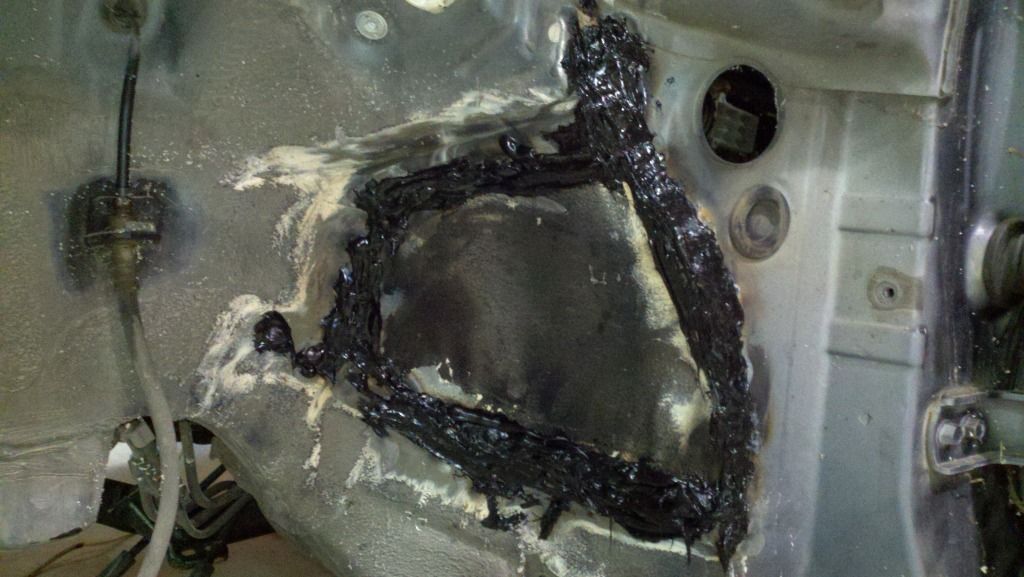
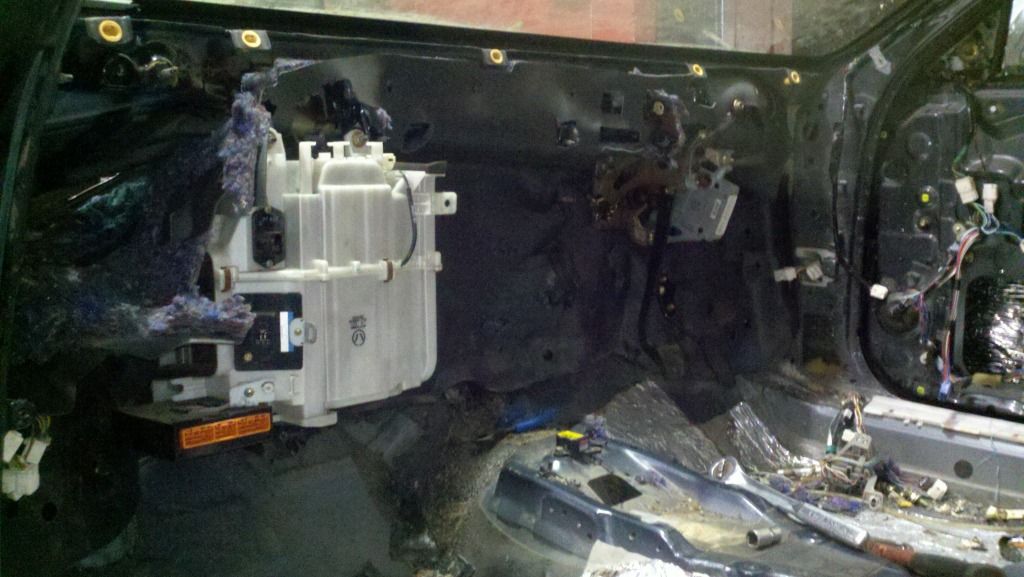
So I cut out the walled hole on the RHD...


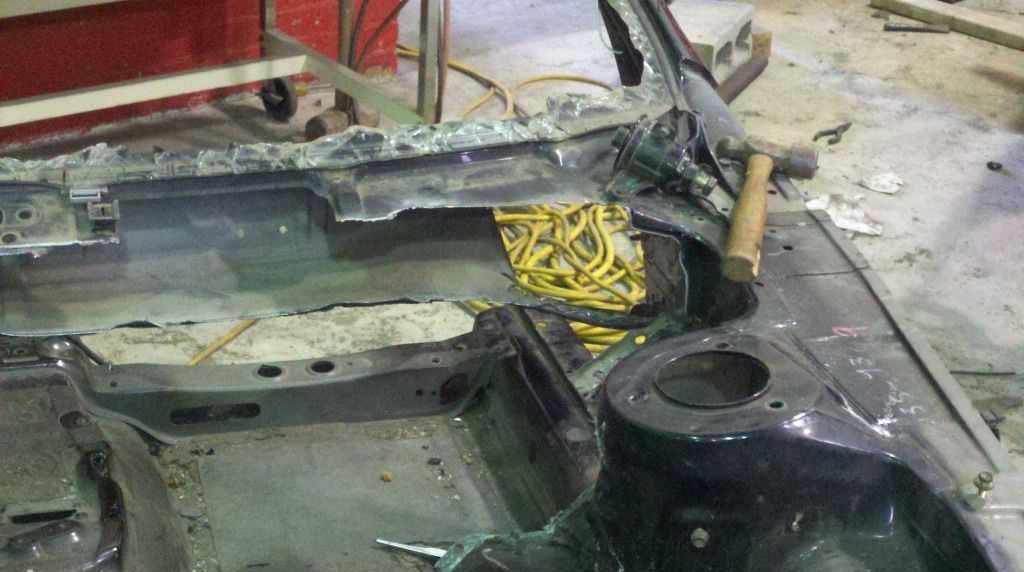
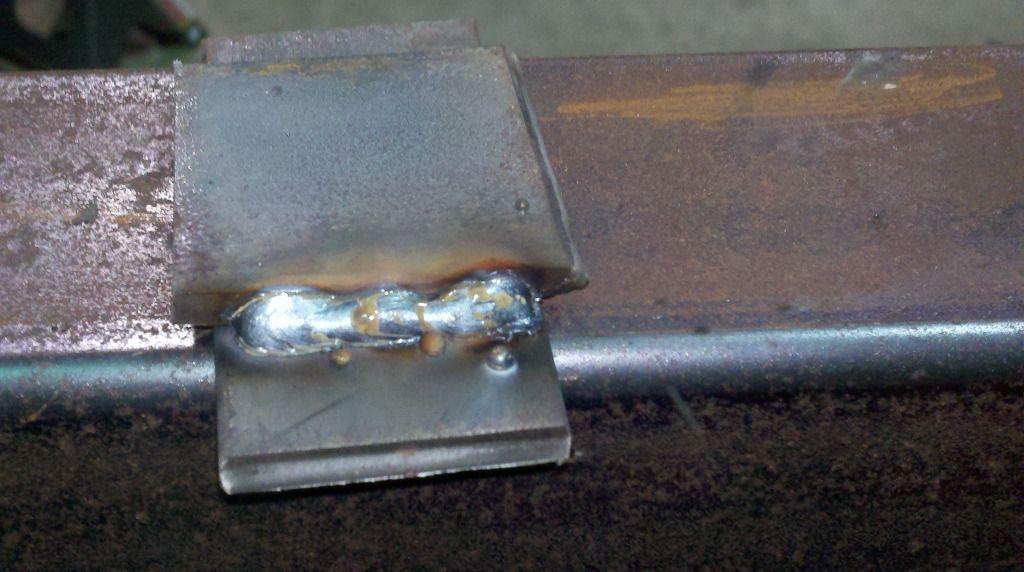
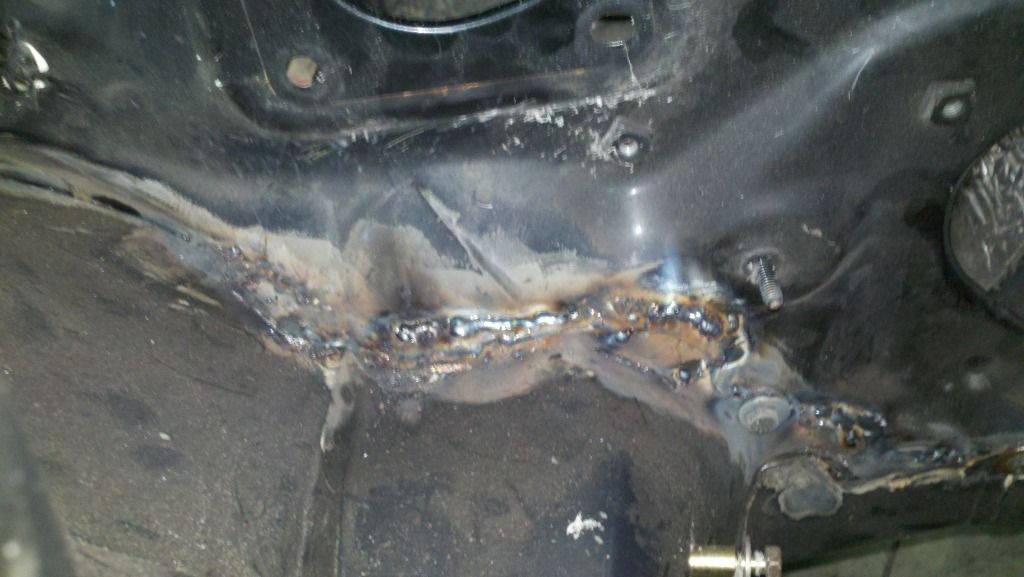
And I cut out a small 2" x 4" hole in that spot with the cutoff wheel on the side grinder.... and I welded and sealed the raised wall hole in with what I had left of my seam sealer


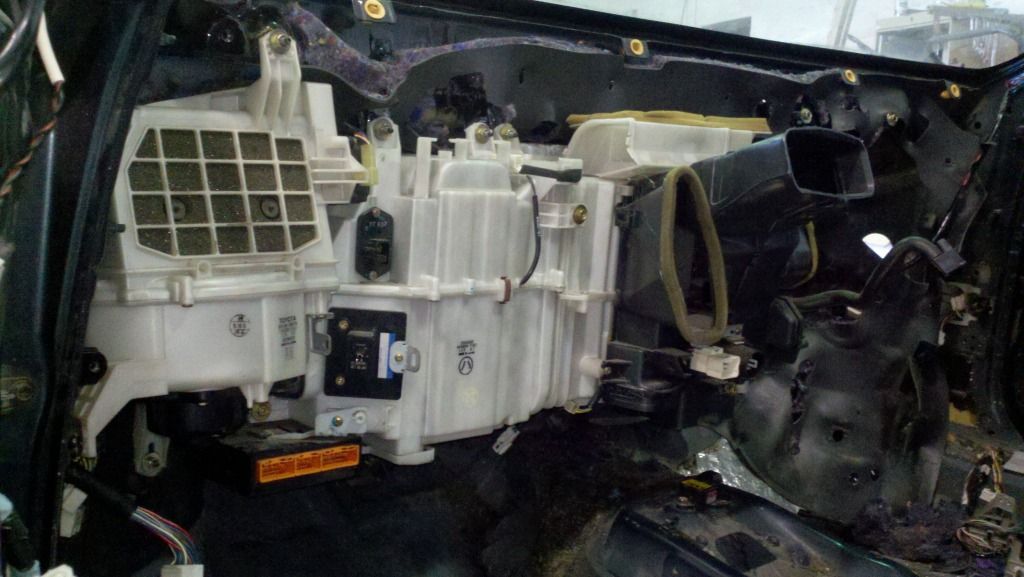
With that done I started to re assemble the HVAC on the inside, quickly noticing I missed a bracket.... So DON'T MISS THESE... you need them - it's different on each side


Also welded some missing studs I needed to mount HVAC stuff while I had the welder out.


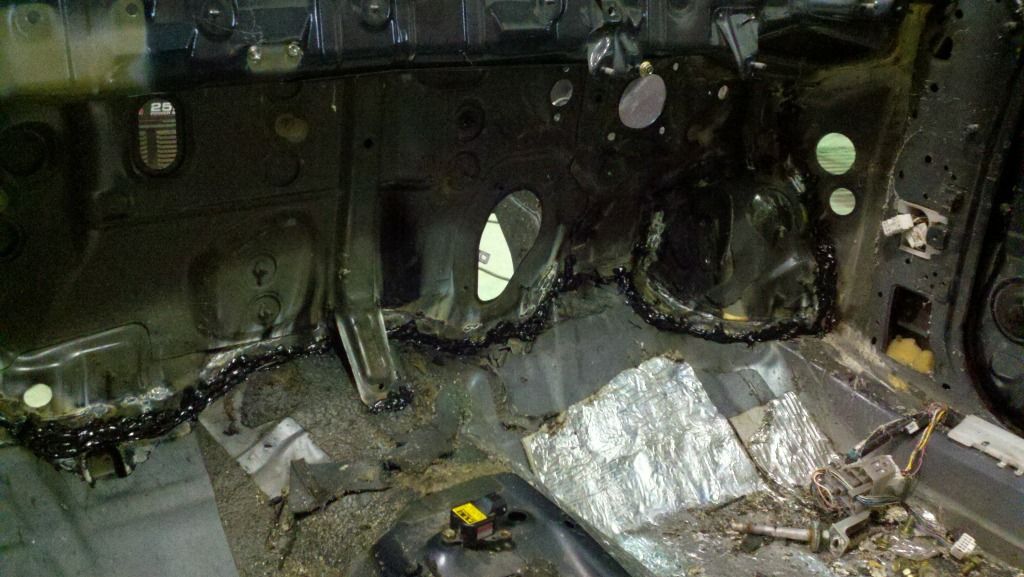
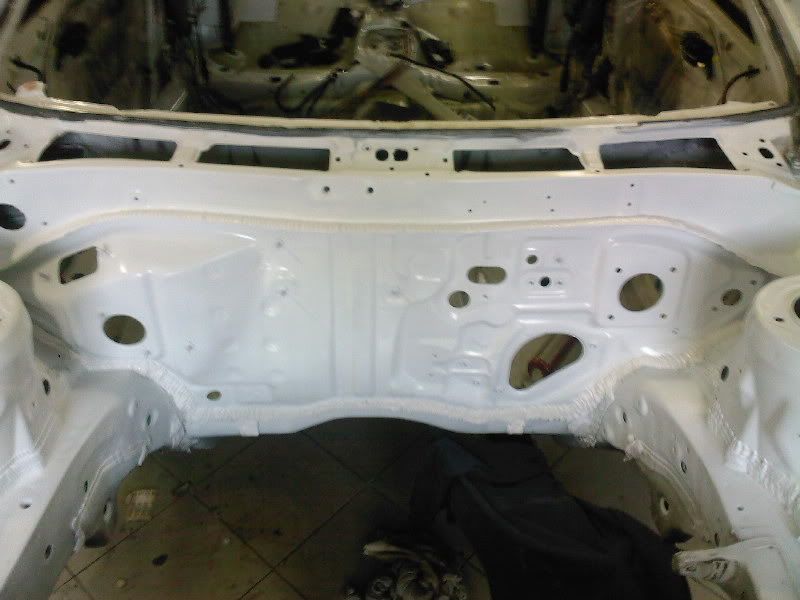
Finished for the day...


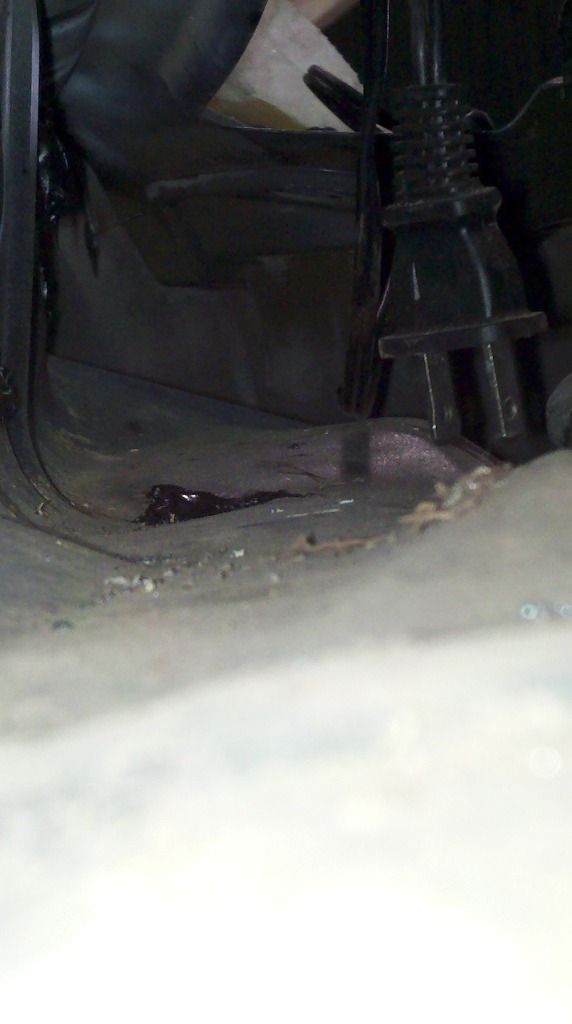
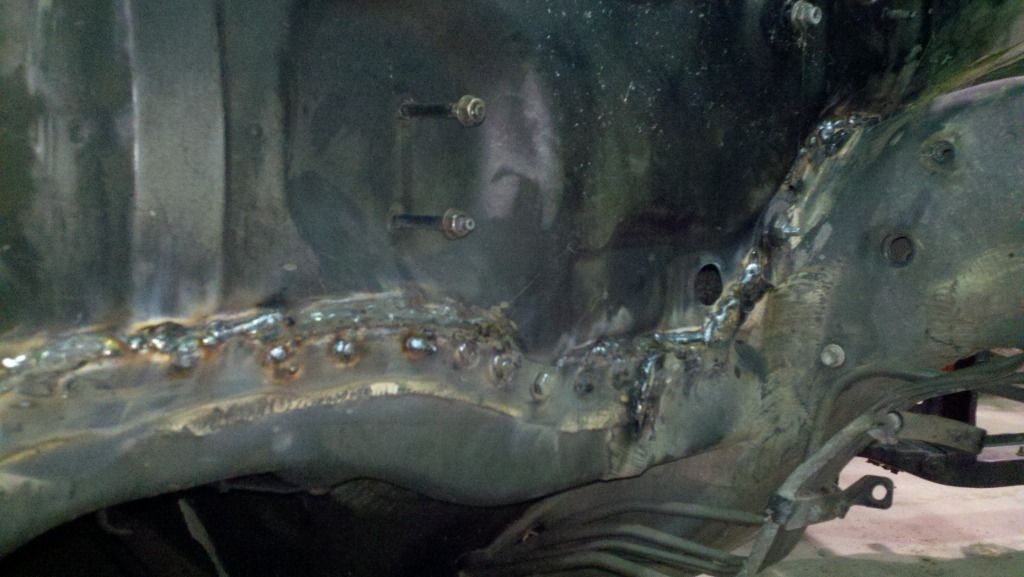
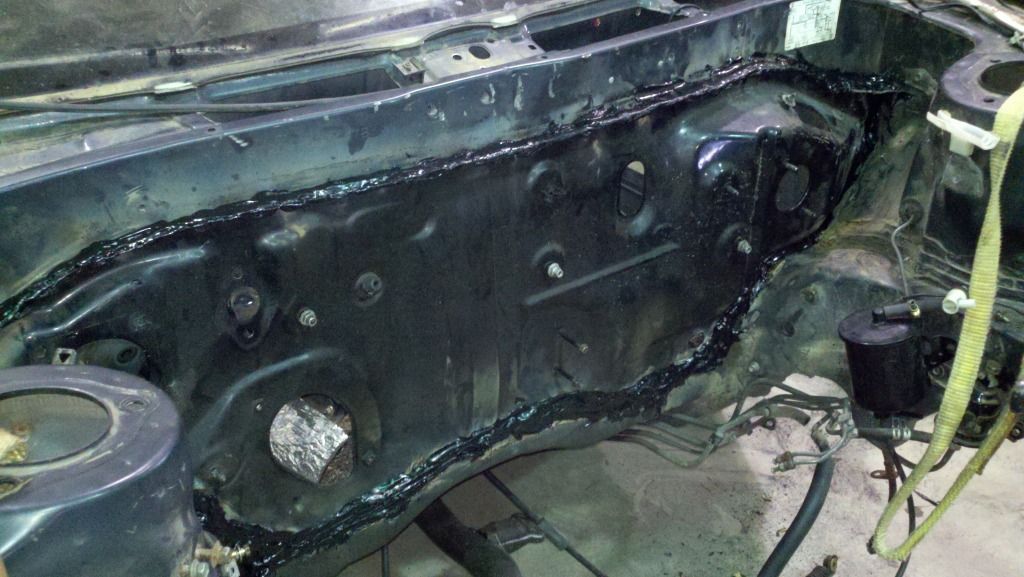
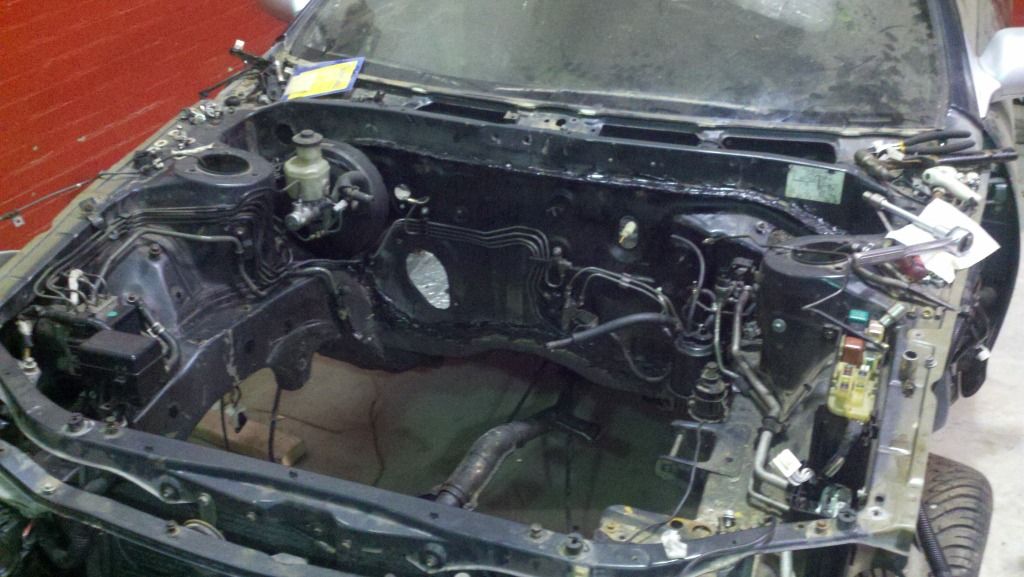
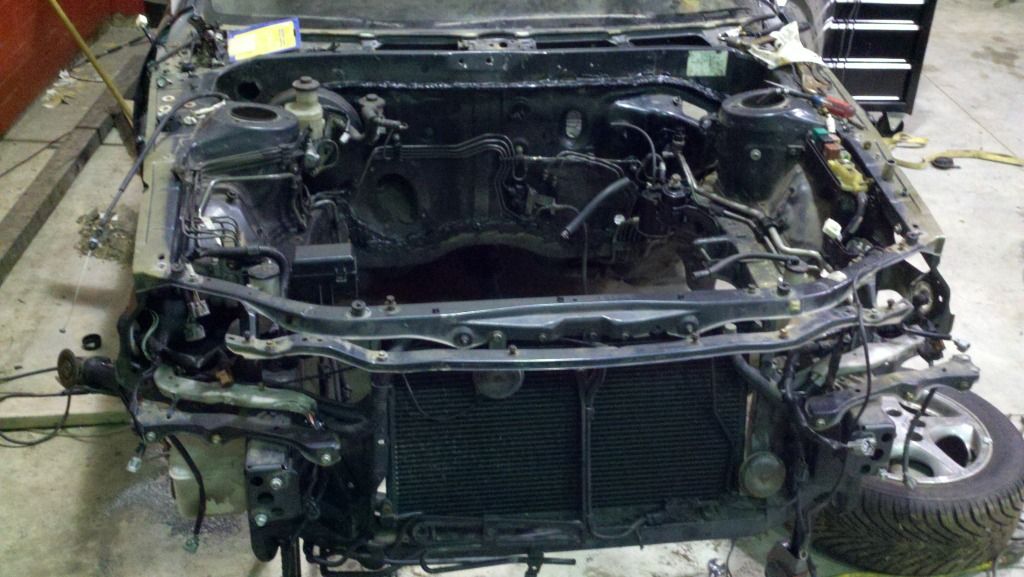
All appropriate lines in the engine bay as you can see.


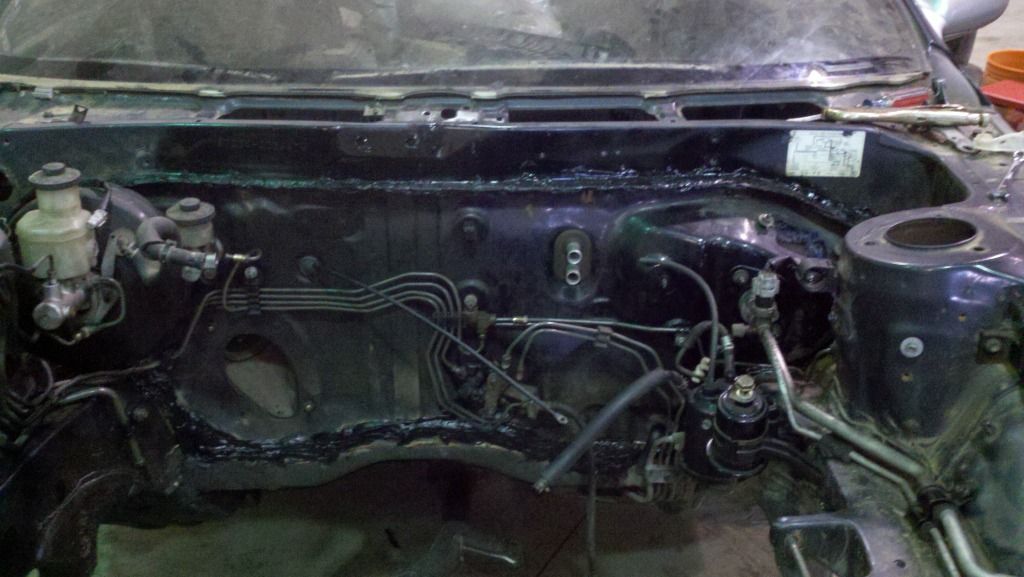
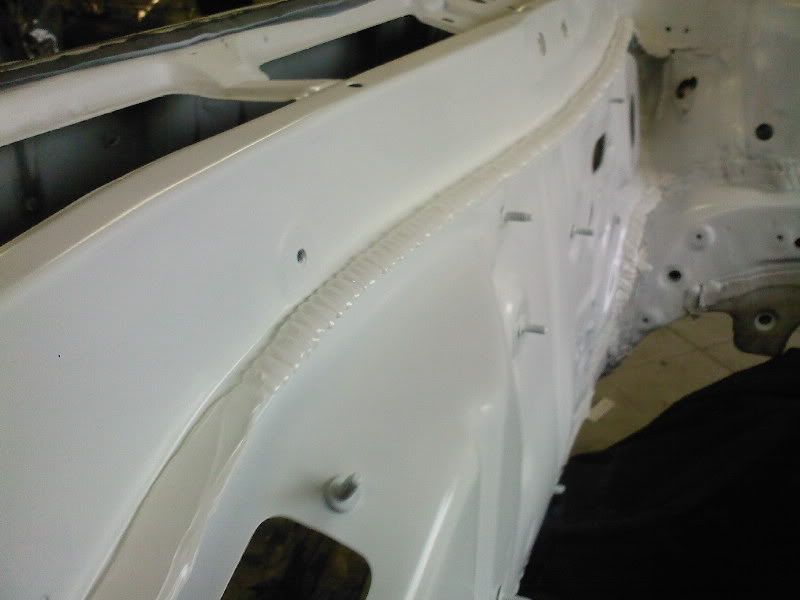
With seam sealer on all the seams....


Only studs I have left to move over are these for the RHD dead pedal....


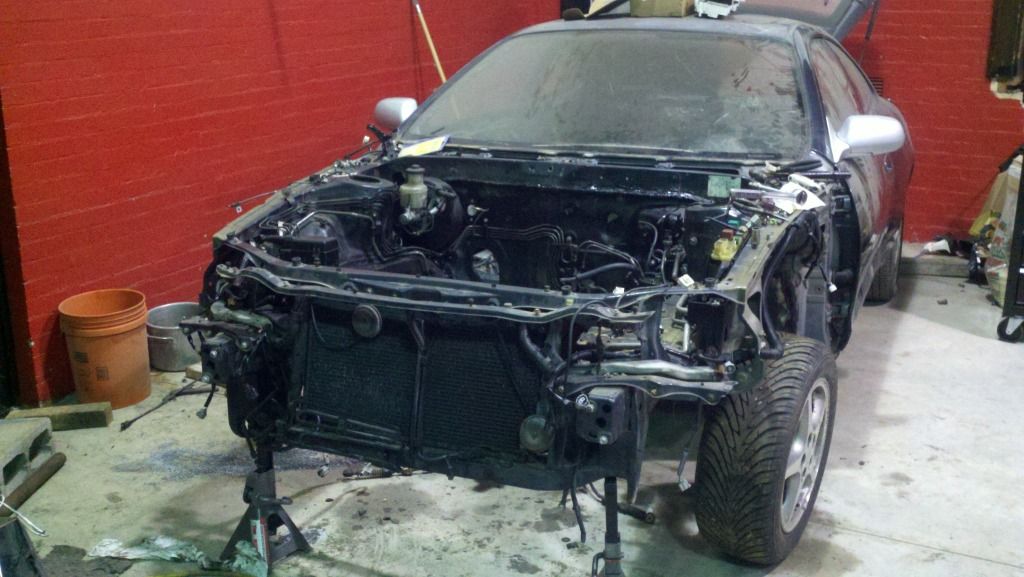
Pedals, steel support crossbar, wiring, dash, and motor remain.

This post has been edited by ricochet1490: Aug 12, 2012 - 6:30 PM
Heh - im doing all the seals with the same thing - handgun and finger biggrin.gif You have to be patient, and wet your finger ALWAYS (glass of water - always helps here - to prevent sticking all the sealant to your fingers!) Also - bulkheads are NOT TOTALLY different. The only difference is the opening for Air pick'up - all you have to do is drill out 4 point welds - cut the opening on the other side - and weld the the metal that you drilled out on the other side smile.gif Theres no need to hack the way you did smile.gif

Actually RHD and LHD chasis is exactly the same - there are all the points where to weld on both chases - if you look close you will notice that there are clues all around the chasis left where every bracket / bolts and etc needs to be welded.

Ex celica owner - just a guy from other side of the pond...Full custom Projects from restoration to performance builds<<<<<< DCw / JDMart >>>>>>>
Hello from Bangkok, Thailand.

I'm also working on rebuild my ST206. She was a victim from last year Thailand's flooding.
Her engine and all of interior parts were damaged.

I bought celica ST202 with BEAMS A/T front clip for swap, nearly same as yours.

And I have a same trouble as you. I could not remove the sound deadening out of my car in good condition.

But your LHD sound deadening look very good.

Could you teach me the proper method of removing?
Use hot air blow is good?

Thanks.
The RHD sound deadening on the firewall is a different material...but I do not know what makes it different. My LHD sound deadening just pulled off the firewall, very easily. There is no secret. The rhd beams sound deadening just sucks. You may have to put aftermarket sound insulation on your firewall as a replacement. I would have if I didn't have lhd insulation just laying around that was in good shape.
>
QUOTE (ricochet1490 @ Aug 14, 2012 - 12:01 PM) *
>The RHD sound deadening on the firewall is a different material...but I do not know what makes it different. My LHD sound deadening just pulled off the firewall, very easily. There is no secret. The rhd beams sound deadening just sucks. You may have to put aftermarket sound insulation on your firewall as a replacement. I would have if I didn't have lhd insulation just laying around that was in good shape.


Oh, your LHD material maybe look like ST185's one that I had ever remove.
Anyway, thank you for your info.
I'v done around 40 RHD to LHD conversions - and ALL - i mean ALL OF THE RHD sound deadning covers - just tear into pieces if you try to remove it... No matter how gently you do this - they still get off in zilion pieces biggrin.gif LHD ones are fine even after almost 20 years! smile.gif The last conversion that im doing is 99' GT-Four with only 57K km - and STILL firewall cover got broken into 100 pieces biggrin.gif


Ex celica owner - just a guy from other side of the pond...Full custom Projects from restoration to performance builds<<<<<< DCw / JDMart >>>>>>>
>
QUOTE (doGGy @ Aug 14, 2012 - 5:05 PM) *
>I'v done around 40 RHD to LHD conversions - and ALL - i mean ALL OF THE RHD sound deadning covers - just tear into pieces if you try to remove it... No matter how gently you do this - they still get off in zilion pieces biggrin.gif LHD ones are fine even after almost 20 years! smile.gif The last conversion that im doing is 99' GT-Four with only 57K km - and STILL firewall cover got broken into 100 pieces biggrin.gif


This.....
Mine got chisled off and broke into a trashcan full of small pieces.... It's nice to know it wasn't just mine then!

And Doggy, it's not wonder your seam sealer looks better!!!! lol you have me at a 40:1 disadvantage in terms of drive side swaps! lol - nice work. Wish I could have gotten that info somewhere prior to my actions of sunday haha