Over 1M Posts • 84K Topics • 9K Authors

'98 Celica GT: The Continuation.... - 6G Celicas Forums

Topic #98163 284 posts Started by NgoFcukinWay
This thread got boring. Mods, close///

Learned a lot in 10 years...I hardly log in anymore, last loginToday Sept 6 2019, and I was forced just to clarify a post. LOLIf you PM me and I dont respond, dont fret or cry. Im alive, better post your questions in the thread below, maybe I log back in2grfe Swapped...Why I chose the 2GR, before you ask read here...A great civilization is not conquered from without until it has destroyed itself from within.@llamaraxing in Instagram is the best way to find me. I hardly log here anymore.
So in lieu of getting laid off from work today, I figured I'd get some things taken care of that I've been meaning to get done. Ironically enough, I was going to request a day off to do all of this, but they went ahead and made it permanent for me.

First thing's first. I had the Supra's front bumper repainted a couple of weeks ago due to the paint flaking off for whatever the dumb reason was and hadn't installed it back onto the car until I got the bumper wrapped in clear bra, so here it is:


It's getting wrapped in a new product called Premium Shield. Works the same as Xpel with the same warranty.

While the bumper was getting wrapped, I sat around in this thing that was in the process of getting a full car wrap and ceramic coating


I'll be back to do this type of work again on Monday. I kind of miss it and beats sitting at a desk all day. Bumper will be ready for pick-up Monday once it's all dried and cured.

After that, it was time for a drive across town to get some more work done on the Celica.

Dragged the motor outside to remove the oil pump and water pump in order to remove the oil pan and boy was I in for a surprise.


God damnit....What the hell is this? Metal shavings, red RTV, some other weird clump. What was supposed to be a simple refresh turned into a full teardown and inspection, so here we go.


Valve cover off and it's looking pretty good in there.


Cam caps and cams are off. Nothing surprising.


Head is off and this looks weird....


Time to flip it over and get to the good stuff.


Unfortunately, I didn't take a pic of the rotating assembly as it started to get late into the evening and I was ready to go home once I got everything out, but upon a quick inspection, the main bearings looked to be in good condition as well as the thrust washers. Rod bearings were a little rough, but not too bad. Probably will be replacing those. Surfaces on the crank looked to be pretty good.


Nekkid block.

Tomorrow, I'm heading back south to the shop after I hit the junk yard to do some more work on the motor. Goal for tomorrow is to double-check the bearings and mating surfaces, give the block and oil pick-up a very thorough cleaning, and hopefully tackle the valve stem seals or the S51 5th gear. In the mean time, I'll need to order a new headgasket, ARP head studs, thrust washers, and possibly new bearings.

Thank you for joining my Ted Talk.

-Alex {](O_o)[}1993.5 Toyota Supra....with stuff........sorta broken....1998 Toyota Celica....this one, too, has stuff........broken....yeah...definitely broken....
Quick update as of recent:


OEM S54 5th gear.


Selector arm removed.


Synchros off courtesy of a steering wheel puller.


S54 driven gear is out. You can see it on the floor to the left. Used a couple of pry bars to get it out. Super tight fit.


5th gear out exposing the pesky needle bearings.


S51 5th gear and driven gear in along with synchros.

Everything else buttoned right up. Tolerances were tight. To help ease installation of the driven gear and the synchros, you can boil them in hot water for a bit to get them to expand before slipping them on. In my case, I took a socket and a hammer to the driven gear. Getting the 5th gear and the synchros on required a second person to prop the gear against the synchros as they were hammered down to prevent the synchros from coming apart because when they do, it's a pain in the ass.

Sent the bare block, head, crank, and flywheel off to the machine shop for some clean, polishing, and resurfacing respectively.


Now, it's time to tackle the valve train.


GSC ALL THE THINGS!!

Valve stem seals, valve springs, and titanium retainers. Probably gonna dream a bit, but would be nice to see if i can hit an 8000 RPM redline.


The tools required to do the valve stem seals.


Titanium retainer up top with the OEM retainer underneath.
OEM valve keepers.
OEM valve spring to the left of the GSC valve spring.


Old, worn OEM valve stem seal on top and GSC on bottom.


1 down. 15 more to go.


And we are done!

Went to the junk yard a couple of weeks ago to grab some shimless buckets out of a couple of Corollas and a Yaris giving me 48 in total. Going to another yard on Friday to see if I can snag some more so I have enough to use in the Supra as well. Ordered a Cometic headgasket along with ARP head studs as well, so they're waiting to go in.

Ordered some King Racing rod and main bearings today along with some Total Seal piston rings. Bearings should be here right after Christmas so I can at least have the crank sitting back in the block so I can go ahead and install the oil pump with the front main seal along with the rear main seal. Will be honing the cylinders as well so everything's pretty.

Now I just gotta figure out what the part numbers are for some of these damn coolant hoses running around the motor and hopefully I can remember where all of the other parts go as I'm reassembling things. I'm gon' die...

-Alex {](O_o)[}1993.5 Toyota Supra....with stuff........sorta broken....1998 Toyota Celica....this one, too, has stuff........broken....yeah...definitely broken....
So ummm..... This happened:


-Alex {](O_o)[}1993.5 Toyota Supra....with stuff........sorta broken....1998 Toyota Celica....this one, too, has stuff........broken....yeah...definitely broken....
This will decimate some after you put about fifteen grand in it. If we have to, overnight parts from Dallas.

"Employ your time in improving yourself by other men's writings, so that you shall gain easily what others labored hard for." -Socrates. Even Socrates told us touse the search button!2006 Aston Martin V8 Vantage.1998 Celica GT-BEAMSSwapped.2022 4Runner TRD Off Road Prenium.2021 GMC Sierra AT4.
>
QUOTE (richee3 @ Jan 31, 2019 - 4:47 PM) *
>This will decimate some after you put about fifteen grand in it. If we have to, overnight parts from Dallas.


Facts.

Everything has been dropped off to the machine shop for work and assembly. Will update with current shenanigans when that comes back.

-Alex {](O_o)[}1993.5 Toyota Supra....with stuff........sorta broken....1998 Toyota Celica....this one, too, has stuff........broken....yeah...definitely broken....
I'm starting to hate Photobucket again.

Anywho, since the last episode of Dragonball Z, I've had to do a bit more work to the block. I found out where the metal bits that were on the oil pick-up came from.


Piston #3 essentially ate itself and took a ring land with it which resulted in this:


It marked up cylinder 3 pretty good, so it had to be bored out.

Also, the piston ring #2 for piston #4 decided it wanted to be a permanent marking of the piston:


That ended up being a major bummer, so I went ahead and used that time to clear off all of that janky ass blue RTV silicone that was all over the throttle body and inlet body. Buddy of mine had a bench grinder with a wire wheel on it, so off I went.


Oh, heeeyyy... Would ya look at that... There's an OEM gasket hiding under all of that mess. Might spray a coat of gasket maker on it and reuse it since it's a metal gasket and not a paper/plastic one.


Also started to clean off the intake manifold, and TVIS manifold, and just about everything else that was caked in grease.


Don't really have a lot of Before & After pics of this process, but basically imagine everything being black and greasy to clean and looking like aluminum again.

Ordered bigger Wiseco 9.0:1 compression pistons in the 86.5mm form along with some ARP rod bolts and off everything went to the machine shop.

Block received a good cleaning and had the surface decked along with getting the freeze plugs replaced with some new brass ones.


The head was dropped off to be decked as well and also cleaned.


Now I'm just waiting to hear back from Justin at PrimeDriven in regards to getting the correct Cometic headgasket that I need so I can glue the head down to the block. I'll be back at the shop on Tuesday to assemble what I can of the short block in the mean time.

This post has been edited by NgoFcukinWay: Feb 22, 2019 - 6:55 PM

-Alex {](O_o)[}1993.5 Toyota Supra....with stuff........sorta broken....1998 Toyota Celica....this one, too, has stuff........broken....yeah...definitely broken....
All of that is entirely too clean to be reassembled and put back in the car. So the plan is to put the harness back on, run it for a bit, then clean the harness up later?

"Employ your time in improving yourself by other men's writings, so that you shall gain easily what others labored hard for." -Socrates. Even Socrates told us touse the search button!2006 Aston Martin V8 Vantage.1998 Celica GT-BEAMSSwapped.2022 4Runner TRD Off Road Prenium.2021 GMC Sierra AT4.
>
QUOTE (richee3 @ Feb 24, 2019 - 5:12 PM) *
>All of that is entirely too clean to be reassembled and put back in the car. So the plan is to put the harness back on, run it for a bit, then clean the harness up later?


For what I paid for these 2 parts, I might as well leave'em up for decoration in my room and buy another used motor. lol

-Alex {](O_o)[}1993.5 Toyota Supra....with stuff........sorta broken....1998 Toyota Celica....this one, too, has stuff........broken....yeah...definitely broken....
some more progress. nothing too major I suppose.


2mm Cometic headgasket in with ARP head studs.


Head torqued down per ARP's specs. New oil pump, water pump, ATS adjustable cam gears, and Gates Racing timing belt installed with a new tensioner pulley and tensioner.


Mounted up the turbo for ****s and giggles.

Valve cover got sent off today for powder coating to match the TiAL BOV. If funds allow, I may have the manifold heat shield and the turbo compressor housing coated to match. Will depend on how everything else painted flat black will go. Pretty boring, but I'm ok with it.

I also need to order a new downpipe as the current/old one has some pretty nice cracks going on and I think, by the looks of it, it's going to prevent the wastegate from fully opening anyways.

It's supposed to rain pretty gnarly the next couple of days, but hopefully it'll clear up by Thursday so I can head back to the shop and continue painting and sorting out other parts.

-Alex {](O_o)[}1993.5 Toyota Supra....with stuff........sorta broken....1998 Toyota Celica....this one, too, has stuff........broken....yeah...definitely broken....
Are you going to send out the manifold for coating to match the turbo?

~bloodMoney
>
QUOTE (bloodMoney @ Mar 13, 2019 - 7:16 AM) *
>Are you going to send out the manifold for coating to match the turbo?


I'm tempted, but if you're willing to donate a bit, I can get it done. lol

>
QUOTE (enderswift @ Mar 13, 2019 - 9:43 AM) *
>I have an extra 3s downpipe I want to get rid of. Brand new from gt4play:

https://gt4-play.co.uk/shop/high-flow-3-down-pipe

PM me if you're interested


PM sent.

-Alex {](O_o)[}1993.5 Toyota Supra....with stuff........sorta broken....1998 Toyota Celica....this one, too, has stuff........broken....yeah...definitely broken....
lolol I've got another kid on the way.... There's no money for anything....

~bloodMoney
Picked up a Berk 3" downpipe from PrimeDriven with some store credit I had. I found it odd that I needed to grind down a bit of the flange so that my wastegate flap thingy would clear to open and close properly, but it's not really a big deal.


Valve cover powder coated and I grabbed a couple of cans of matte black bbq grill paint and started painting a bunch of stuff (intake & exhaust manifold, throttle body, heat shields, timing covers, misc brackets, etc). Painted the "Yamaha" and the timing marks on the cover with some white-out. Ordered a bunch more bolts from Toyota to replaced the rusted ones along with a new idler pulley for the alternator/AC compressor as that one was rusted and bearing was going out.


Can someone confirm if the 2 water lines circled in red are connected? Is blue the water feed for the turbo?


Are the red and yellow for the heater core and where does the green one go off to?

-Alex {](O_o)[}1993.5 Toyota Supra....with stuff........sorta broken....1998 Toyota Celica....this one, too, has stuff........broken....yeah...definitely broken....


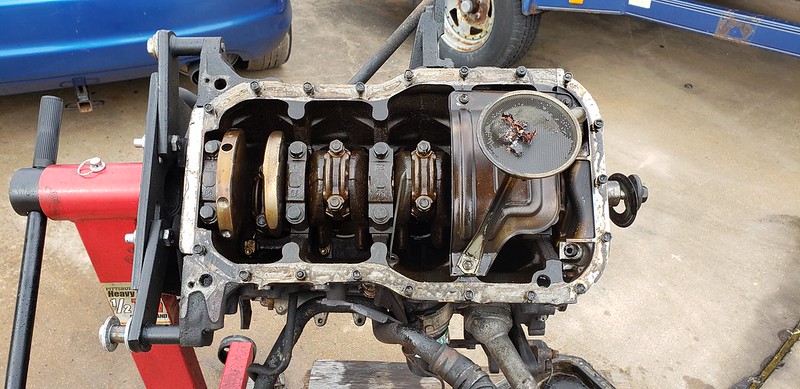
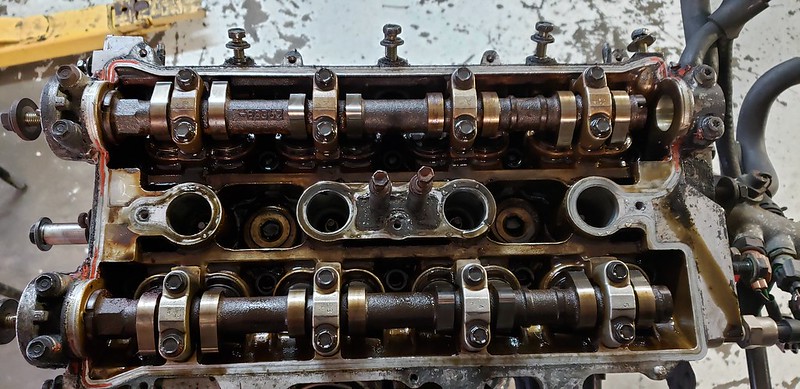
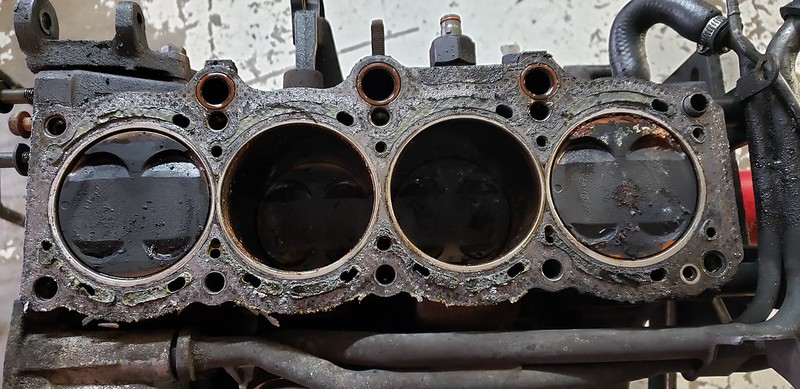
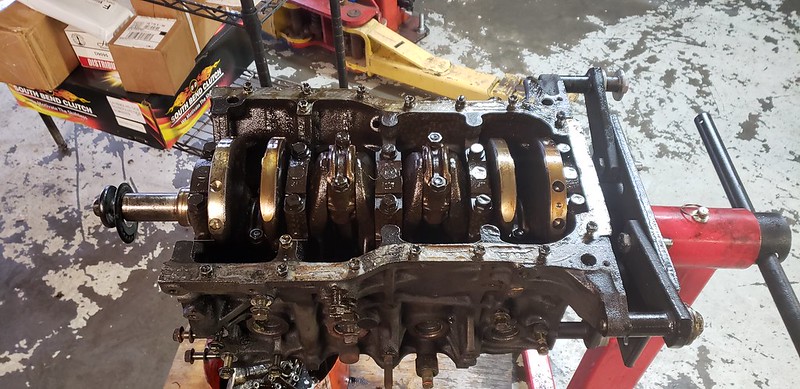
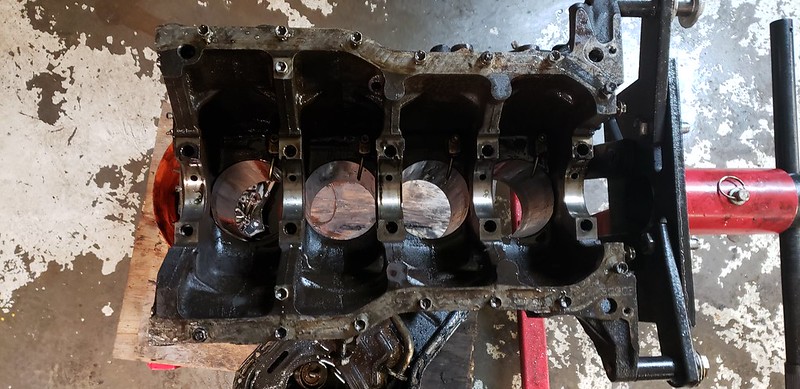
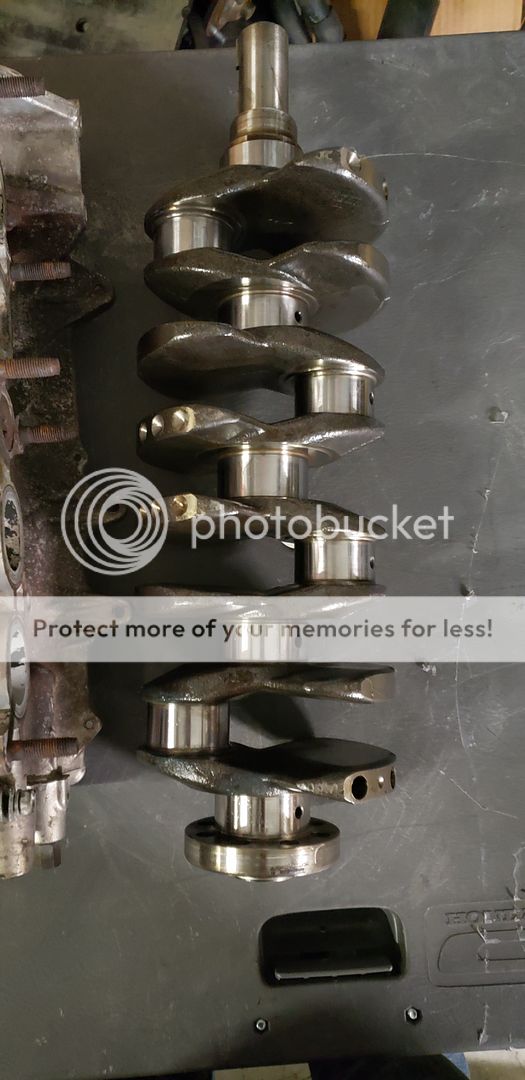
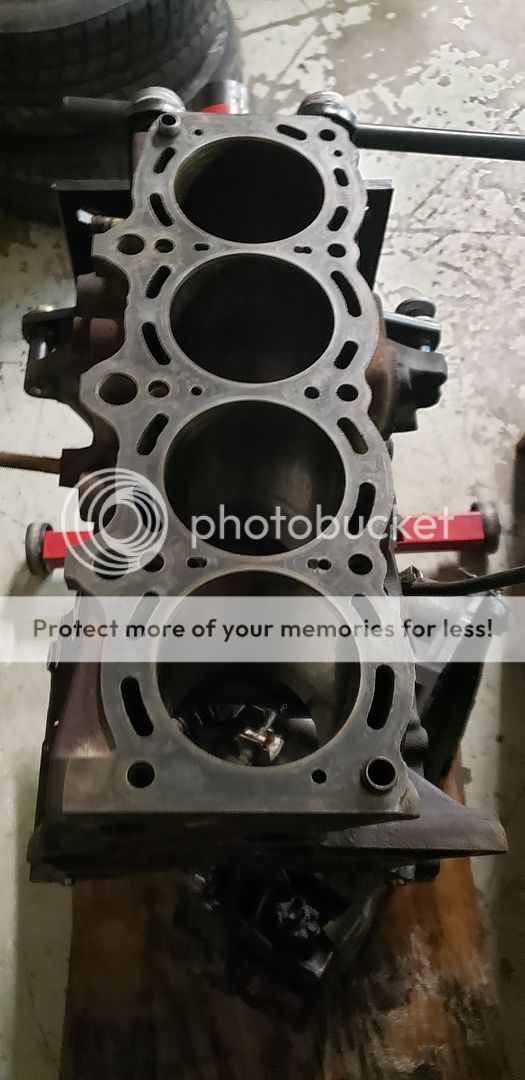
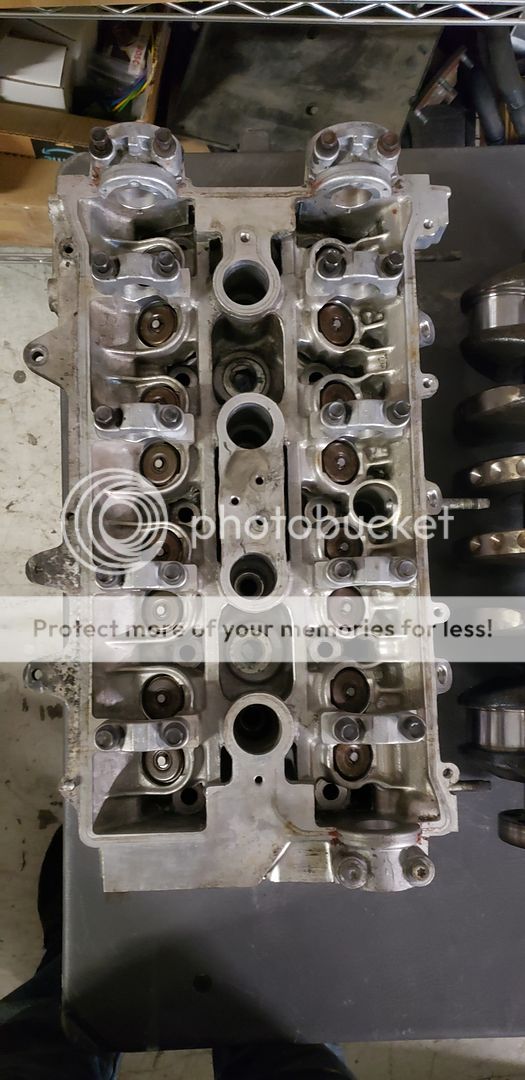
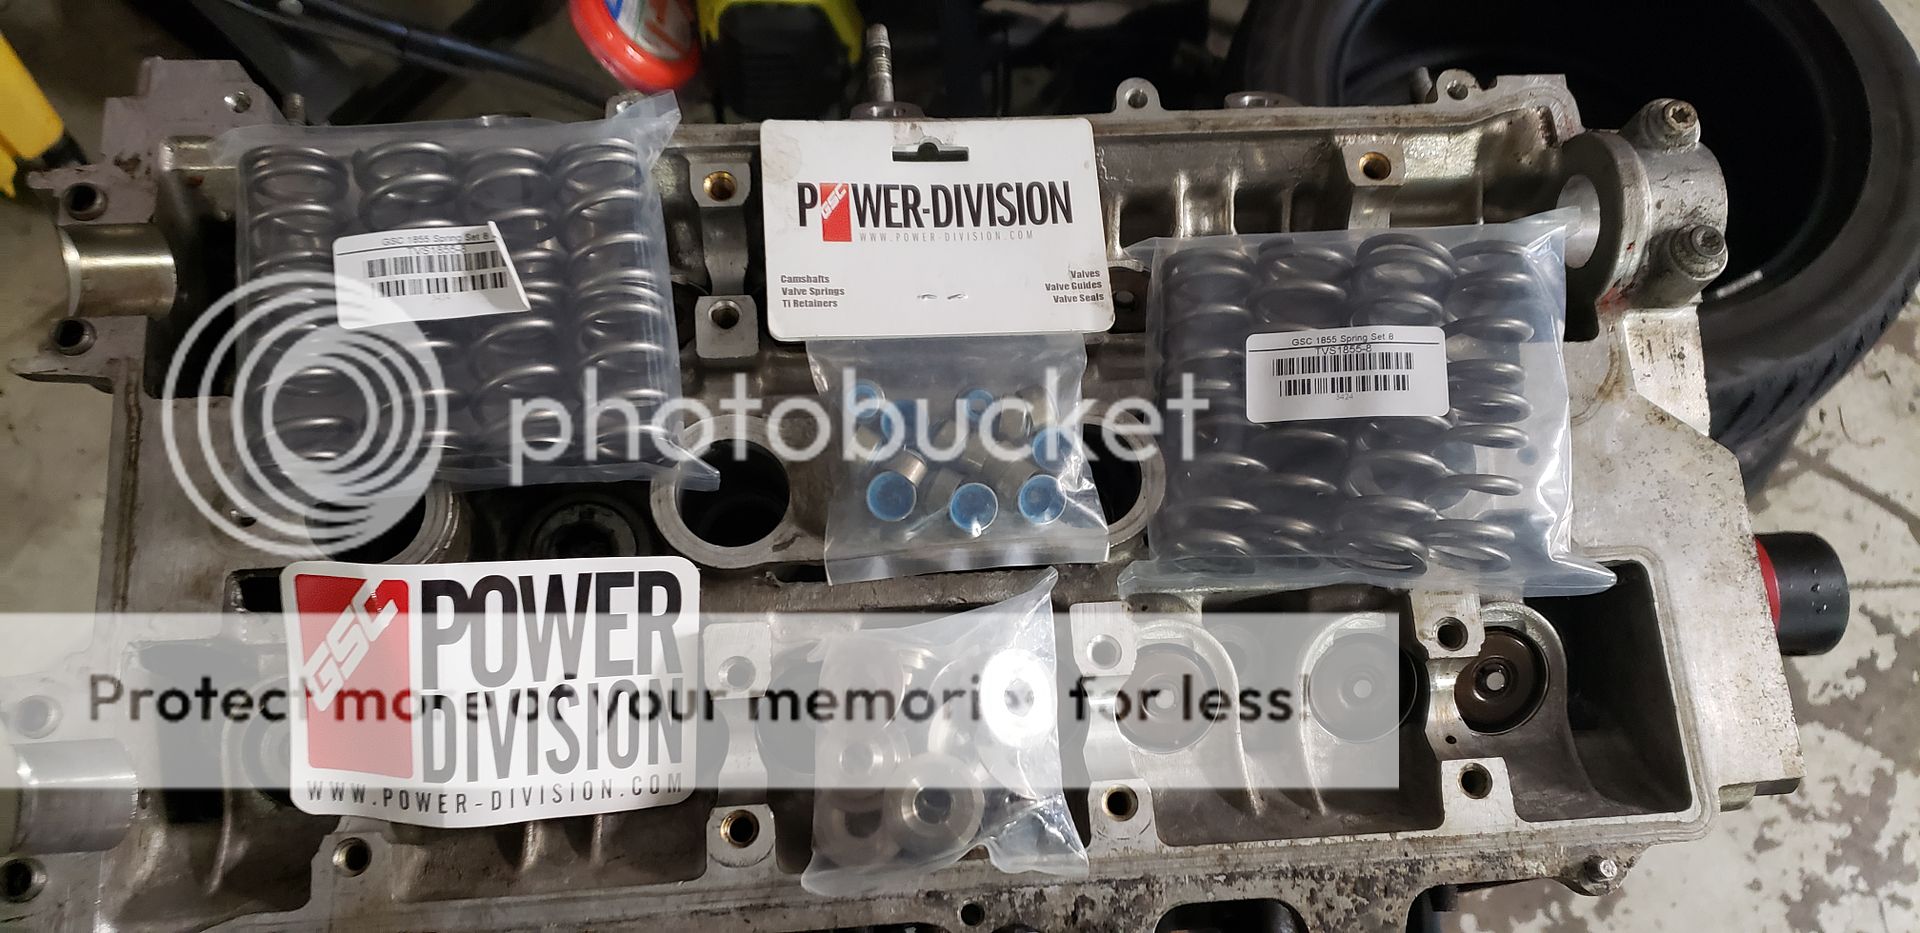
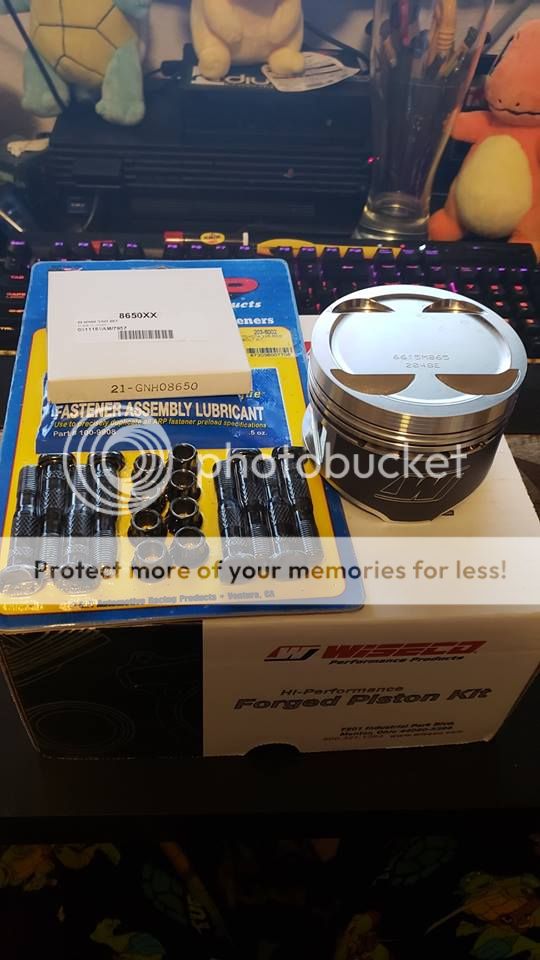
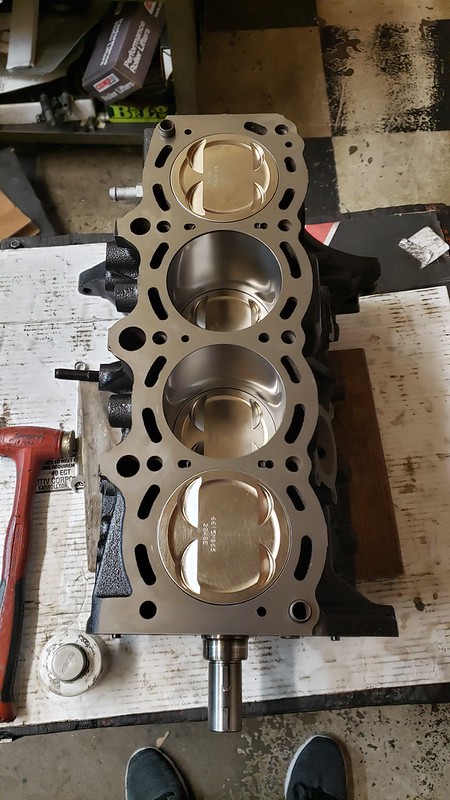
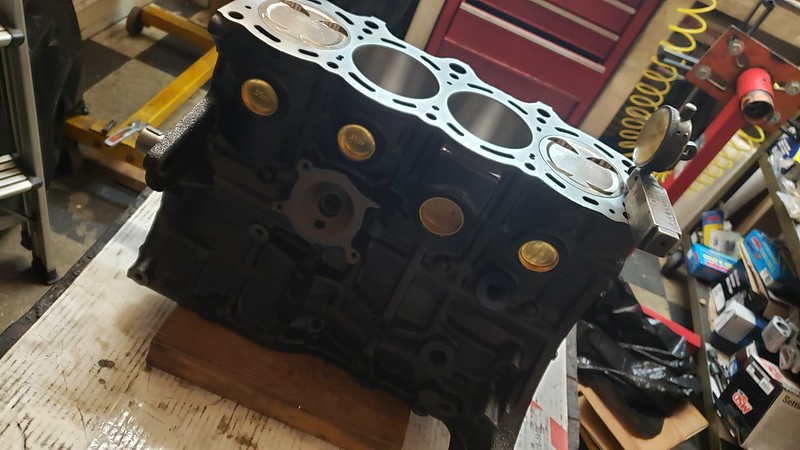
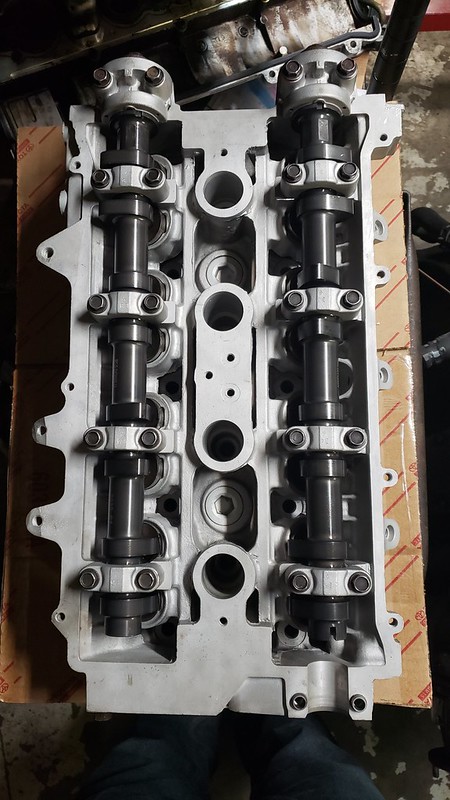
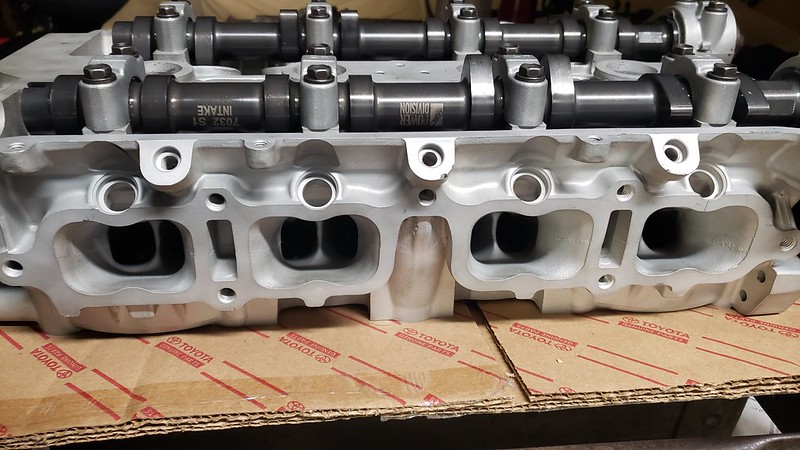
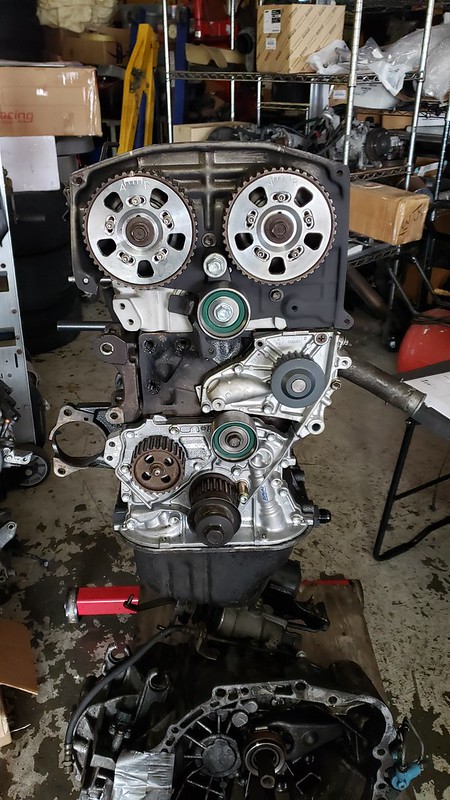
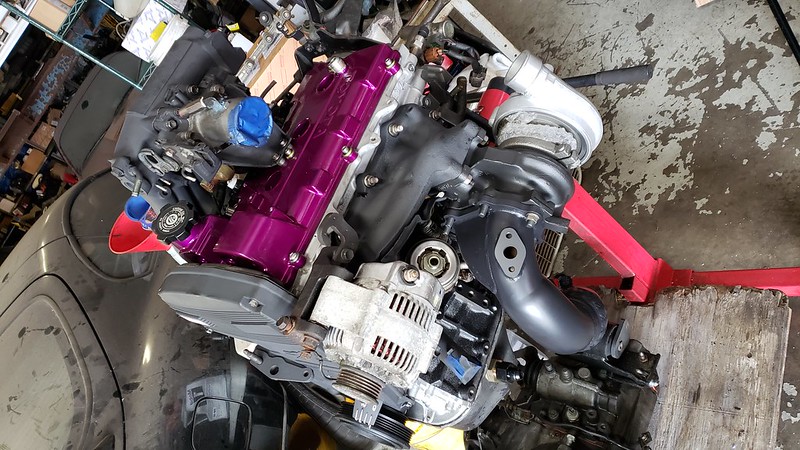
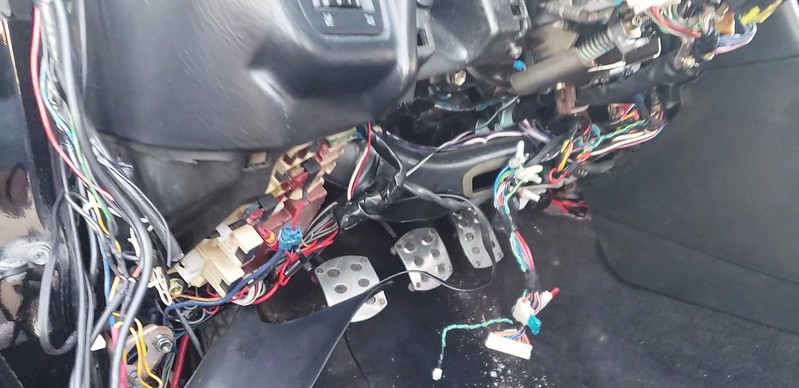
not sure what else has been sorted out since my last post, but from what I can remember, I broke some more **** (water line for the IACV. gonna bypass that), installed the OEM 2JZGTE 550cc injectors, and got the wiring harness mounted and plugged in (for the most part). Nothing all that great I suppose, but it's better than nothing. The motor is about 90% assembled and just about ready to go back into the car, but before that....


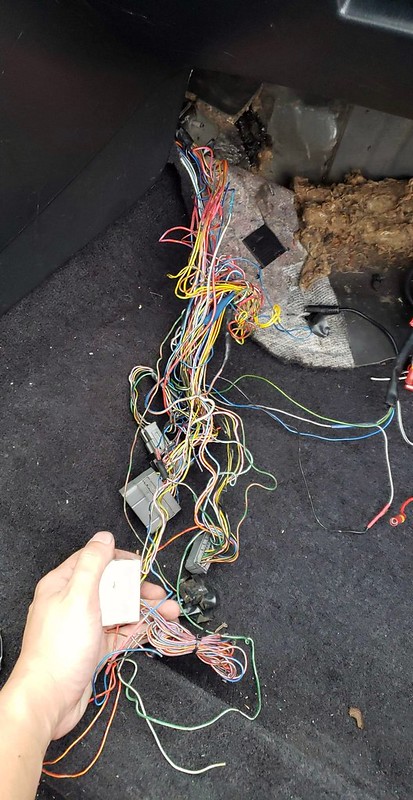
It's time to sort out the mess in the engine bay. There's a lot of random wires and misc. crap running through the bay and through odd orifices and the bay's paint could really use some refreshening, so I figured now would be the time to do it.

While I was cleaning up, I took a gander over at the AC condenser and would ya look at that? Would ya just look at it?!


It's kinda hard to tell, but the condenser has a bowling affect to it. Looks like something hit it pretty good from the front and pressed it in, so I ordered a new condenser....and compressor....and drier....and expansion valve... sheesh...

Took the pressure washer to the bay and went to town after I did a quick scuff of 320 grit to the bay...and then someone left me unsupervised...


I think my pressure washer calligraphy skills are getting a little better. lol

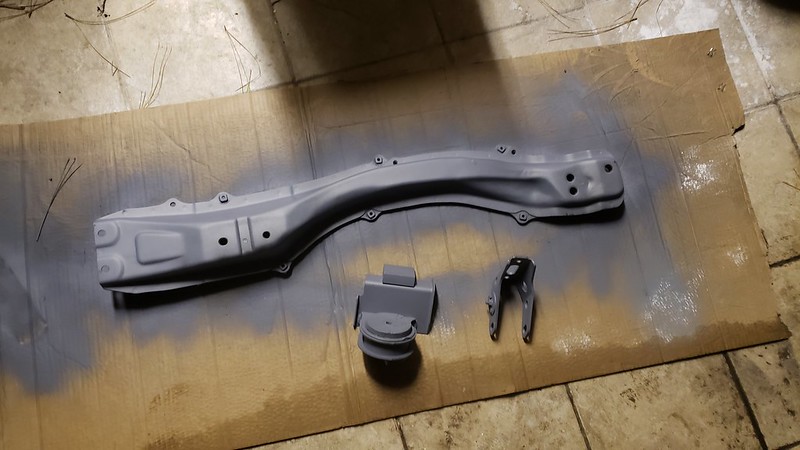
After a few hours, finally got a good majority of the things I needed cleaned and taped up. This is gonna be a pretty quick and dirty paint job since it's a black car. Also cleaned up and pressure washed the front crossmember as well.


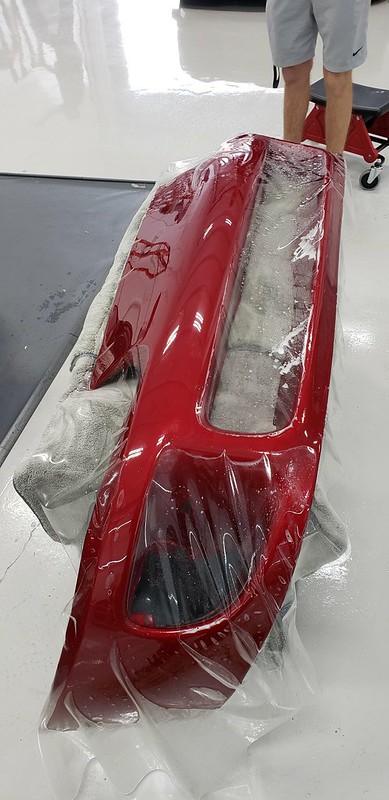
Called it a day there and decided that I wanted to take the rear spoiler off to repaint as well since the clear coat has seen better days. The rear hatch has seen better days as well with a rust patch by the Toyota emblem and some dings by the front post of the spoiler wing thing.


Doesn't look too bad wingless, I suppose, but I eventually plan to run a TRD wing on it.

Was starting to run out of daylight and I don't have access to the shop since my friend's out of the country for vacation, so I took the wing home and started work on it.


Started to knock off the clear coat using some 150 grit sand paper and progressively worked my way up to 400 grit. It was probably unnecessary to go that high, but figured it wouldn't hurt to do so. Minus the still-visible paint, the wing is pretty smooth.


Found a couple of small spots on the rear wing that's gonna need some body filler, so I'll be doing that sometime this weekend when it rains. It's been raining off and on these last few days and is supposed to be continuing to do so for the next couple of weeks, but there looks to be a pocket of sun shine this weekend that I want to try to take advantage of to prep the rear hatch for paint work.

The reason I'm doing more paint work than I probably should is because I bought some SprayMax 2K filler primer and 2K clear coat. They're pretty expensive at about $20/can, so I wanted to maximize the usage out of each can. Hopefully I have the patience to not make it look like ass. We'll find out on the next episode of Dragonball Z!

-Alex {](O_o)[}1993.5 Toyota Supra....with stuff........sorta broken....1998 Toyota Celica....this one, too, has stuff........broken....yeah...definitely broken....
I loathe bodywork..... I just don't have the patience for it.

~bloodMoney
I can't decide what's worse, bodywork or interior.

2001 Miata LS 5-speed
>
QUOTE (bloodMoney @ Jun 28, 2019 - 7:05 AM) *
>I loathe bodywork..... I just don't have the patience for it.


I'm not looking forward to it either. Mainly the rusted bit, but i'll find out soon enough tomorrow.

>
QUOTE (Box @ Jun 28, 2019 - 6:24 PM) *
>I can't decide what's worse, bodywork or interior.


Bodyterior. I don't mind interior work too much depending on what it is. Body work is all new to me minus doing detailing work. I think it should be ok though....maybe...

-Alex {](O_o)[}1993.5 Toyota Supra....with stuff........sorta broken....1998 Toyota Celica....this one, too, has stuff........broken....yeah...definitely broken....
Just replacing pieces on either isn't too bad, but extensive body work or interior work... Hmmmm.... At least interior work is cleaner, so there's that I guess.

2001 Miata LS 5-speed
So umm....yeah...


Not sure how I'll be tackling this one. Maybe a sledge hammer or something. The rust actually crept down towards the lip edge of the hatch, so it's pretty nasty, but I spray some rust coating thing over it in the mean time to hold it over til then. I won't be keeping this hatch around for long.

Other than that, got the rear hatch sanded down up to about 320 grit. It'll do for now.


And then before the storm came a-rumblin' through, I got the bay primered.


I said "fck it" and did one thicc a$$ coat before the storm. Gonna hit it with another light coat later when I get around to wrapping up the rear hatch. In the mean time, I'm gonna finish primer coating the front crossmember in my back yard since I'm home now and the storm has passed...for now...

-Alex {](O_o)[}1993.5 Toyota Supra....with stuff........sorta broken....1998 Toyota Celica....this one, too, has stuff........broken....yeah...definitely broken....
Just fill any rust holes with Bondo like most anyone else. laugh.gif

2001 Miata LS 5-speed
>
QUOTE (Box @ Jun 29, 2019 - 9:44 PM) *
>Just fill any rust holes with Bondo like most anyone else. laugh.gif


I honestly probably could. The holes are about the size of a dime, so it won't be THAT bad of a temp repair.

Went ahead and painted the front cross member last night along with the motor mount.


The poly bushing sandwich piece thing got painted, too, because it's getting replaced with an actual poly bushing from BRD once I can dig up my rear mount to confirm with Lou.

Heading back down to the shop today to do some more grunt work because it looks like the weather is gonna be clear for the rest of the day.

-Alex {](O_o)[}1993.5 Toyota Supra....with stuff........sorta broken....1998 Toyota Celica....this one, too, has stuff........broken....yeah...definitely broken....
So we had a break in the weather today. It was forecast to rain today, but I guess Mother Nature decided to offer a break and gave us a rain-free, sunny afternoon. I took this opportunity to pack up my **** and drive the 43 miles across town to get working on the car.

I didn't really take a whole lot of pictures of the progress, but I managed to plug up the rust holes in the reat hatch with some bondo. Tried to do it for the holes from the old 3-post spoilers, but I don't think it'll hold up that well. Coated whatever exposed rust with that rust preventative paint or whatever it's called.


Still has a couple of divets, but that'll be packed in with primer to make it flush-ish. Also filled in the holes for the rear Toyota badge as well. I'm not even gonna bother with that dent on the hatch lid. lol

After some drying time with the rust coating, it was time to primer.


Got fancy with some of that SprayMax 2K primer. Same primer I used in the engine bay. It's a good primer, but doesn't like to be sprayed in a position other than vertical, so it's made it kind of a chore doing the horizontal surface of the hatch. I managed to get a light, first coat on the hatch along with a light coat and a few touch-ups in the engine bay, and rear spoiler. When it came to the second, heavy coat, it started to lose its efficiency and I ran out about halfway. I'm gonna pick up another can tomorrow and possibly a can of Rustoleam primer as well just in case.


You can kinda see where the can started to run out of breath, so I left it at that. Hopefully weather will hold out some more later this week and let me finish this job.

Also, if anyone is looking to delete their rear wipe arm, the MK4 Supra butt plug fits.


-Alex {](O_o)[}1993.5 Toyota Supra....with stuff........sorta broken....1998 Toyota Celica....this one, too, has stuff........broken....yeah...definitely broken....


Some spots still look like dog ass, but it's still way better than it was before and that was the goal. Now to glue everything back together.

-Alex {](O_o)[}1993.5 Toyota Supra....with stuff........sorta broken....1998 Toyota Celica....this one, too, has stuff........broken....yeah...definitely broken....
Glue? Supposed to use cable ties ala Honda style.

2001 Miata LS 5-speed
Cable ties is amateur league. We're in JV now.

-Alex {](O_o)[}1993.5 Toyota Supra....with stuff........sorta broken....1998 Toyota Celica....this one, too, has stuff........broken....yeah...definitely broken....
Let's see.......

I started cleaning up the wiring mess that was left behind the pillar pod and driver's foot well area.


I also plucked out the old Viper alarm that was in the car along with the Blitz turbo timer as well. I got rid of those pedal covers cuz my shoe laces kept getting caught on the screws that help them stay in place.


This was basically everything I pulled from the driver's area.

Passenger side was pretty neat.


Yikes.


Took that little bit of the body harness home to organize a bit. Was told a lot of that can be removed, so I will be doing that this weekend. Hopefully I don't phuc anything up.

I placed an order for new poly engine mounts from Lou over at BRD in the UK. They got sent out today, so hopefully they'll be here mid-week next week so I can drop the motor in by week's end.

In the mean time, it was time to take care of AC stuff.


Replacing the condenser because, you know...


yeah.....I've no idea how something like that can happen.


Replaced the compressor as well. Old one looked like poo and I'd rather be ready for this south Texas heat. By now, I had ran out of day light and I was getting pretty hungry, so called it a day for now. Heading back tomorrow to finish replacing the AC dryer and the o-rings for the ends going to the fire wall. I might have a leak somewhere because when I had the system discharged before starting this, there was barely any freon left in the system. Should be buttoning up the driver's side area as well since I was needing a butt connector that I forgot to bring with me.

I'm getting pretty close to getting this thing together. For a while, I was losing motivation to keep working on the car and feeling indifferent about it. I was at this same point with the Supra as well years ago when the motor wasn't in the car. Even as I'm getting closer to the finish line, I still feel indifferent about it and whether or not I want to keep the car after all is said and done. Maybe cuz it's been me working on the car solo 95% of the time and it feels kinda meh. I guess time will tell though.

-Alex {](O_o)[}1993.5 Toyota Supra....with stuff........sorta broken....1998 Toyota Celica....this one, too, has stuff........broken....yeah...definitely broken....
I think you'll feel better about it once it's up and running again, it's normal to feel disdain towards things that aren't working and are taking forever to put right. I know exactly what that's like...

2001 Miata LS 5-speed