Over 1M Posts • 84K Topics • 9K Authors

My Yelli Celi Bodywork Project - 6G Celicas Forums

Topic #37751 155 posts Started by Coomer
This thread is going to be updated as I do some bodywork and paint my car. I always love these progression threads myself, so I figured I'd make my own this time. smile.gif

Please post your comments as I go along. Since this is my project car and has a salvage title due to vandalism, I'm not doing things that I would if this were going to be a super nice paintjob, like having the rear side windows removed (Average quoted price was $200 around here) and using urethane base coat/clear coat paint (Expensive! And two different types of coats means twice the chances of me messing up.) I'm going to use an enamel of some sort, and going to stick with yellow probably.

Anyway, on with the project:

>>Day One>>

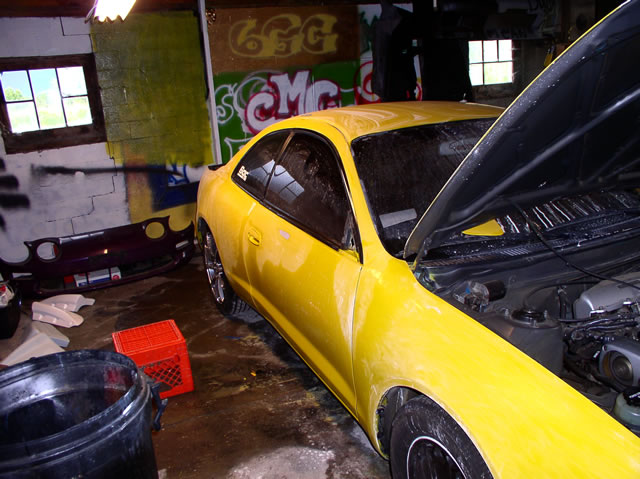
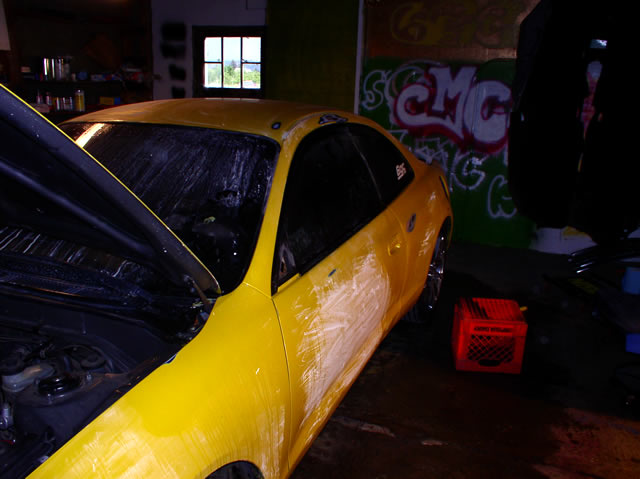
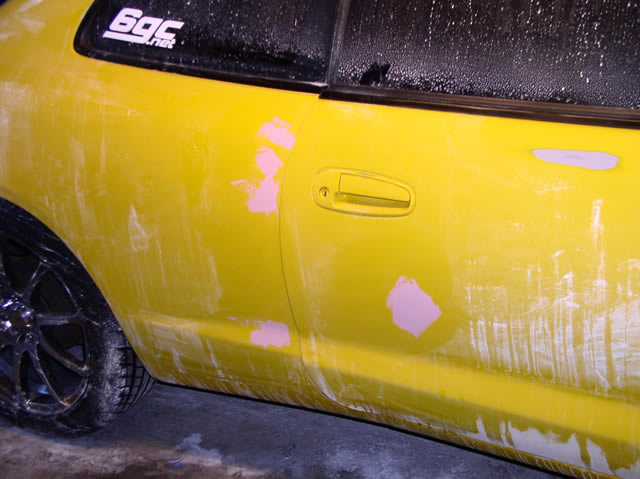
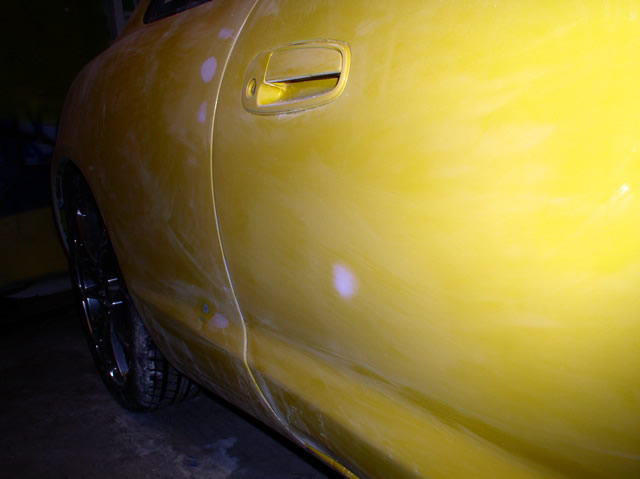
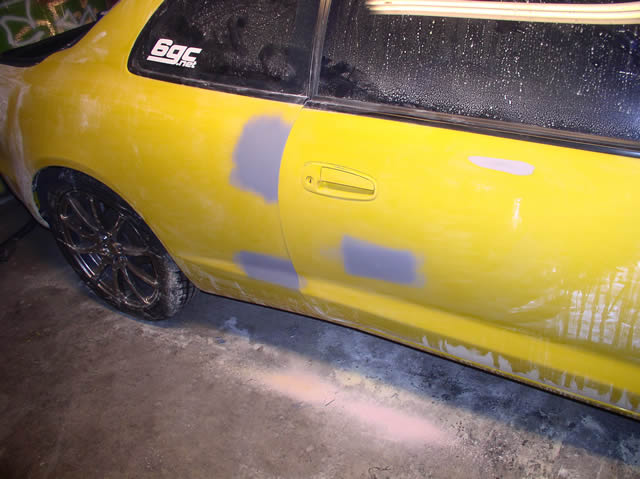
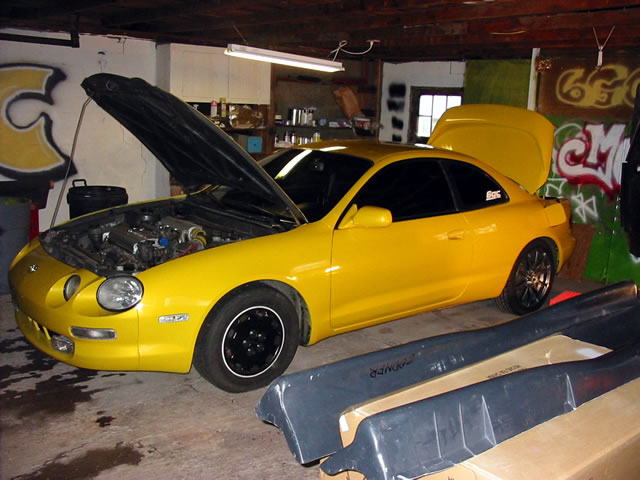
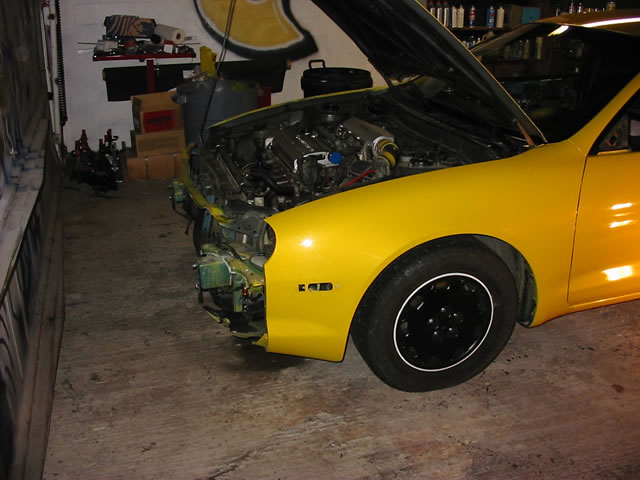
Day one started with washing the car with lots of harsh dishsoap and drying it, to remove dirt and some wax. Don't mind the amateur graffiti or the ugly front wheels...Les Schwab screwed up my alignment and it ate my nice Yokohomas up front. frown.gif But do note those sexy sideskirts in the foreground...DCW JDM dealer option replicas, which fit perfectly and are beautiful! Props to Romas for excellent work on those skirts! biggrin.gif

Attached Image

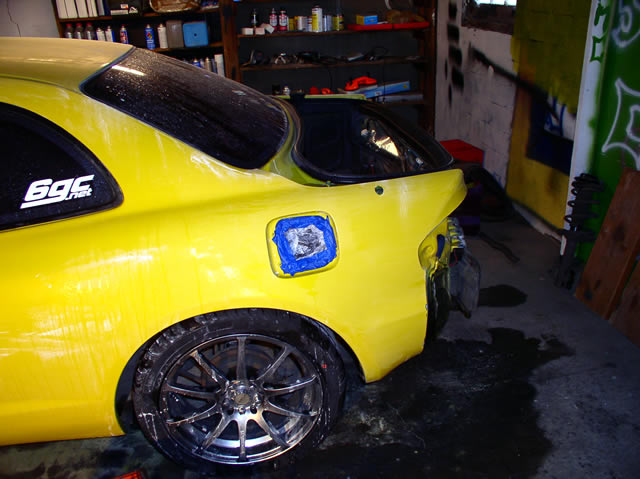
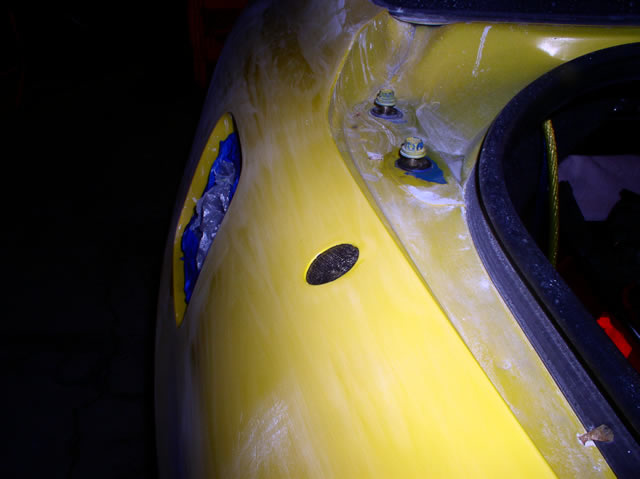
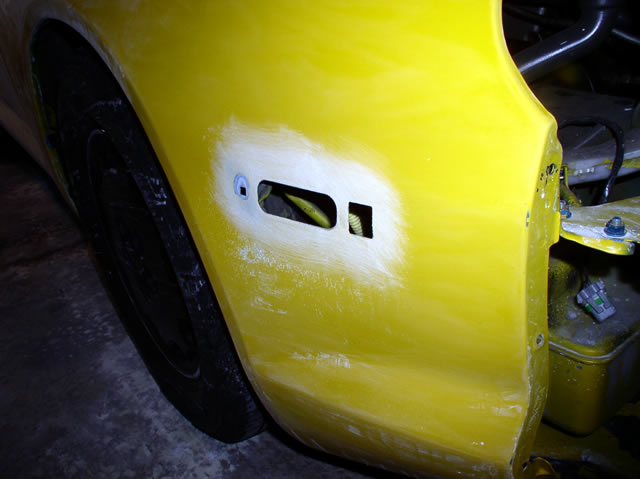
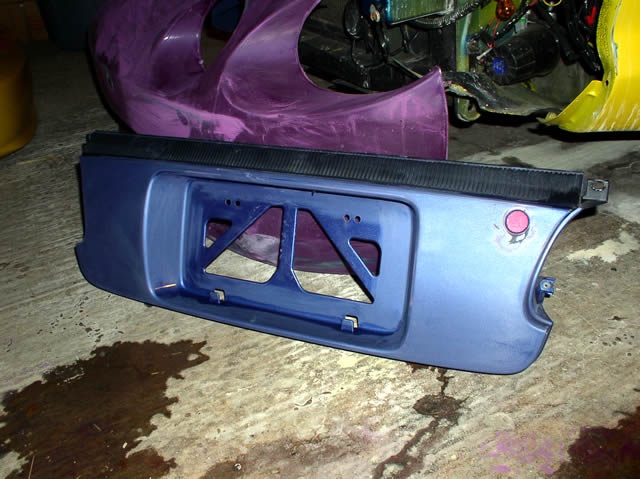
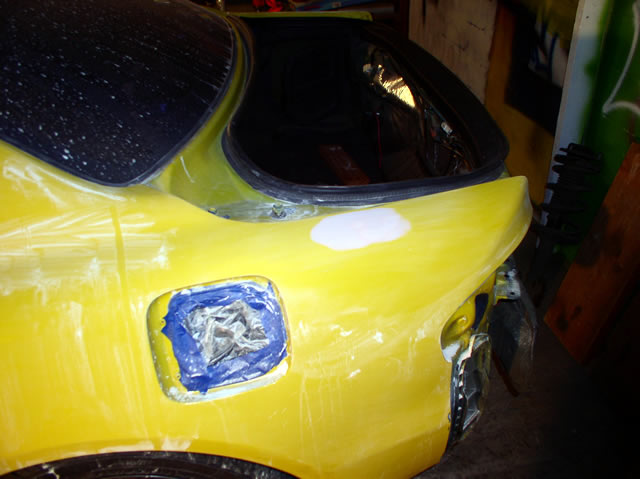
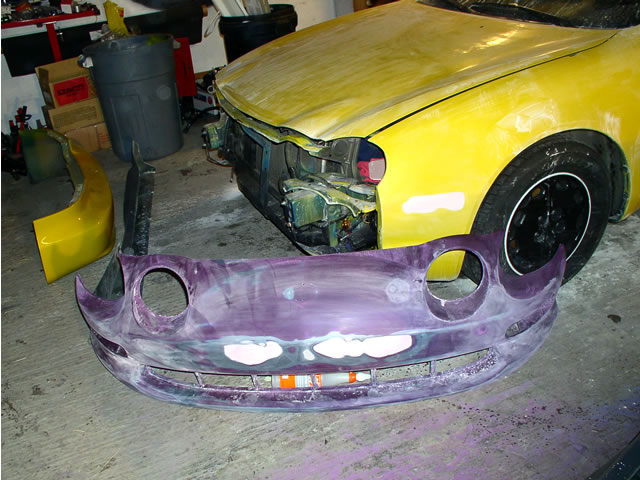
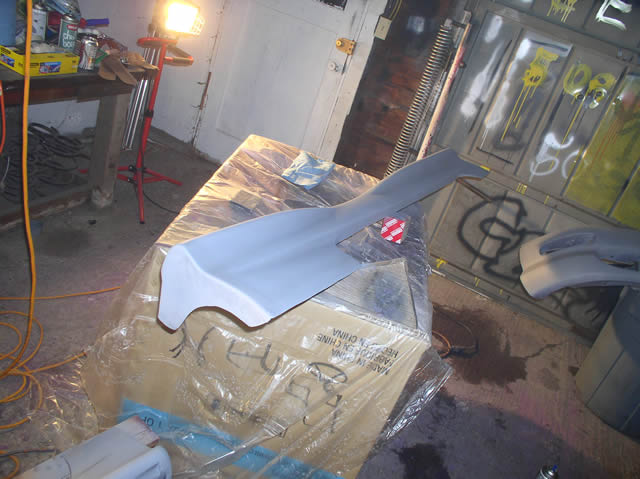
I then removed the bumpers, headlights, tail-lights, trunk lid, license plate bezel, and some other things. My front bumper is being replaced with a non-modified '95 bumper, and I'm getting rid of the fog lights. My license plate bezel and trunk lid are being replaced with parts from a '94 coupe as well, since they were both damaged in the horrible vandalism incident last June.

Attached Image

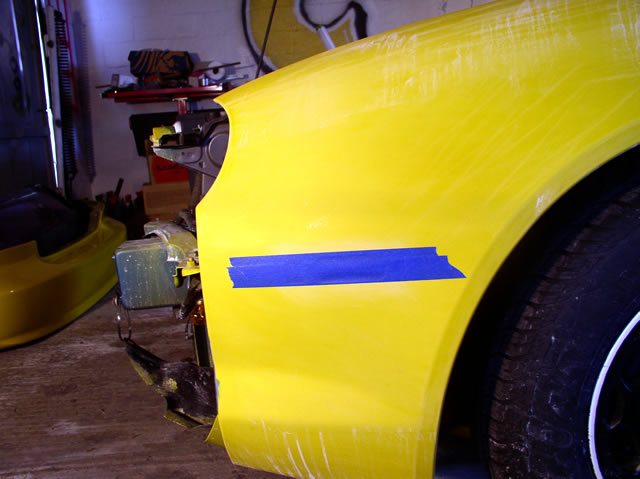
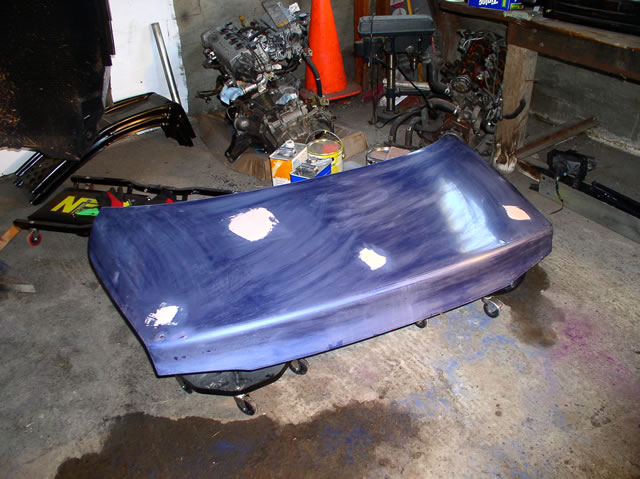
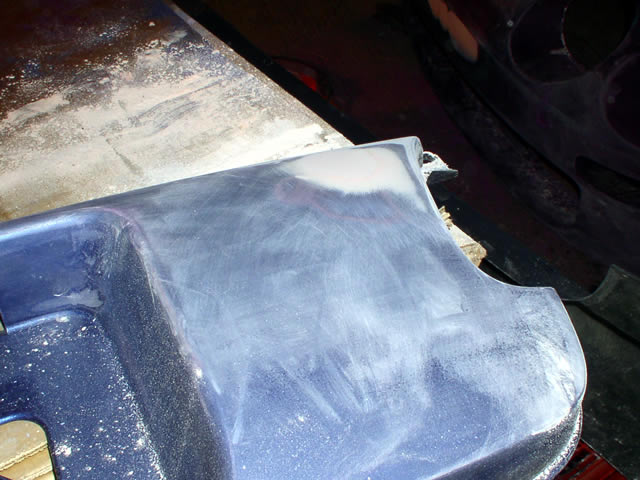
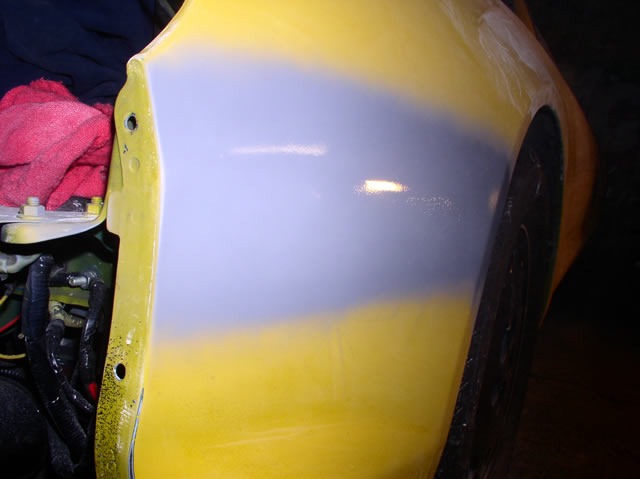
The next step was to start sanding, so I applied grease and wax remover to the hood and front fenders and wetsanded those with 400 grit sandpaper. I called it a day after wetsanding the front end.

New Toyota project coming soon...
>>Day Two>>

Day two started with more cleaning with grease and wax remover, and then sanding some of the scratches from when my car was vandalized. I used 120, then 220, then 320, then 400 for these areas, except in a couple areas where the scratches are so deep that it'll be easier to use some body filler.

Attached Image

I then sanded the roof and sides of the car, fuel door, all that fun stuff. I managed to get fiberglass embedded into my arm from my spot sanding pen, which wasn't much fun.

Attached Image

Attached Image

Attached Image

Once the whole car was sanded (the stuff off the car still isn't sanded, except the trunk lid), I took a break and then worked on getting the TRD replica wing to fit. My new trunk lid has four holes in incorrect places that need to be filled, and needs four new holes for the wing. I drilled the new holes and laid fiberglass over the holes that are going to be filled from the bottom side of the trunk lid, and tomorrow will fill these holes in completely with body filler.

I also fixed a small chip in a sideskirt caused by shipping, and filled the backside of the antenna hole with fiberglass cloth. From what I read, for a small area such as this, the fiberglass cloth should be fine and shouldn't crack and fall off. Again, this is another corner cut, where the best situation would've been to have sheet metal welded in there.

Attached Image

At this point, it was late, and I'd been working for a good eight hours or so, so I called it a night.

I'm debating whether or not to shave the sidemarkers. Now would be to opportune time to do it, but I'm not quite sure if I want to. What do you guys think?

New Toyota project coming soon...
Nice work Coomer, yeah if I were you I would shave the sidemarkers. Looks cleaner.

JDM Powerplant installed, BPU coming very soon!
nice. good to know you're keeping your celica.

ss-iii splitters and 404 skirts areon. which means i need to update my sig.
looking nice, hope everyhing comes out great smile.gif
You have incredible skills Coomer, I vote get rid of the side markers.

oh yea 1988 called, they wanted their graffiti back wink.gif

my st205 swapandour Beams swap
looks good so far chris, good to see you bringin back the yellow celi!
ditch the markers. =)

Former Team 5SFTE pro member ;)13.6@108MPH, 5SFTE Powered
Keep up the good work Coom. Are you keeping her now?

(Laughs at Batman)

QUOTE(lagos @ Jul 10, 2006 - 1:55 PM) [snapback]454118[/snapback]i know your trying to do the right thing for your motor, but this is one of those times where you should just trust the guys who have had their swaps for a while and have done a ton of research into this.
Nice work Coom!! I think u should ditch the side markers smile.gif

Buy my Celica $2,500 -http://www.6gc.net/forums/index.php?showtopic=76562&st=0
good lookin coom.

new color? same color? mods?
I guess im outta the loop? Not selling ne more I'm presuming? Did you decide to go back to the cars natural hair color? Turquoise Pearl ftw.

MyFlickrMyeBay_Perpetual Aperture_
aren't u going with that greenish color?

Buy my Celica $2,500 -http://www.6gc.net/forums/index.php?showtopic=76562&st=0
Nice work, can't wait to see it finished.

JDM guy made me do it.
About filling in the fender, do you think the fiberglass would hold? I was thinking the same thing, but thought the glass would pull and crack the bondo. whats your thought?
as long as you fill thr outside of the holes with fiberglass before body filler you should be ok. make sure that the surrounding area is ground to bare metal of course

Coming in 2010full paintjob - new wheels - modified body - new interior - engine build- marriage
>
QUOTE(b1gr3d @ May 28, 2006 - 10:25 PM) [snapback]438802[/snapback]
>
as long as you fill thr outside of the holes with fiberglass before body filler you should be ok. make sure that the surrounding area is ground to bare metal of course


Ground to bare metal would not matter, because Glass does not bond very well to metal.. I was thinking of drilling holes and then laying matt and resin
>
QUOTE(dustinkemp @ May 28, 2006 - 8:44 AM) [snapback]438650[/snapback]
>
good lookin coom.

new color? same color? mods?


Same color I think...not entirely sure yet. There will be some extra body parts and shaved stuff. smile.gif

>
QUOTE(Supersprynt @ May 28, 2006 - 8:47 AM) [snapback]438652[/snapback]
>
I guess im outta the loop? Not selling ne more I'm presuming? Did you decide to go back to the cars natural hair color? Turquoise Pearl ftw.


Yeah, I got lots of interest, but everyone kind of fell through, so I'm keeping it.

>
QUOTE(Digndoug @ May 28, 2006 - 2:07 PM) [snapback]438652[/snapback]
>
About filling in the fender, do you think the fiberglass would hold? I was thinking the same thing, but thought the glass would pull and crack the bondo. whats your thought?


I'm going to fill mine with fiberglass...hopefully it'll hold up. wink.gif

New Toyota project coming soon...
>>Day Three>>

Day three didn't consist of getting a whole lot done. I started by sanding some areas on the car where I'd missed before. I then sanded down the sidemarker area both on the outside and inside of the fender, taped it off so that resin wouldn't drip down, and applied two layers of fiberglass cloth and resin to the inside of the fender.

Attached Image

Attached Image

Attached Image

I then put my efforts towards sanding the front bumper and rear license plate holder. It took me forever to sand down the front bumper! Once this was done, I glued a piece of plastic behind the key hole in the rear license plate panel. I'll fill the front with plastic body filler, and it should work perfectly to shave the plate hole. I used this technique on the Yelli Celi's rear plate panel after the car was vandalized, and it held up perfectly.

Attached Image

Attached Image

I also began sanding down a sideskirt, but by this point my fingers were bleeding, so I called it a day.

New Toyota project coming soon...
damn... bleeding fingers. that's when you know you're working too hard. nice work coomer.

ss-iii splitters and 404 skirts areon. which means i need to update my sig.
Hey Coomer,

good luck and much success with the project. I had no idea you suffered such a vicious attack last summer! It's a wonder the Yelli Celi is still on the road. Many would have given up. I guess you are obsessed as the rest of us wink.gif . I will be flagging this thread because I too am starting a bodywork project, hopefully this week. there are so amny obstacles and life keeps getting in the way. Appointments and shift changes, deliveries and commitements keep popping up. I will start a thread as soon as I start. I am going to fix the bumps and bruises the ol' Celipig suffered in it's previous lifetime ( the last owner was a dick-- neglect, scratches, rust, etc) and repaint it stock colour-- Alpine Silver Mettalic. There is so much to do, and I fear I will suffer withdrawl syndrome when I have to drive my Tracker for 2 to 3 weeks while I get this done. i am seriously addicted to my Celi.

Again, hope all goes well and you have a chance to share your experience with the community.

Ray.
>>Day Four>>

Today was a very productive day, at least by my standards. biggrin.gif I started by sanding down the areas where I was going to apply body filler, and then filled those areas. I filled the front bumper license plate holes, sidemarker holes, a chip on the hood, a ding on each door (only two dings on the entire car in 3.5 years...parking way away helps a lot,) scratches on the passenger rear quarter panel, the antenna hole, dings and holes on the trunk lid, a chip in a sideskirt, and the shaved license plate holder key hole.

Attached Image

Attached Image

Attached Image

I used USC Halftime, which works very well as both a body filler and icing. Once the filler was dry, I sanded down the areas with 120 and then 220.

Attached Image

Attached Image

Attached Image

Attached Image

Finally, once all that was done, I cleaned the areas up and shot them with Duplicolor rattle-can sandable primer and primer sealer.

Attached Image

Attached Image

Attached Image

New Toyota project coming soon...
Are you relocating the key hole, with the Curren wing on it it wont pop.

Jeez this entire thing would be my nightmare, good work.

MyFlickrMyeBay_Perpetual Aperture_
>
QUOTE(Supersprynt @ May 30, 2006 - 12:19 PM) [snapback]439387[/snapback]
>
Are you relocating the key hole, with the Curren wing on it it wont pop.

Jeez this entire thing would be my nightmare, good work.


Nope, my key hole was absolutely destroyed when my car got vandalized. My old trunk wouldn't pop either, so I just prop up the handle on the inside and then open the trunk. I very rarely use my trunk anyway, since it's got a battery, amp, and sub back there.

New Toyota project coming soon...
I have been recomended to weld shut the sidemarkers and trunk hole.... Is there any reason that you chose not to?
>
QUOTE(dustin15brown @ May 30, 2006 - 1:09 PM) [snapback]439399[/snapback]
>
I have been recomended to weld shut the sidemarkers and trunk hole.... Is there any reason that you chose not to?


Budget. tongue.gif

Like I said in the first post, I cut some corners to save money, since it is just my project car. I read that the fiberglass should hold up, and it has for a long time on my bro's car, so hopefully it holds up. smile.gif

New Toyota project coming soon...
damn coomer, nice job, this really inspires me to do my own car.. as soon as i fix my headlight issues im gonna be all over this thread for tips and tricks
>
QUOTE(brianforster @ May 30, 2006 - 2:03 PM) [snapback]439439[/snapback]
>
damn coomer, nice job, this really inspires me to do my own car.. as soon as i fix my headlight issues im gonna be all over this thread for tips and tricks


Cool man. smile.gif

Here's some tips I haven't posted yet that I've learned so far:
  • Buy good sandpaper and change your piece out for a new one once it gets dull...sanding with dull sandpaper takes forever...it's worth the extra cost of a bit more sandpaper to get it done much faster.
  • Use good body filler...USC Rage Gold is excellent. I've used USC Half-Time on the Yelli Celi for this project and it's worked very well too.
  • Wear a respirator when wetsanding fiberglass...don't think that the water will contain all the fiberglass...small particles still get into the air and are very bad for you. If you can smell fiberglass when wetsanding, that's a sign that you should be wearing a respirator.
  • Quit when you're tired, and if you start to lose inspiration take a break and go look at some sexy cars online or something...that's always motivating for me. smile.gif

That's all I can really think of now.

New Toyota project coming soon...
my big problem with my body work right now is my freaking front bumper and headlights, they are so out of wack that im just depressed every time i look at my car.. once i fix the front end the rest of the car will be a piece of cake
The fender looks good.. Thats exactly what i wanted to do, but wasnt sure if it would hold.. and Dont want to have to re-do it some other time.. Im thinking i might try it aswell, but im going to drill some holes around the outside as well, so when the glass lays and drys will have a better hold.
Can't wait to see your finished project @ the meet Coomer!

with out the front bumper or heat lights the front end looks kinda like the new mustang hah tongue.gif not the exact same or anything...just kind of reminded me

IPB Image

IPB Image