Over 1M Posts • 84K Topics • 9K Authors

Green Bullet ST205 Re-Born - 6G Celicas Forums

Topic #77385 1008 posts Started by bsamps4
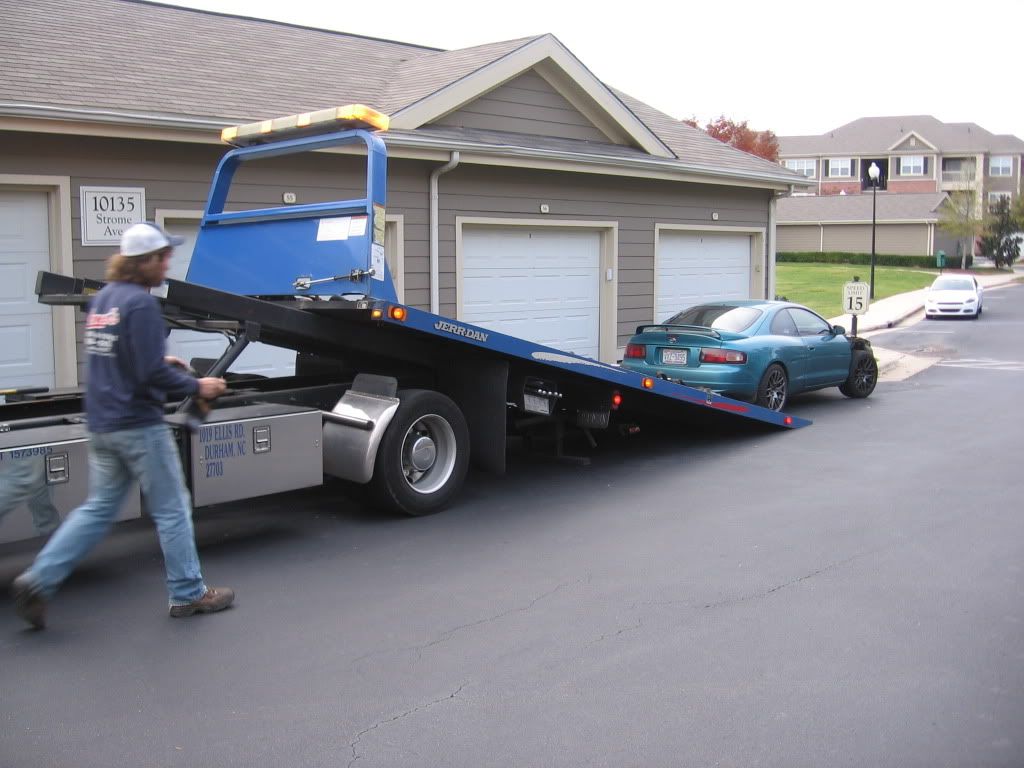
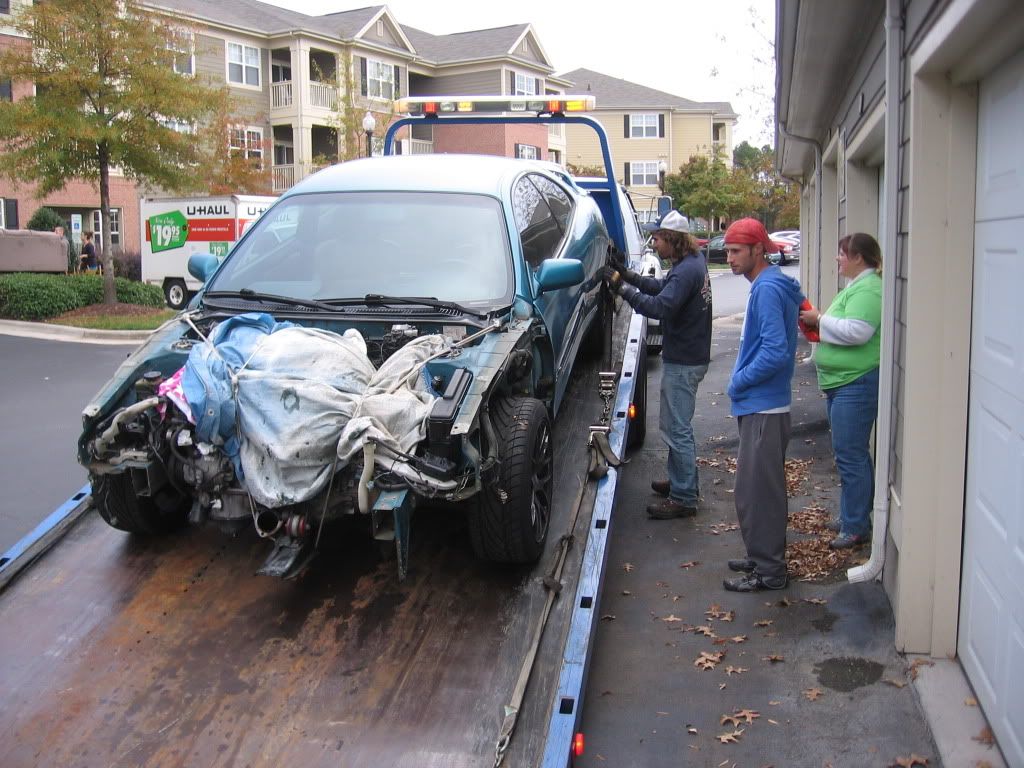
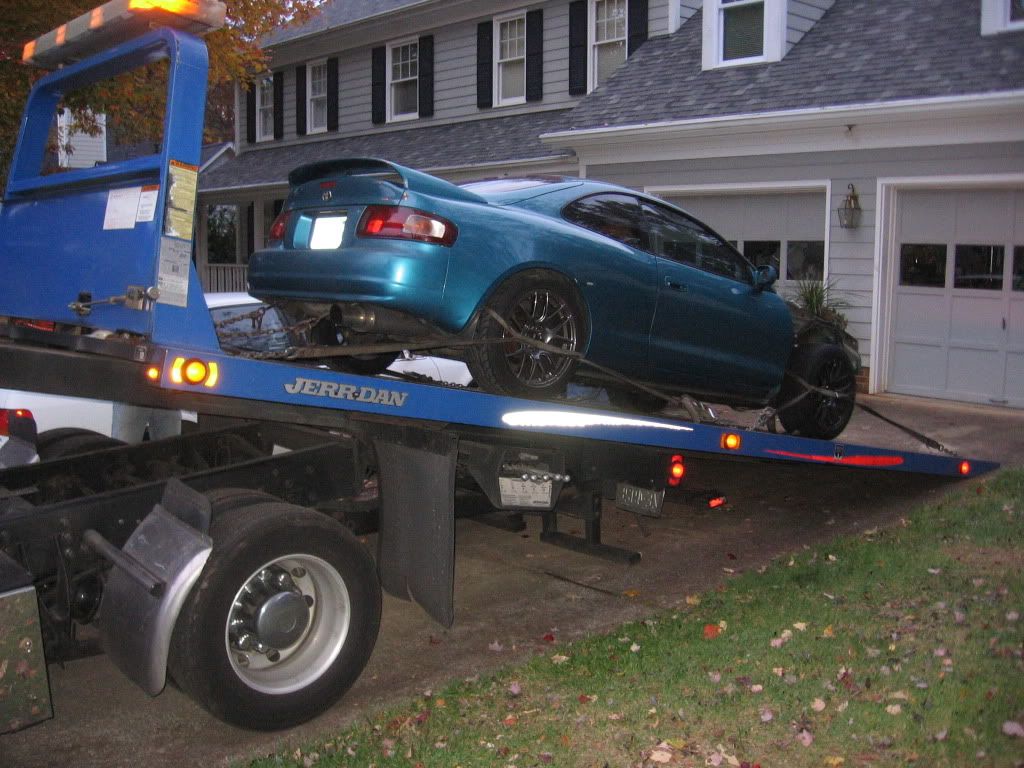
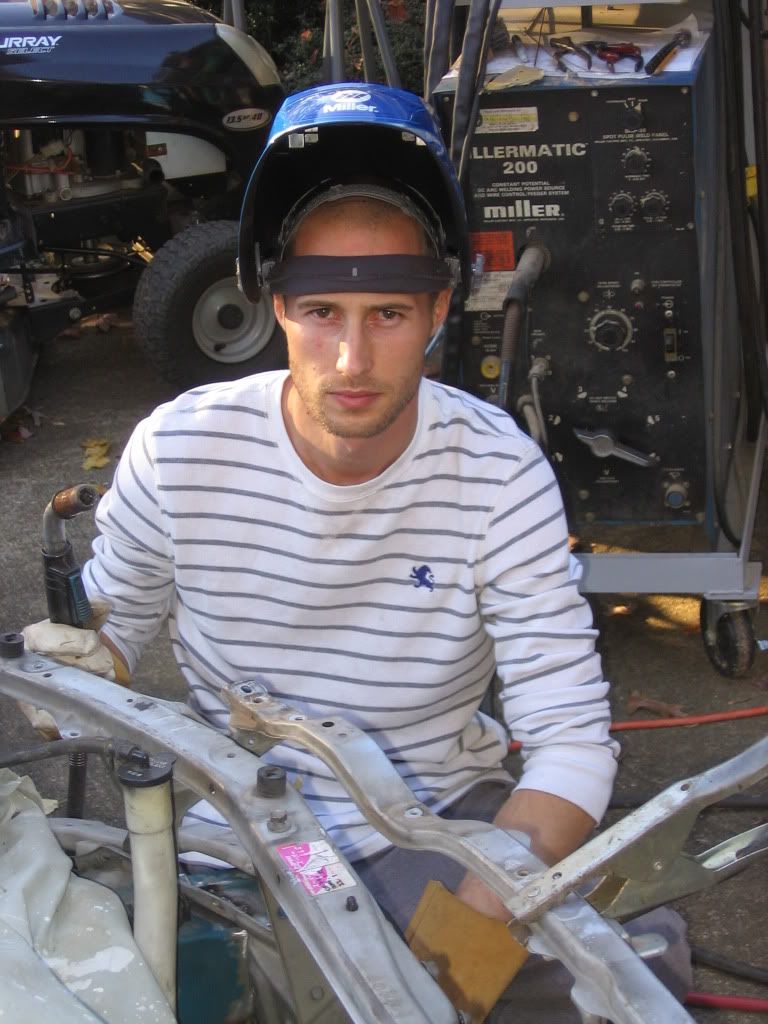
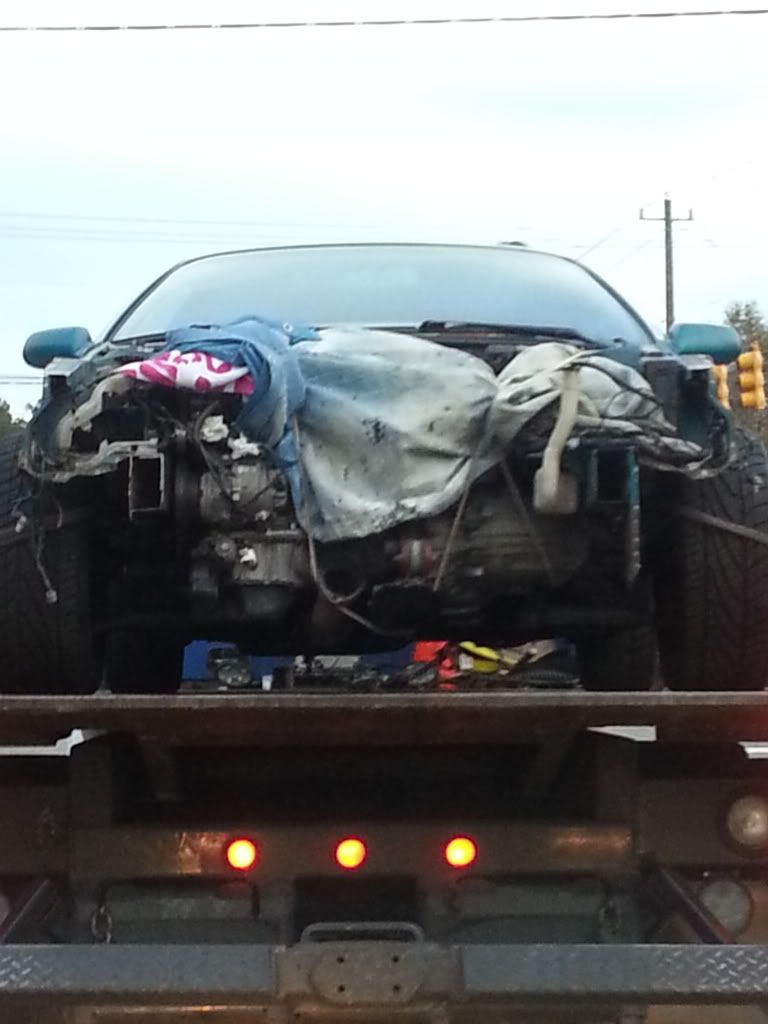
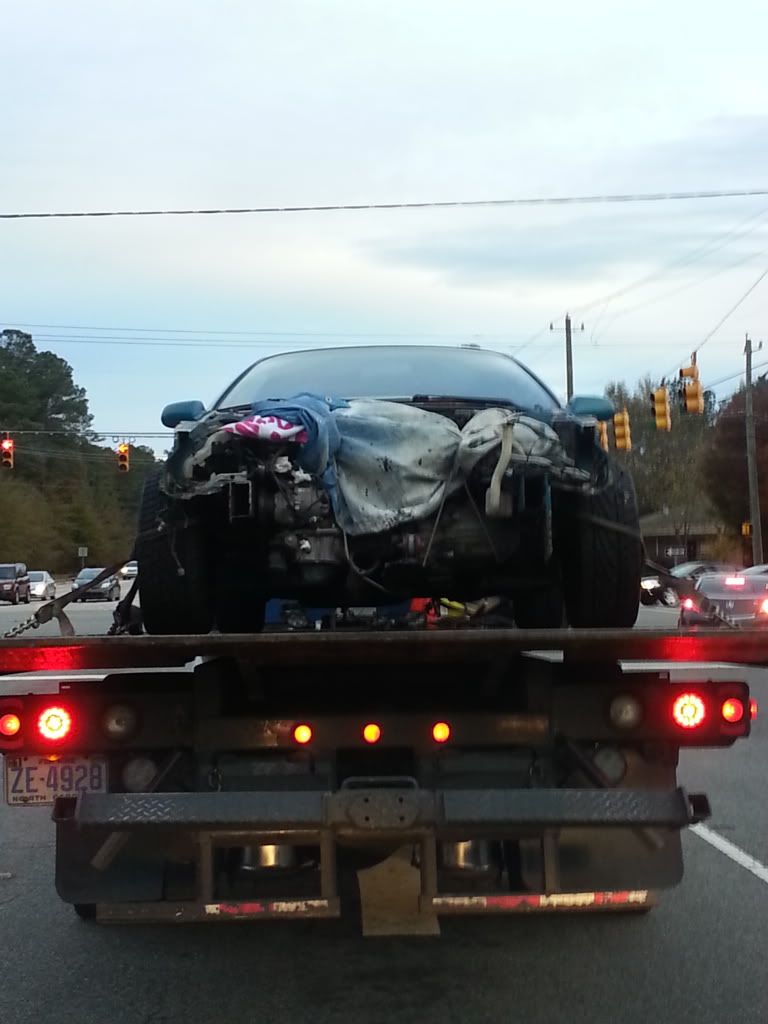
So it was finally time to have the car towed over to my Dad's house for finish welding. Wish I had towed it there in the first place, but you live and you learn.


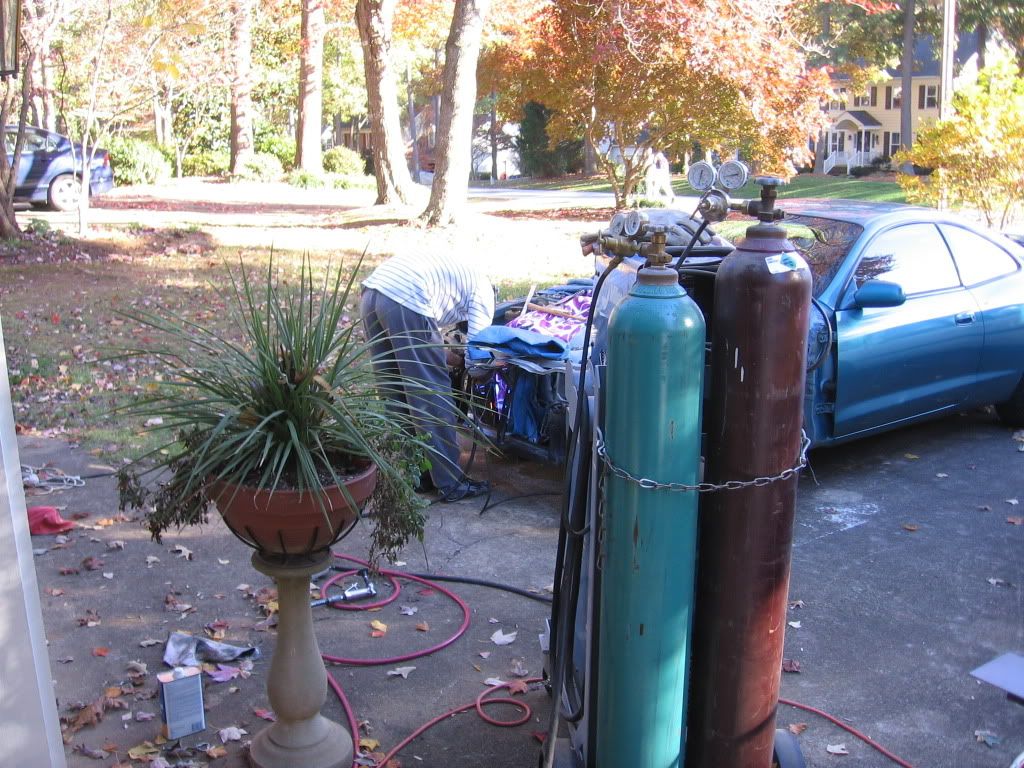
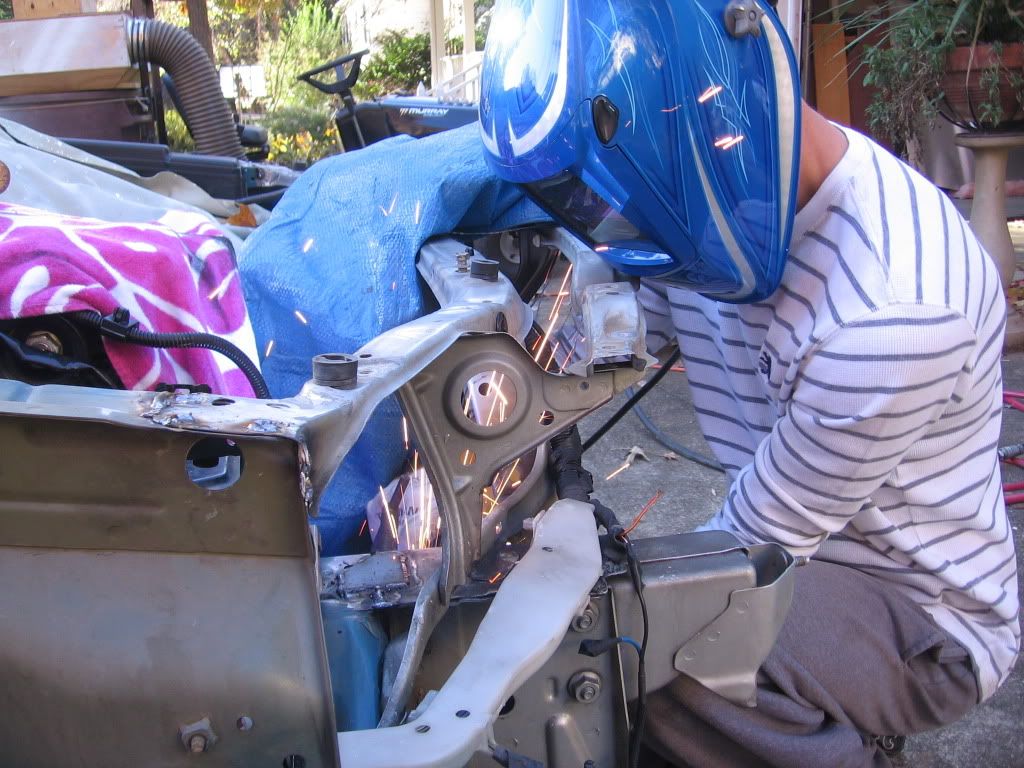
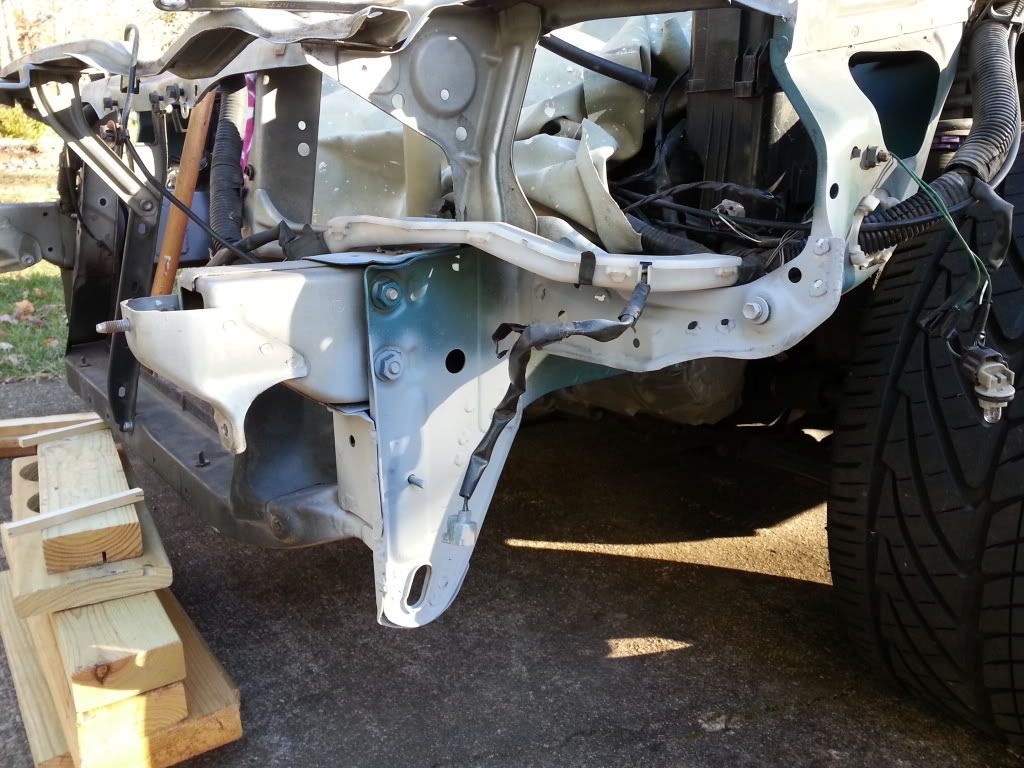
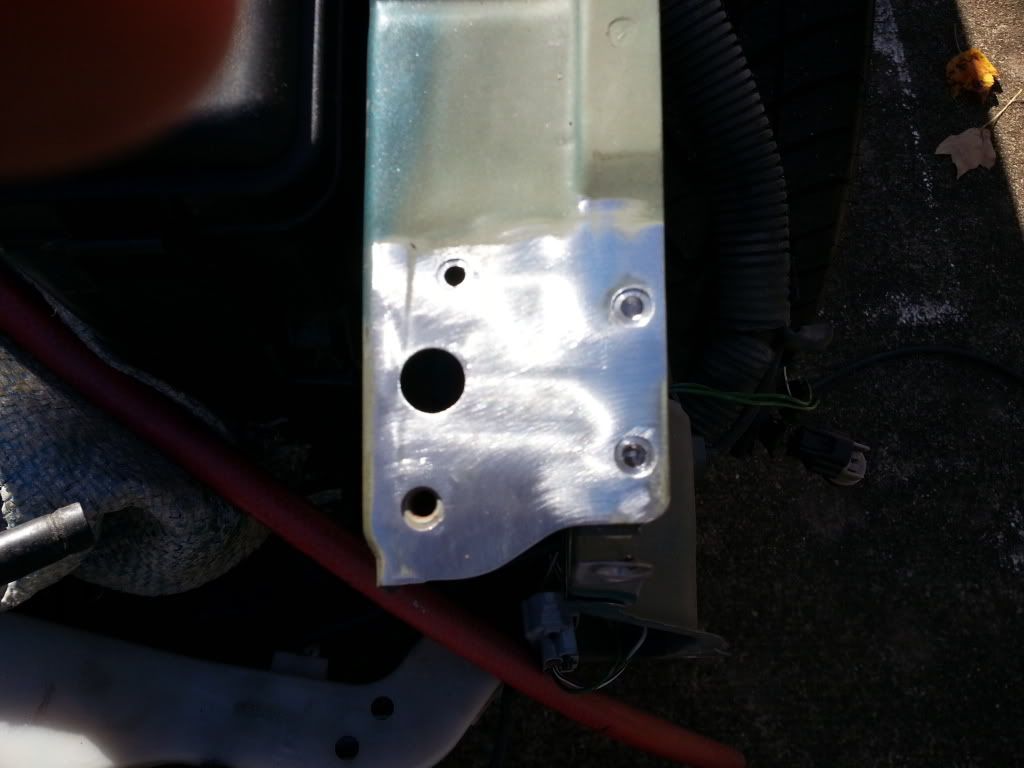
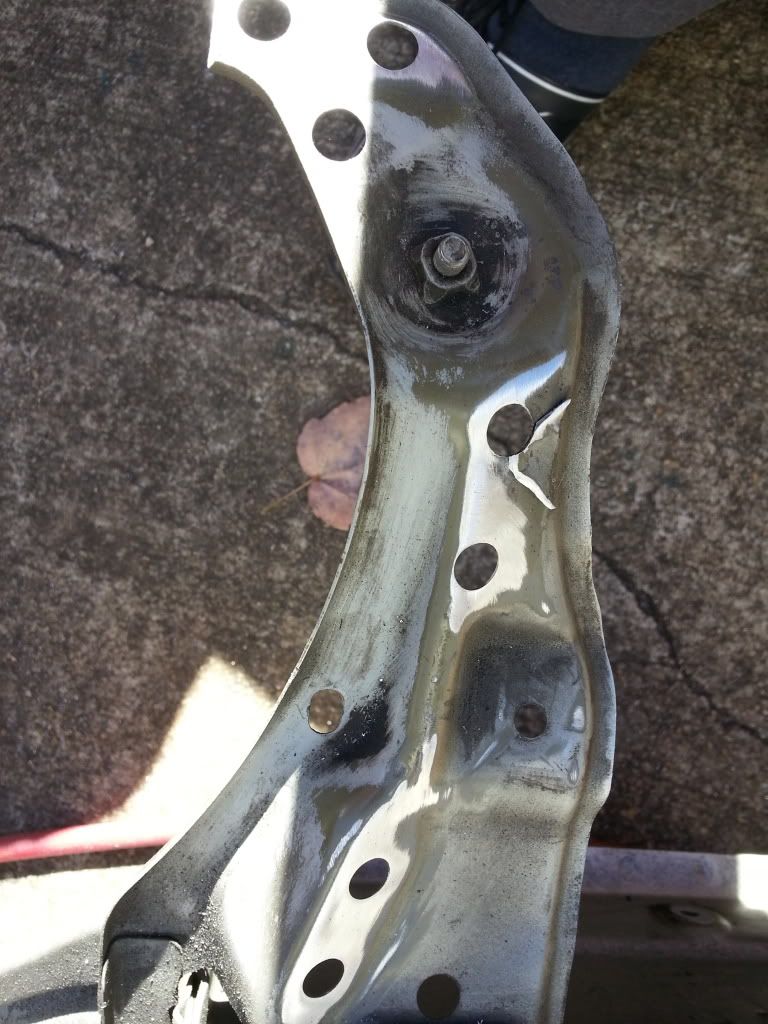
Then it was time to clean up all of the weld points so that we could get strong welds in all the areas that were necessary.


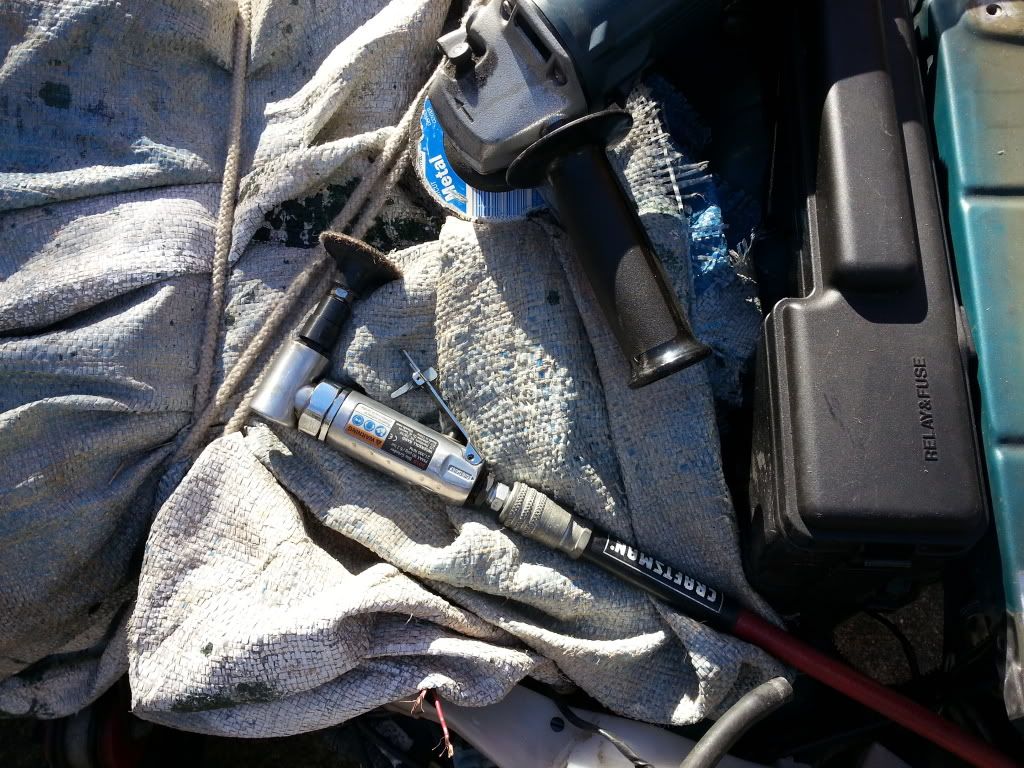
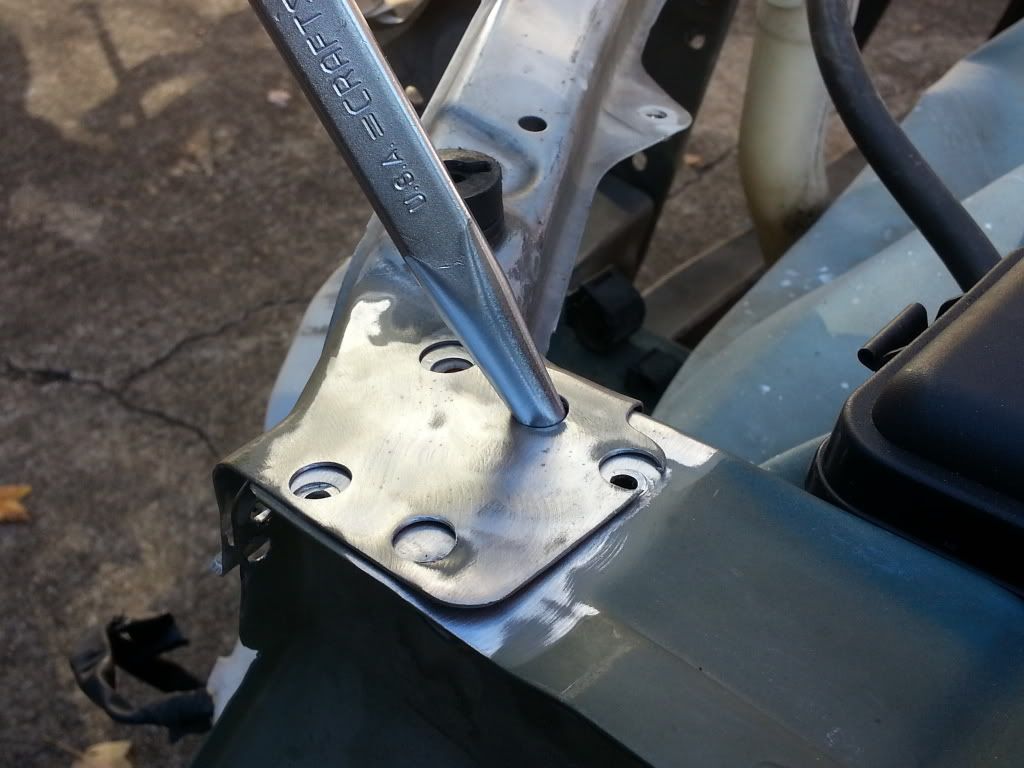
Used a grinder, and my trusty angled die grinder


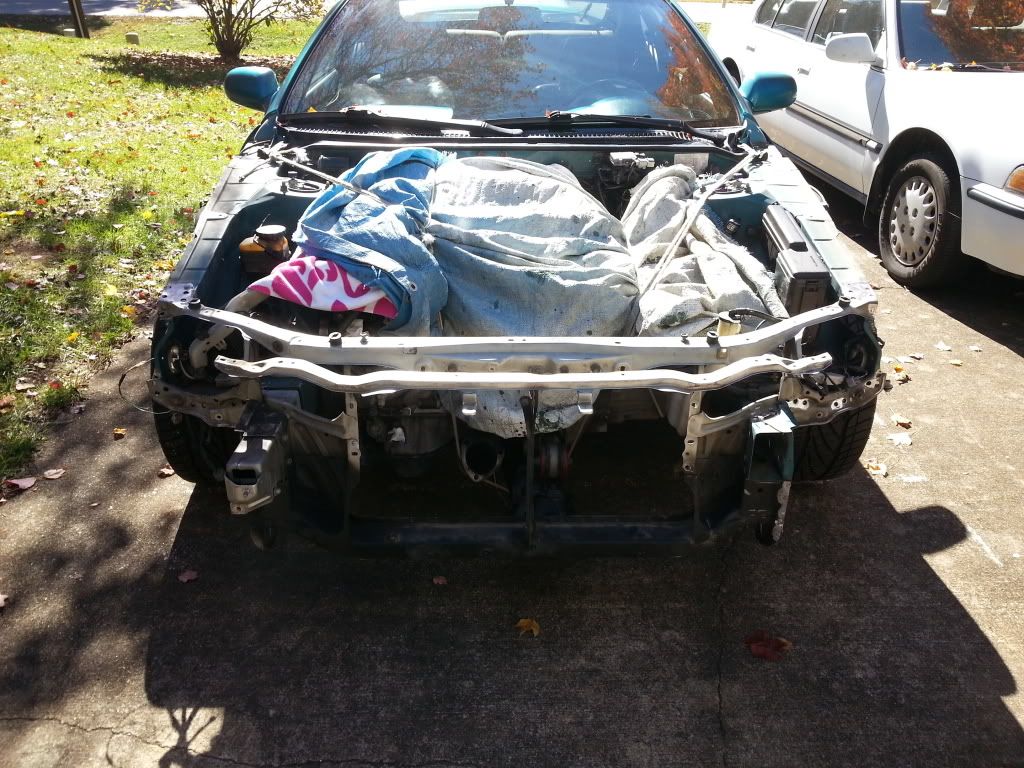
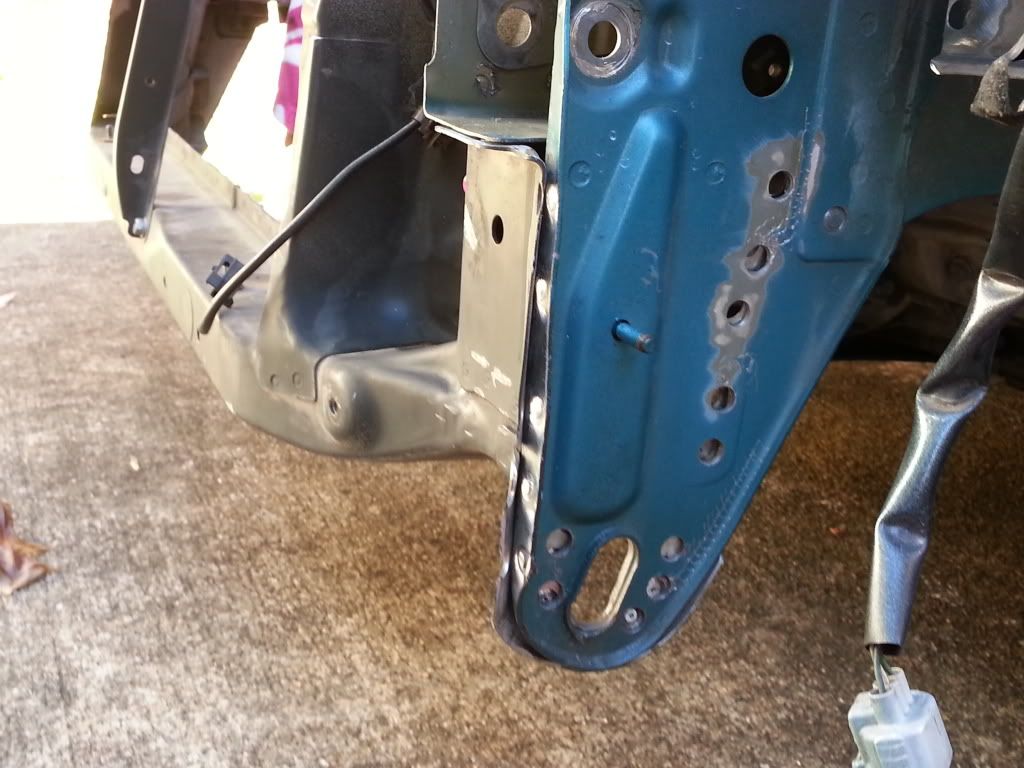
Then it was time to test fit the new frame.


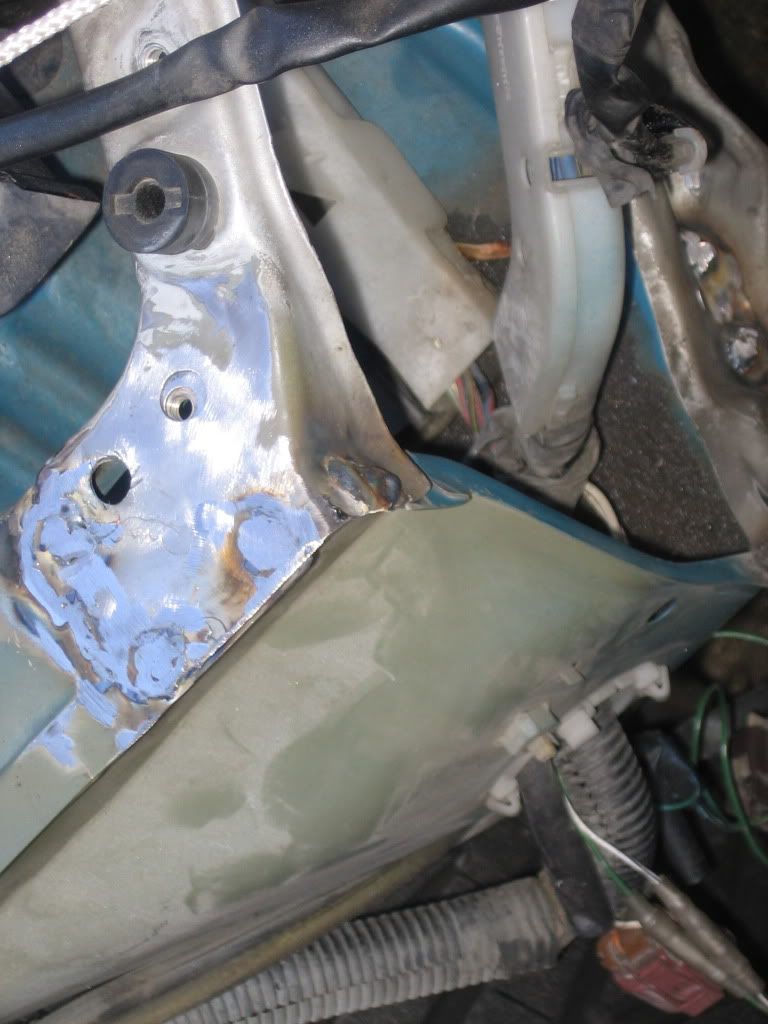
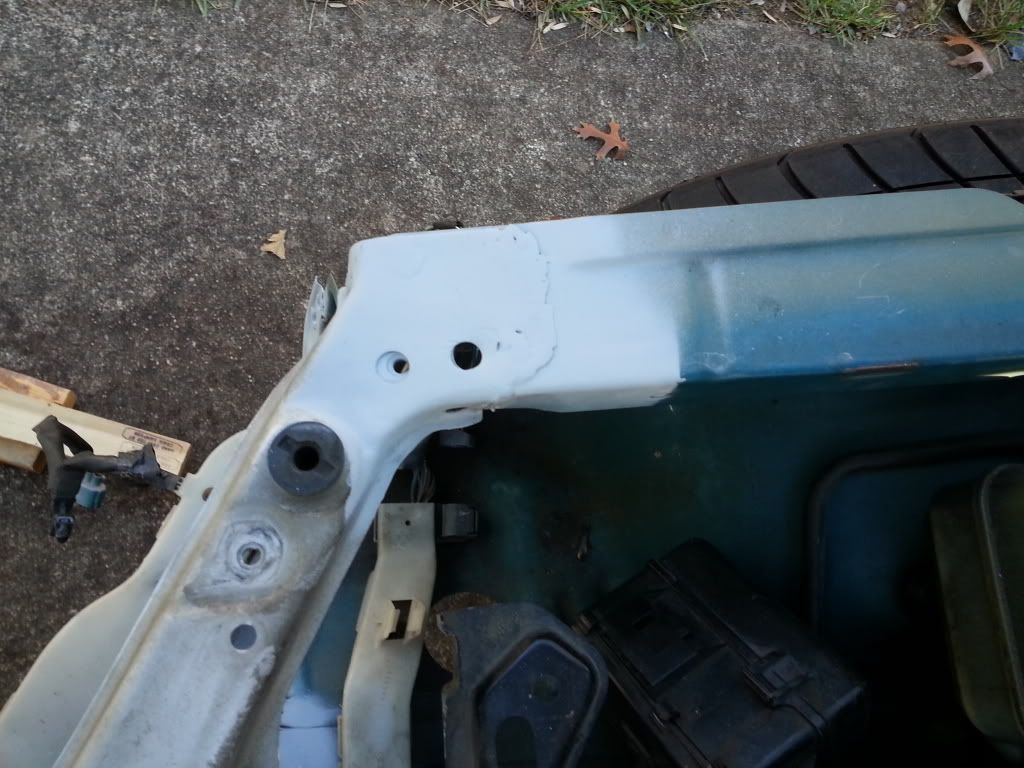
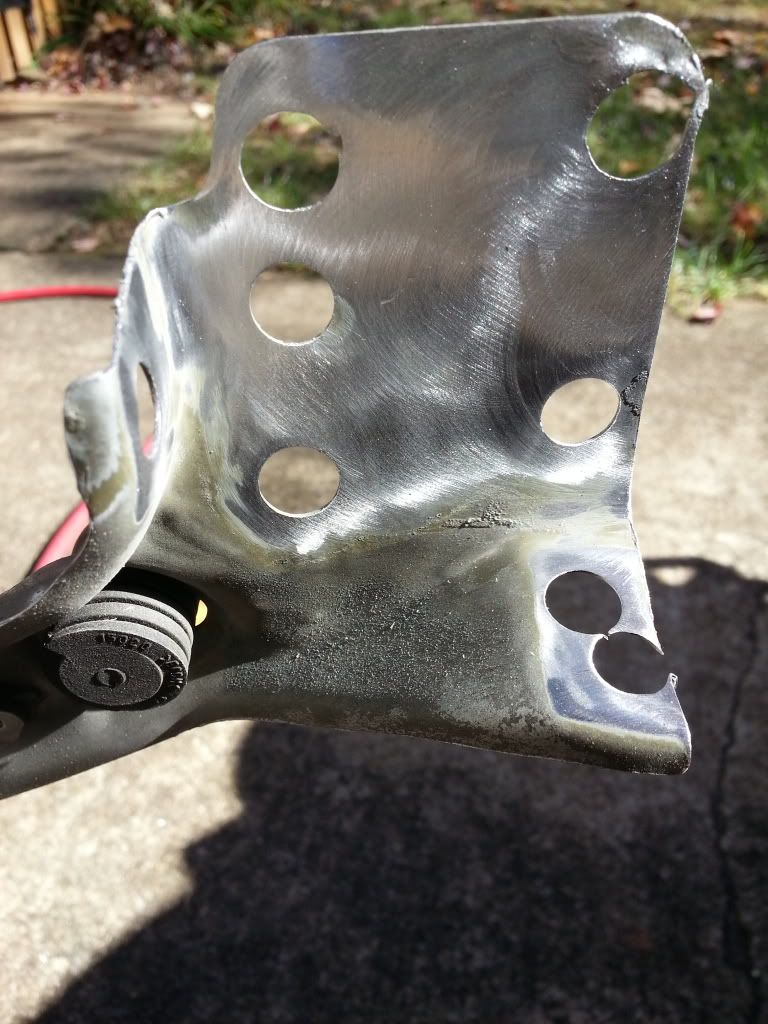
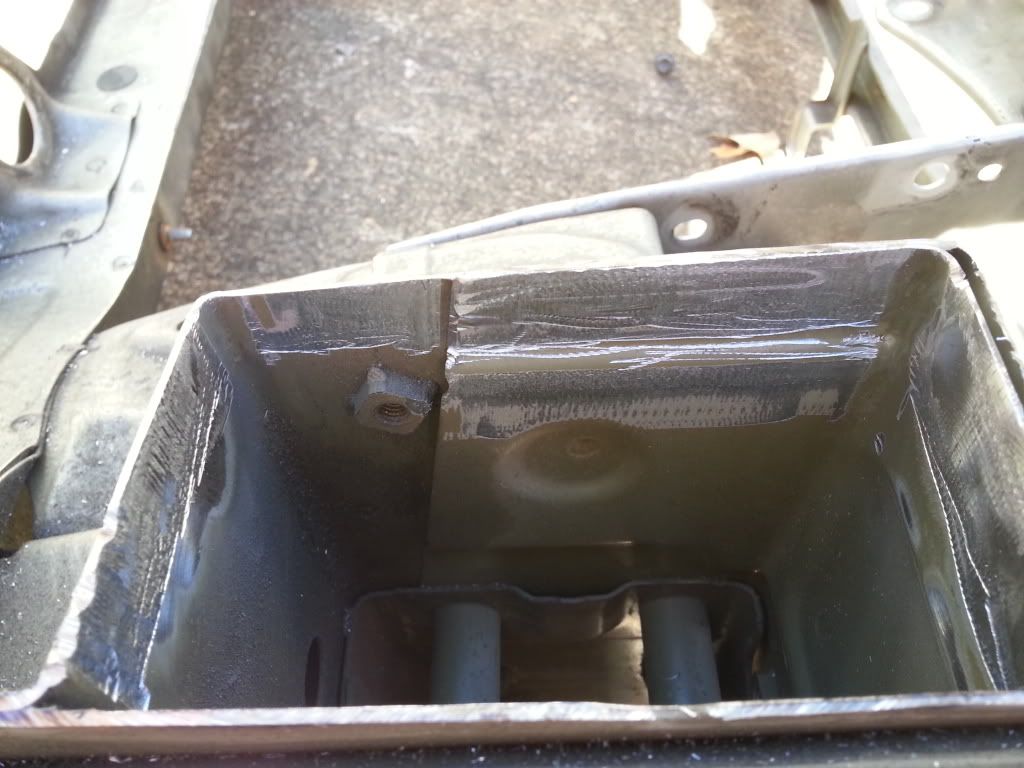
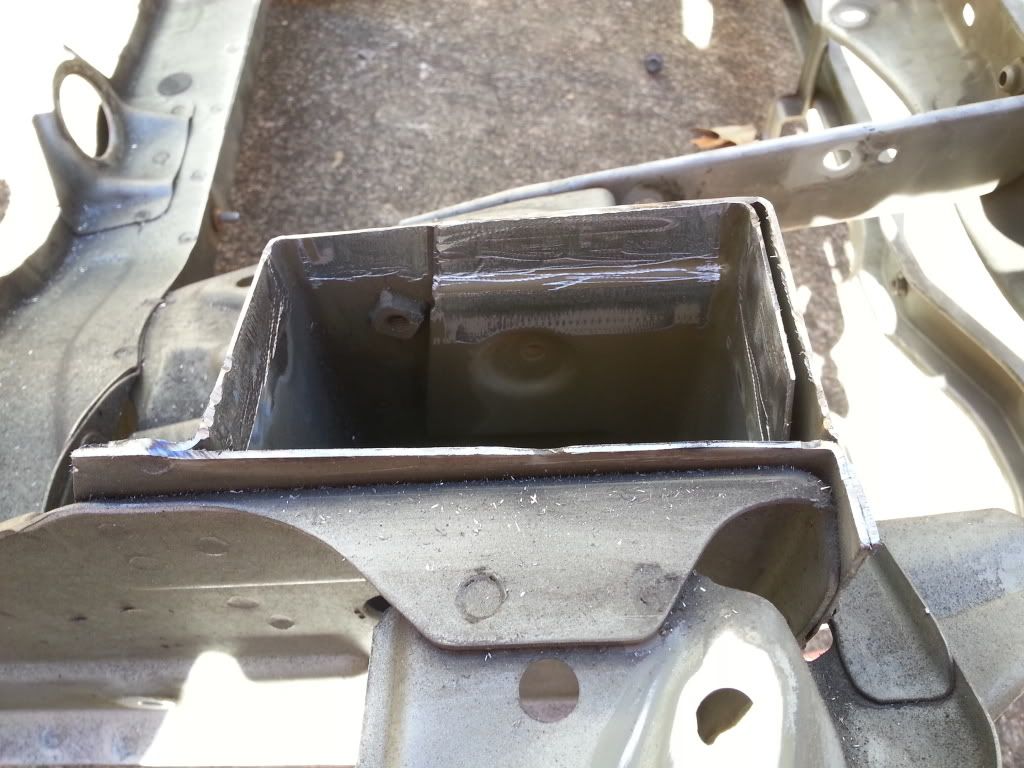
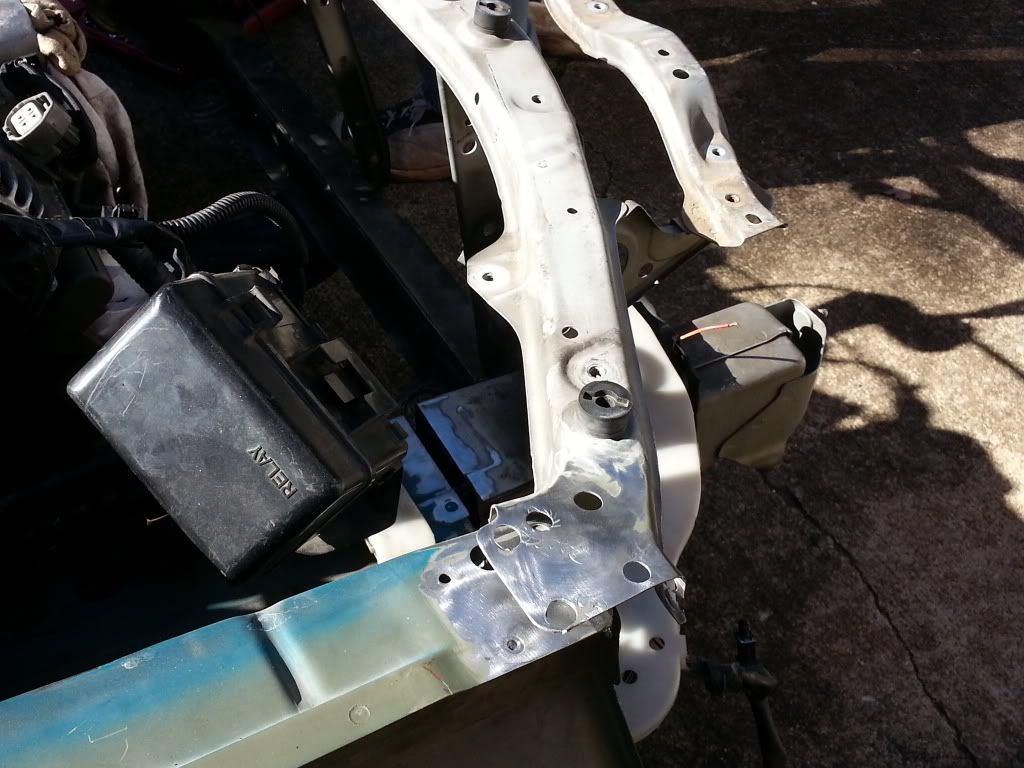
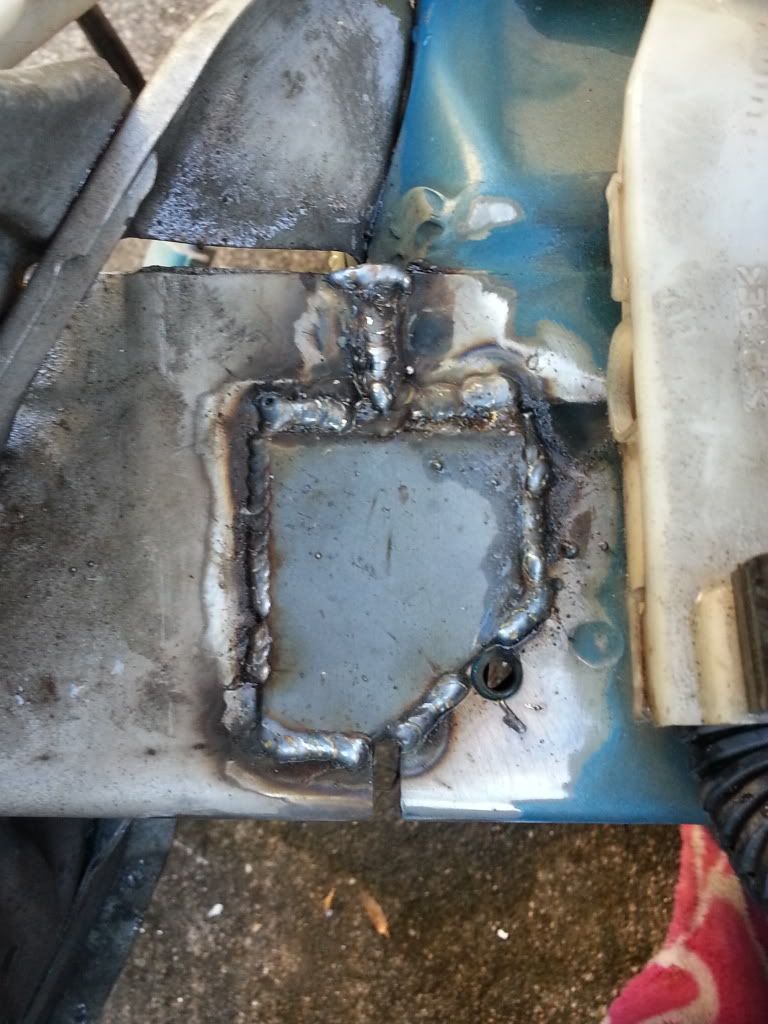
Everything lined up great so it was time to grind inside of the front right frame rail to attach a sleeve to weld on


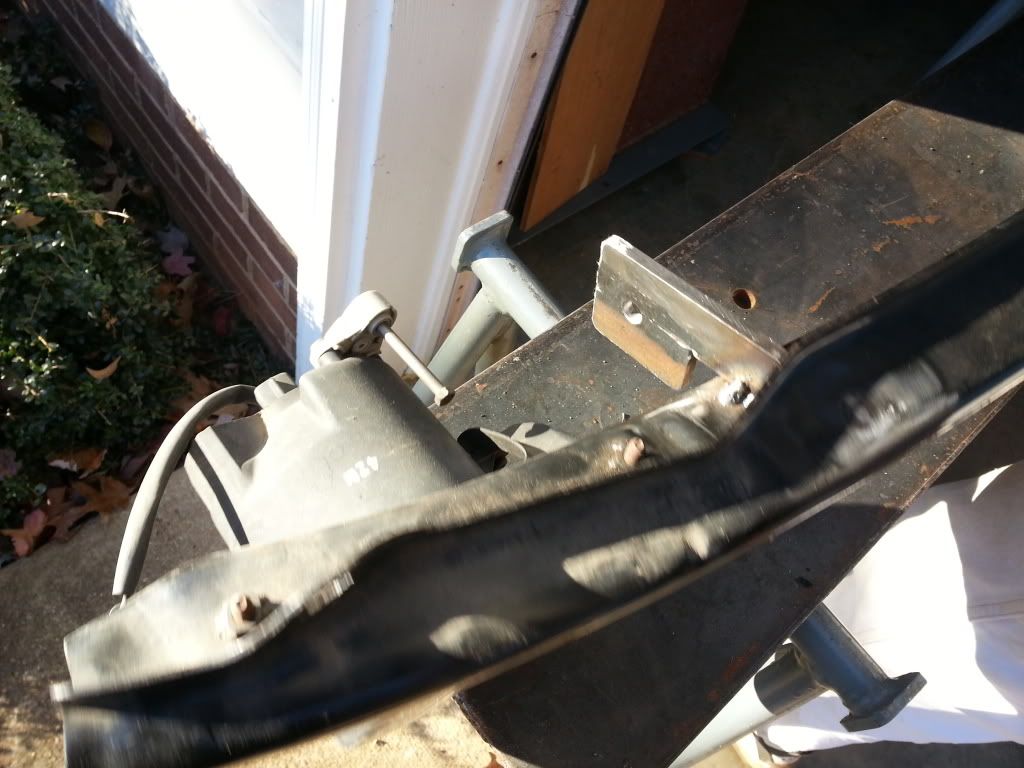
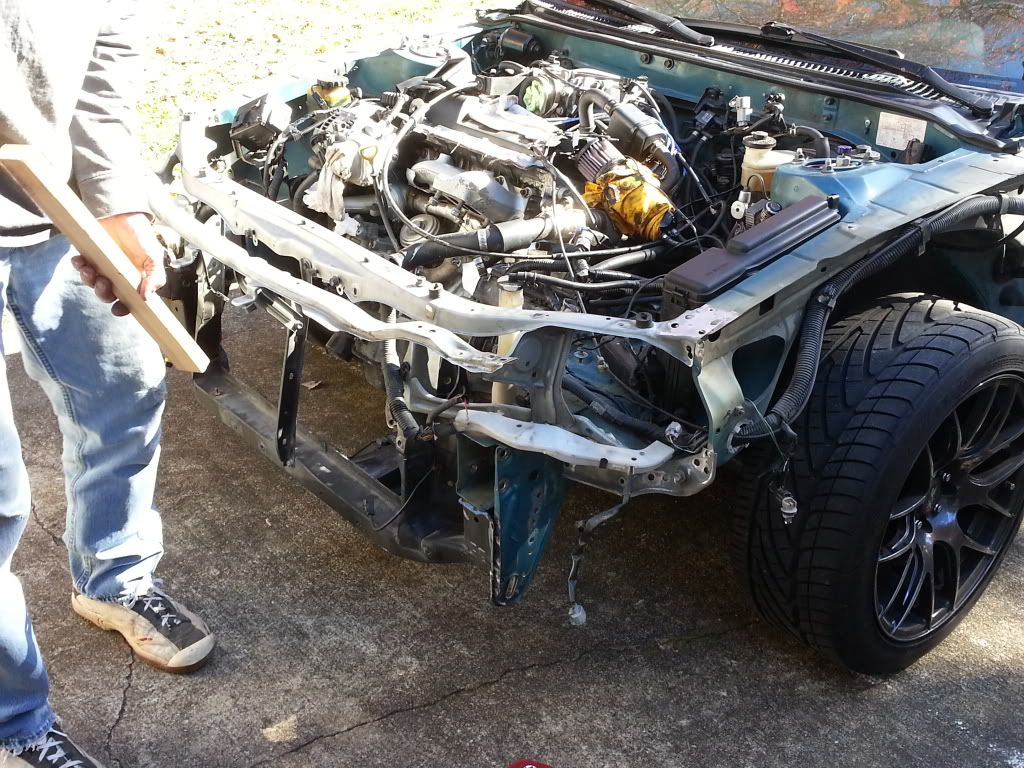
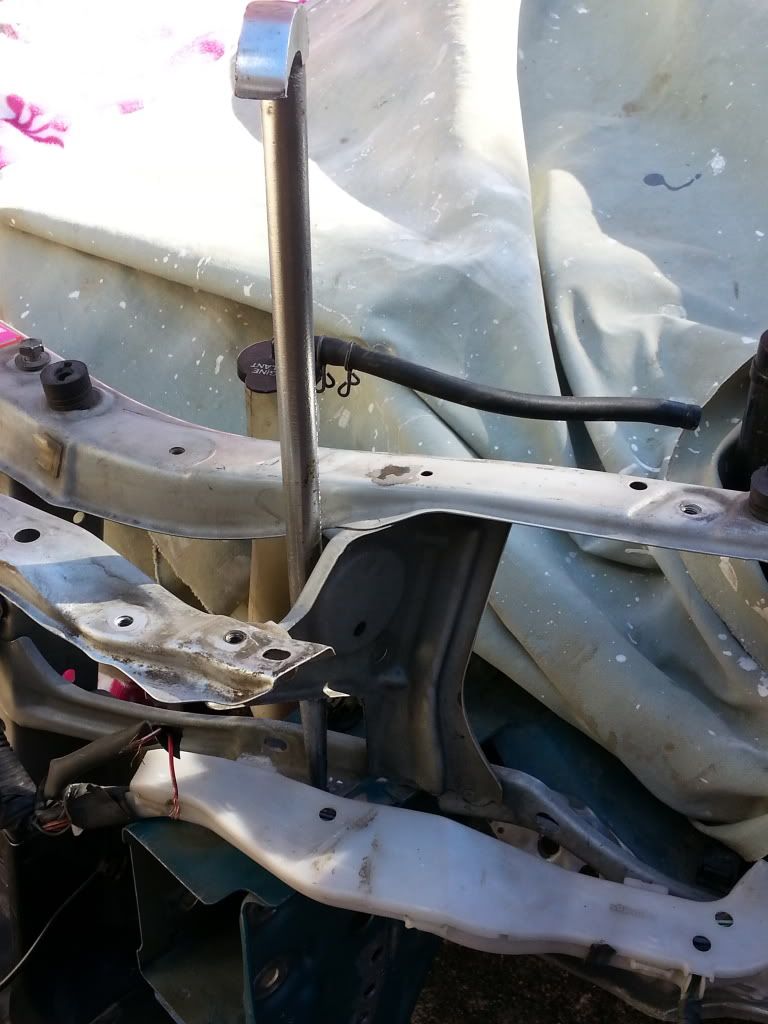
Then it was time to use some wood and a hammer to mock everything up for finish welding, along with some careful measurements and slide pins.


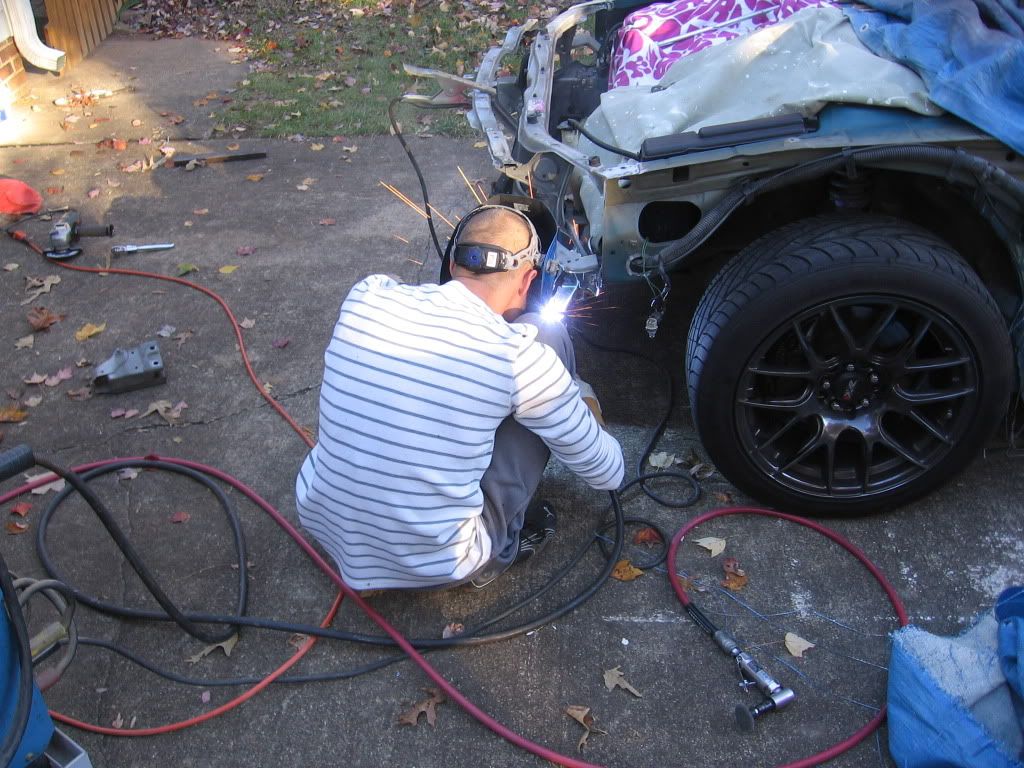
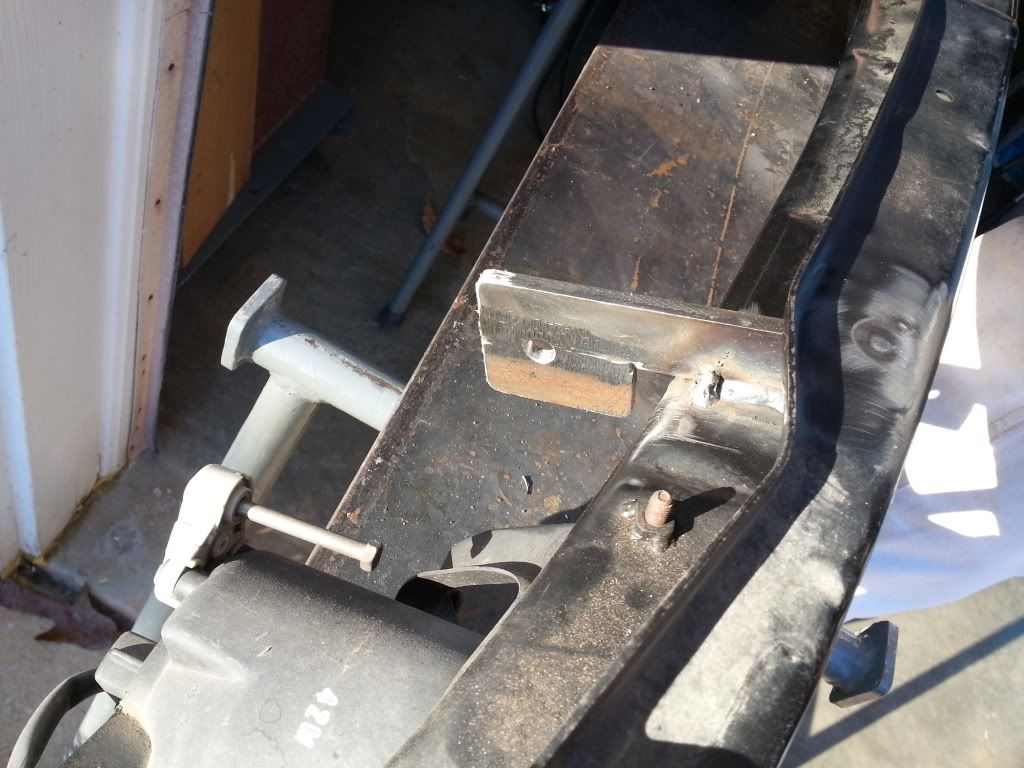
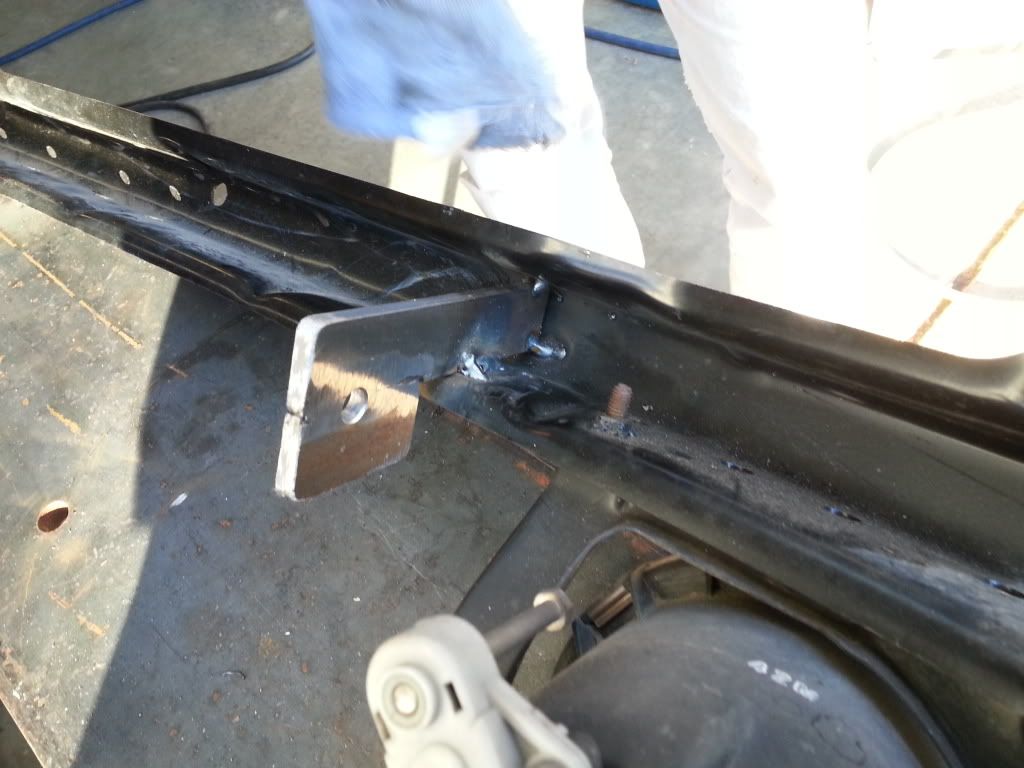
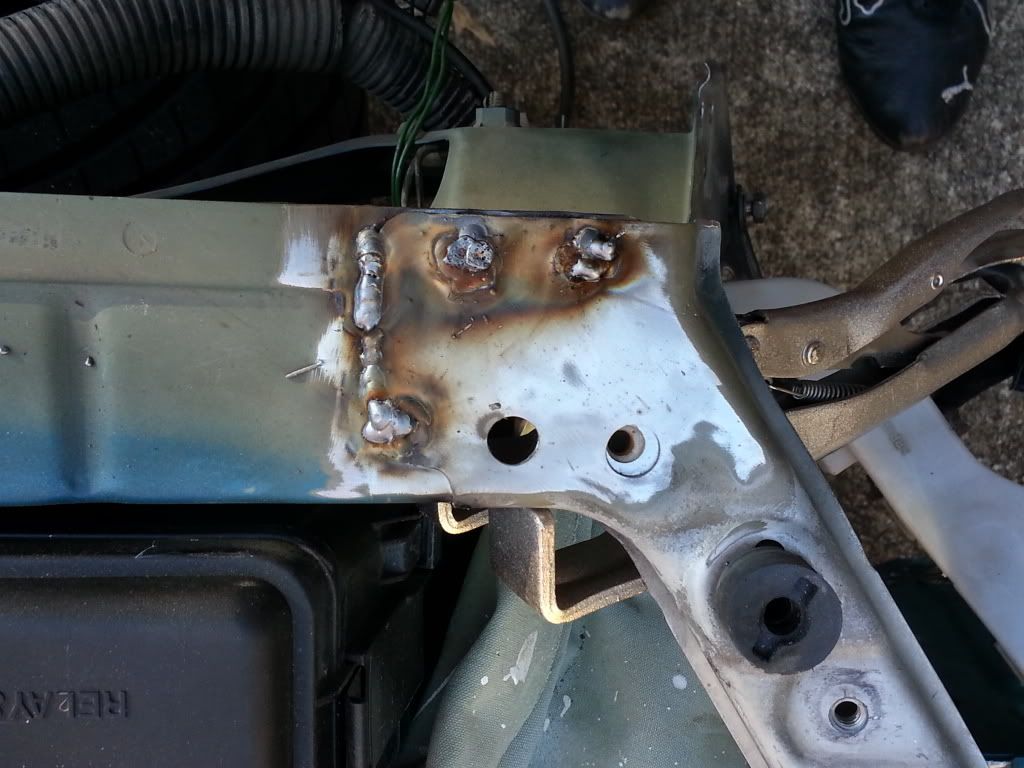
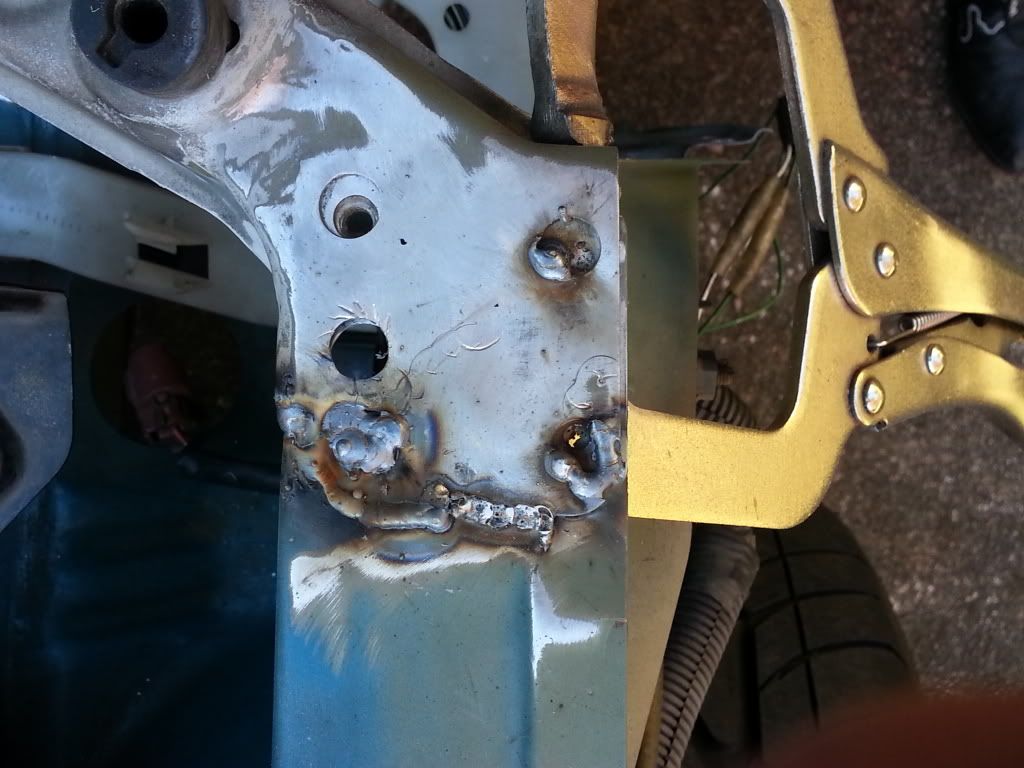
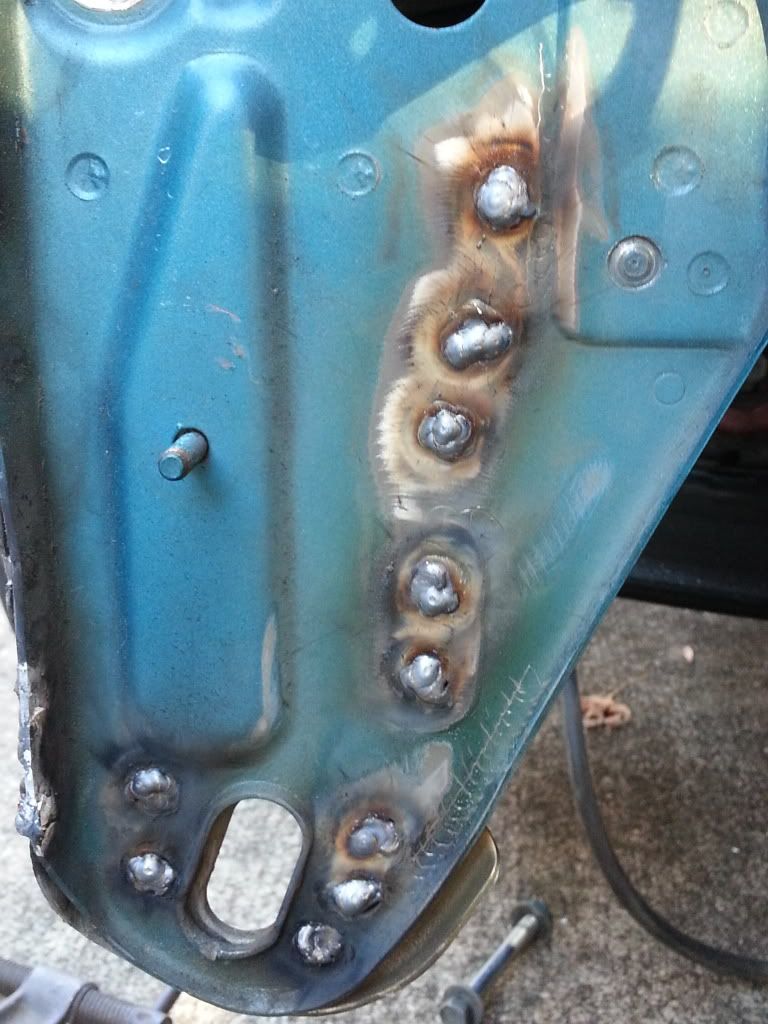
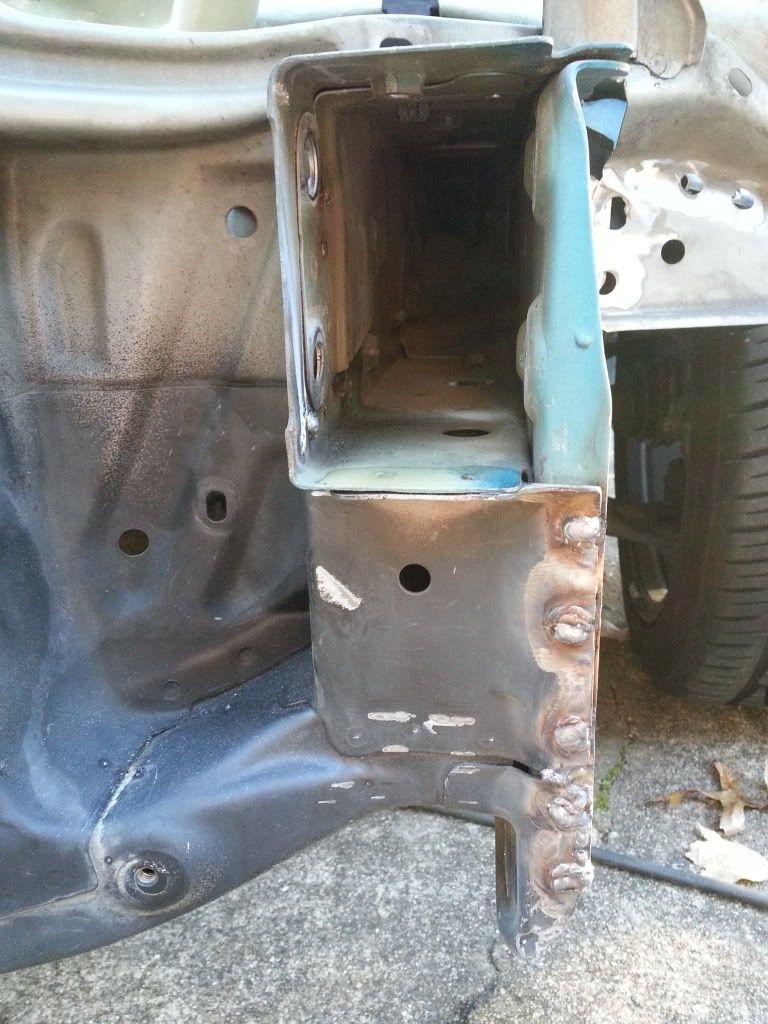
After everything was lined up it was time to weld. Used stitch mode on the Miller Mig to sew it all up!


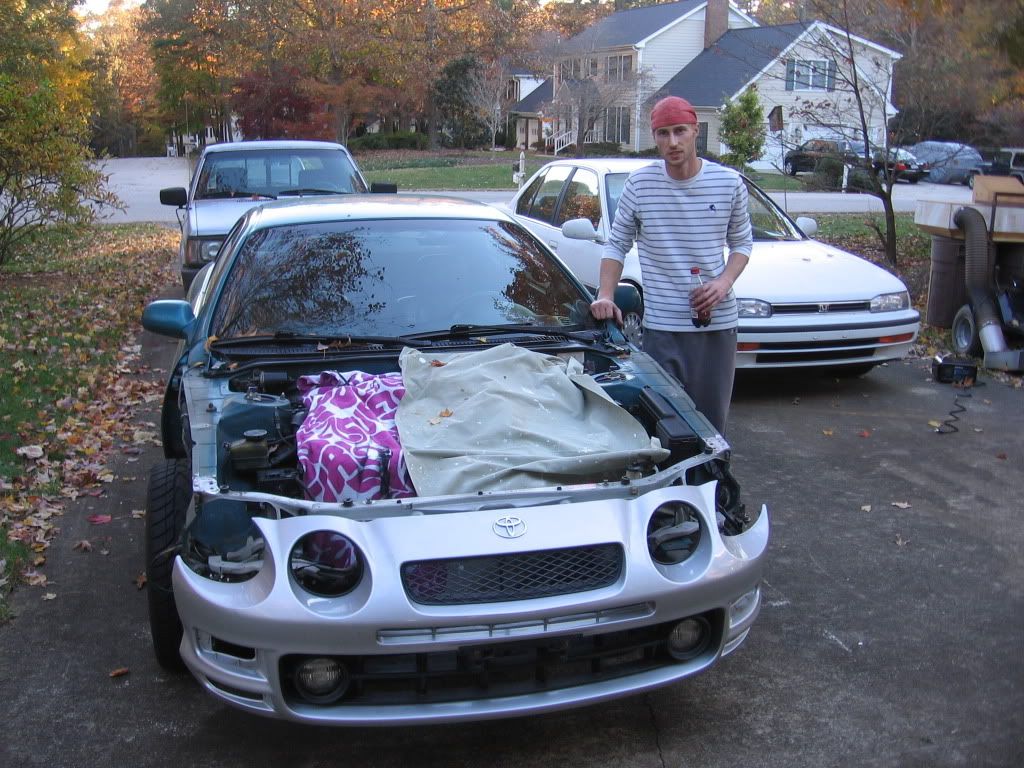
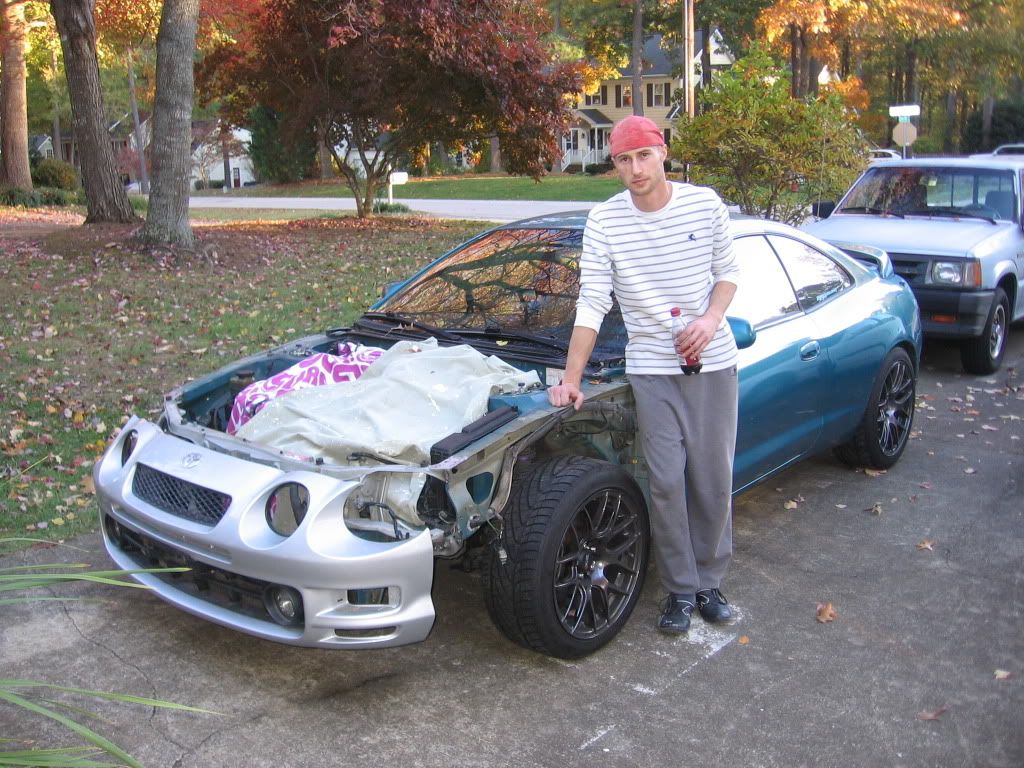
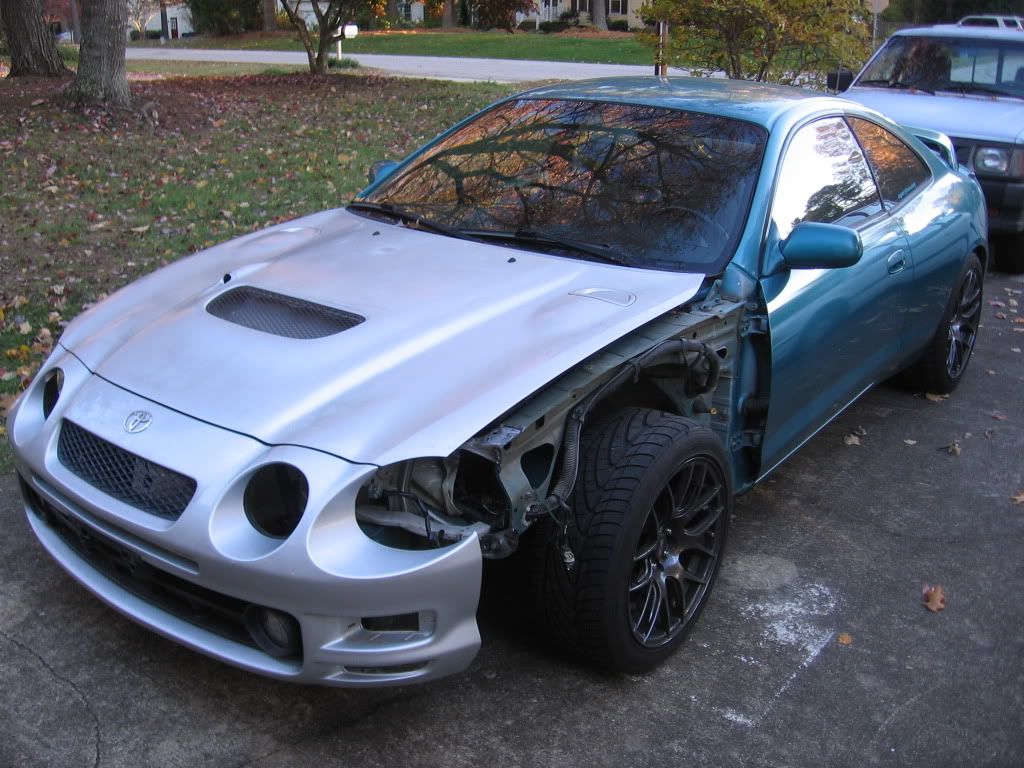
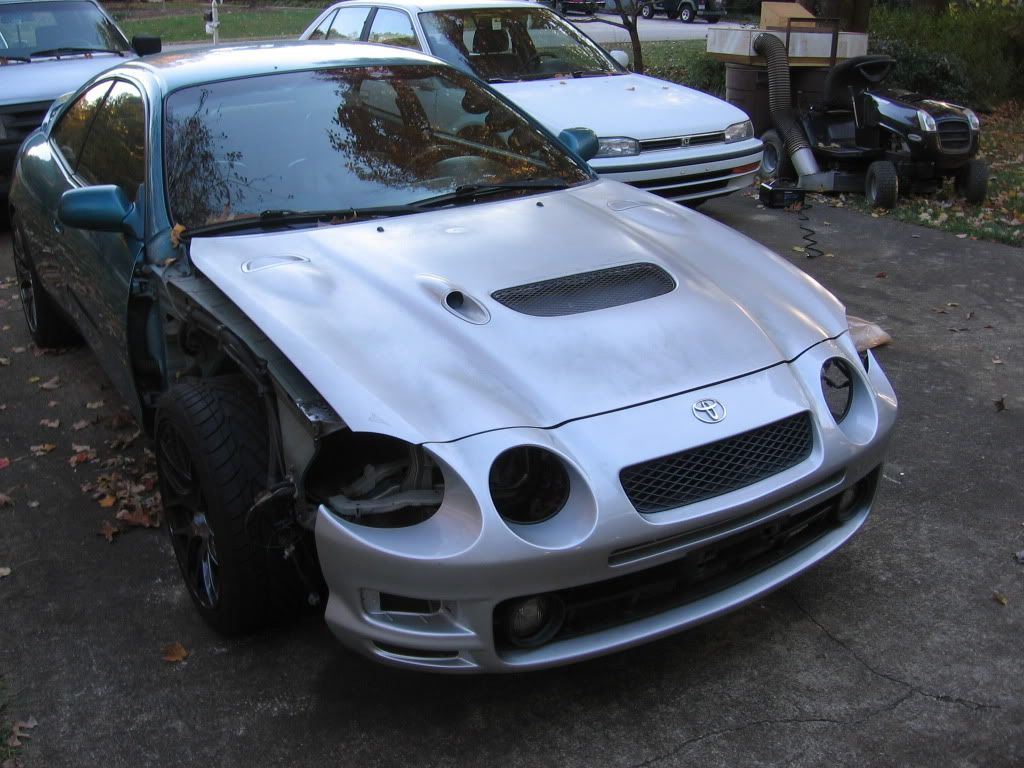
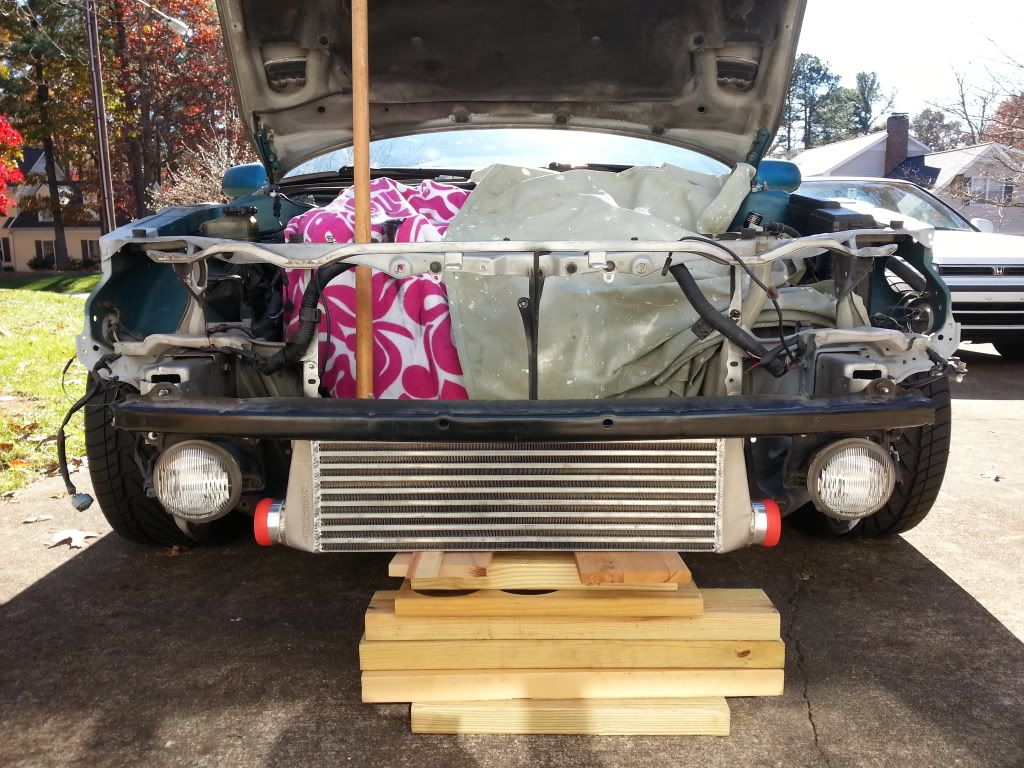
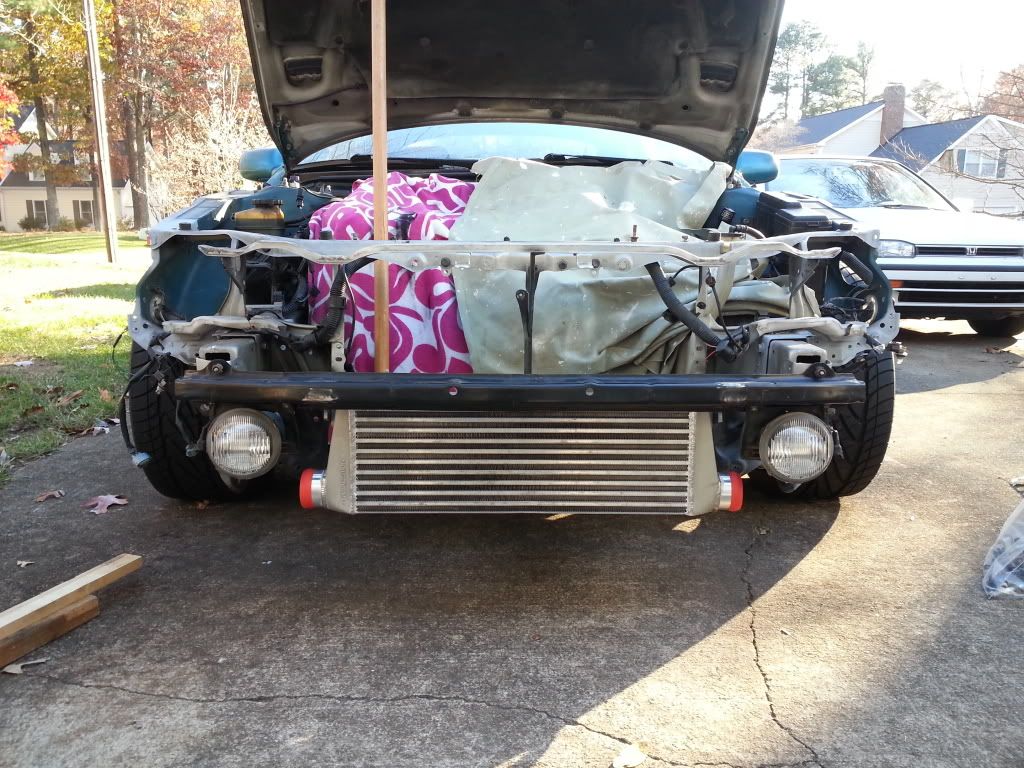
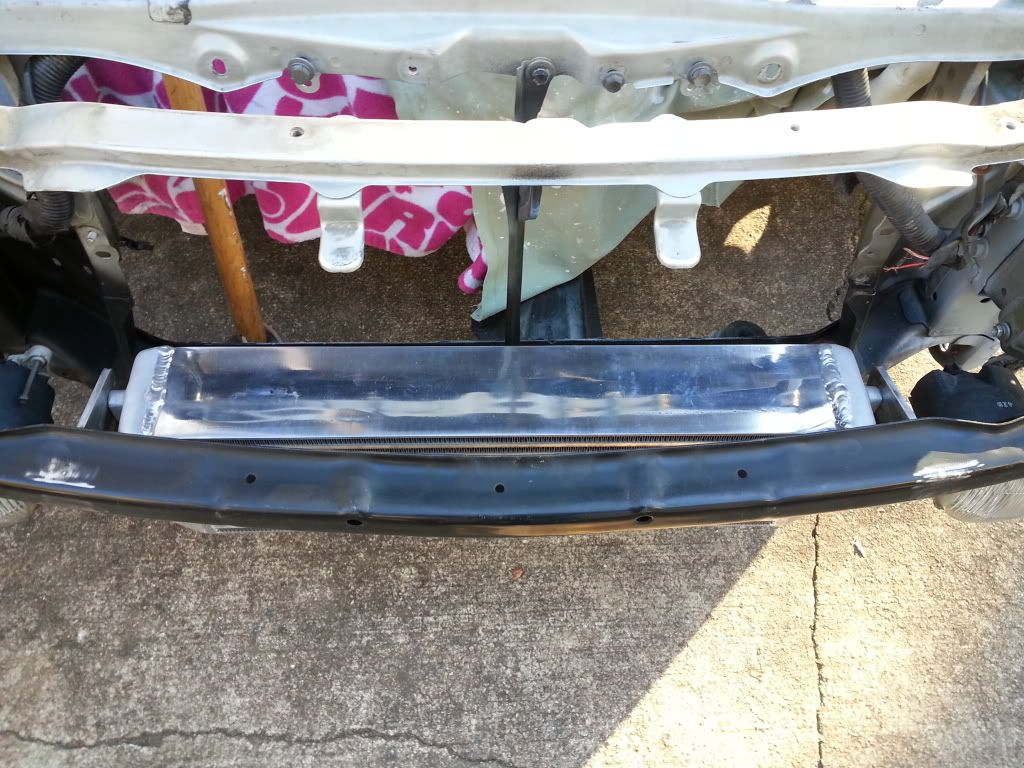
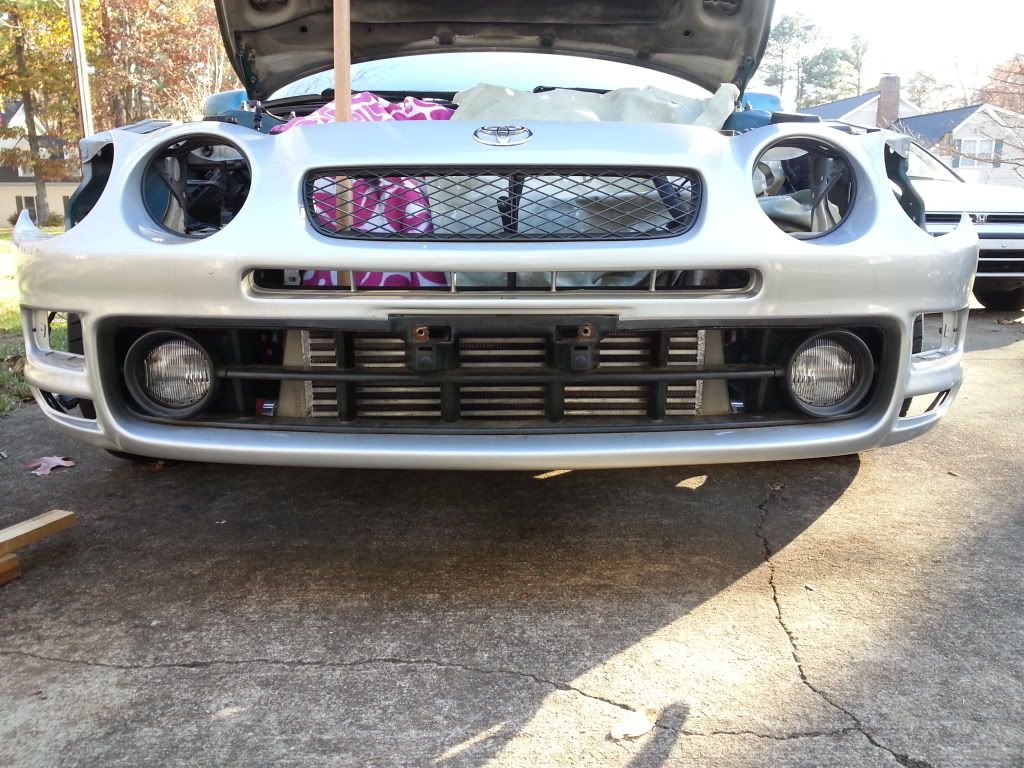
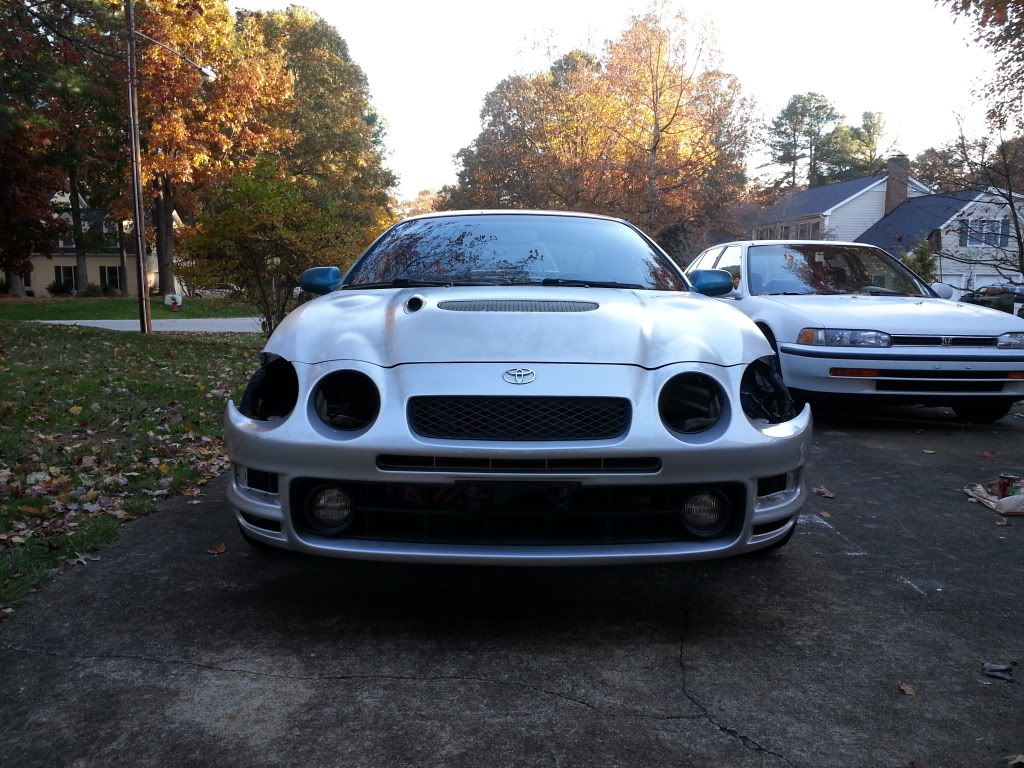
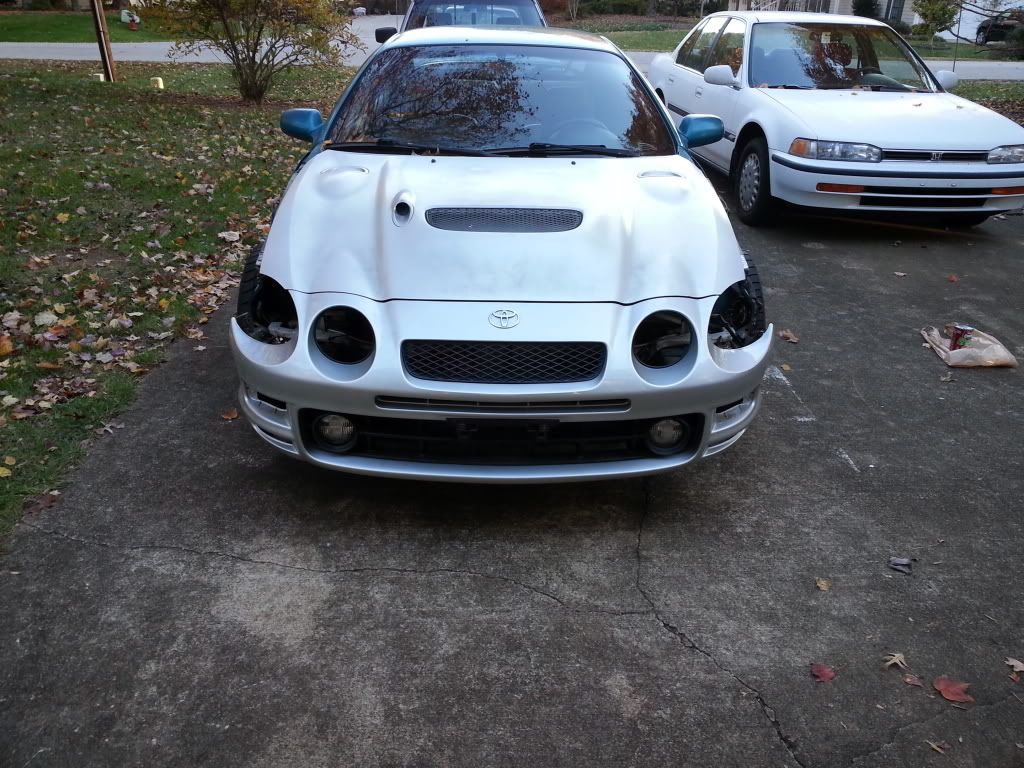
And then it was time to test fit some body panels.


Yay!!!! I'm so happy things are starting to move forward for you. So are you keeping it a street car, or going with the track car route?

2001 Miata LS 5-speed
dang you guys at 6gc make these projects seem like a breeze. "oh i just totaled my car hmm i'll just weld here and there n done..."

Group buy to replicate Narrow E series transaxle partshttp://www.6gc.net/forums/index.php?showto...p;#entry1107514
>
QUOTE (enderswift @ Nov 10, 2013 - 8:21 PM) *
>Like a boss.

Good shyt dude


Thanks man!


>
QUOTE (Box @ Nov 10, 2013 - 11:25 PM) *
>Yay!!!! I'm so happy things are starting to move forward for you. So are you keeping it a street car, or going with the track car route?


It's kinda gonna be a half and half. More on the track side, but still streetable.


>
QUOTE (BonzaiCelica @ Nov 11, 2013 - 4:22 AM) *
>dang you guys at 6gc make these projects seem like a breeze. "oh i just totaled my car hmm i'll just weld here and there n done..."


lol...it's not as bad as you think. A lot of it is having access to the right tools!

Apparently my dad took a few pictures while I worked. So here those are.


This post has been edited by bsamps4: Nov 11, 2013 - 6:54 AM
Great work! Any chance of a pic of the back of the bumper so i can see how the Radiator upper grill attaches?

Great colour by the way!

>
QUOTE (Cavegod @ Nov 12, 2013 - 6:06 AM) *
>Great work! Any chance of a pic of the back of the bumper so i can see how the Radiator upper grill attaches?

Great colour by the way!


I'll snap a shot first chance I get. Since the car is at my Dad's place I'll have to get it Sunday after next because I will be out of town this coming weekend. I can tell you how it attaches in the meantime. There are two sandwich plates. One on top and one on bottom, and there are three popper clips that retain this plates and pinch them to the front bumper on those upper and lower plates. Fairly simple to remove if you have a very small screw driver that can squeeze between the plastic grill.

And by the way, your car looks great man! Had a double take when I saw it first. Looks so much like mine!
thanks alas it's not turbo'd but maybe V6'd in the future!

I';ve ordered the plates from Toyota and got the clips from Ebay, so the plates go above and below the grill to be out of sight I presume?

I did try body kit sealant but it just didn't stick to the plastic or paint so OEM it is.
Once you get the plates it'll really stand out on how to put it all together. It can only be installed one way.
>
QUOTE (BonzaiCelica @ Nov 11, 2013 - 5:22 AM) *
>dang you guys at 6gc make these projects seem like a breeze. "oh i just totaled my car hmm i'll just weld here and there n done..."


My exact thoughts about almost every big project cars on here biggrin.gif
Kinda makes me anxious about how I will have to work on mine later haha.
>
QUOTE (dudeofchaos @ Nov 13, 2013 - 8:31 PM) *
>>
QUOTE (BonzaiCelica @ Nov 11, 2013 - 5:22 AM) *
>dang you guys at 6gc make these projects seem like a breeze. "oh i just totaled my car hmm i'll just weld here and there n done..."


My exact thoughts about almost every big project cars on here biggrin.gif
Kinda makes me anxious about how I will have to work on mine later haha.


Hopefully you won't ever have to do body work of this magnitude. It's slow going and it really sucks, and you can't breathe until it's all back together!
Got a few more things done today. I cleaned and primed my welds, and created a bracket to hold the new intercooler.


Yay progress!!! Looking good, can't wait to see it all back together. Seems like you're getting pretty close to having it back together?

2001 Miata LS 5-speed
>
QUOTE (Box @ Nov 24, 2013 - 11:57 PM) *
>Yay progress!!! Looking good, can't wait to see it all back together. Seems like you're getting pretty close to having it back together?


Not as close as it looks. Everything is so torn down, and with the cold coming in our progress is slowing down. I have A LOT of things left to do. I doubt it will be running by Christmas unless I can get a good day with one final push to get it back into shape.
Just don't watch football one weekend. tongue.gif

2001 Miata LS 5-speed
Alright guys...Here's where I'm at right now. Running into a few problems so I'm looking at more downtime. ATS accidentally sent me a few incorrect parts, but their kit is also
formatted for an mr2. So they are working with me to format everything to suit my car...

Wastegate sits too high for hood to close.


Unable to clock turbo down because of this slave cylinder line.


Bottom downpipe flange fits perfectly, but o2 sensors interfere with alternator and oil dipstick


Screamer pipe won't bolt all the way on because it his the front motor mount.


Overall build quality of this kit is stunning, and the parts provided are top notch. I am NOT saying anything bad about ATS this was my fault in the end for not being entirely specific about the use and function of this kit.
bummer about the fitment man. i wonder if they put those Dp's together themselves. seems like lowering or rotating the ports for the 02 sensors would solve that. dont know how close they will get to the rad fans though. also since you have a welder maybe you could bend the oil dip stick tube back then make an extension for the bolt hole tab so you can still attach it . The guys at ATS have been pretty fair with me in the past i hope you get something put together.

good luck

This post has been edited by JasonTX: Dec 16, 2013 - 12:14 PM

JN 3:16--------------------------------------
>
QUOTE
>Wastegate sits too high for hood to close.

lol that's a pretty awesome problem to have laugh.gif

Wouldn't be a project if there wasn't an obstacle every step of the way. Seems like everyone is running into this kind of stuff lately. Either way looks amazing as is, cant wait to see the final setup thumbsup.gif

This post has been edited by enderswift: Dec 16, 2013 - 11:04 PM
The kit looks beautiful tho hooked up and deffinetly looks quality. I'll be keeping an eye out for the revision setup.


Edit: *are you still using the 205 ecu at the moment?*

This post has been edited by Ted95: Dec 18, 2013 - 12:29 PM

st205 powered ss3 coupe
Cut a hole in the hood, bend the dipstick, ditch the pipe. Problem solved.

Learned a lot in 10 years...I hardly log in anymore, last loginToday Sept 6 2019, and I was forced just to clarify a post. LOLIf you PM me and I dont respond, dont fret or cry. Im alive, better post your questions in the thread below, maybe I log back in2grfe Swapped...Why I chose the 2GR, before you ask read here...A great civilization is not conquered from without until it has destroyed itself from within.@llamaraxing in Instagram is the best way to find me. I hardly log here anymore.
>
QUOTE (njccmd2002 @ Dec 18, 2013 - 12:33 PM) *
>Cut a hole in the hood, bend the dipstick, ditch the pipe. Problem solved.


Sounds logical.. lol

Was just kidding btw

This post has been edited by Ted95: Dec 18, 2013 - 8:56 PM

st205 powered ss3 coupe
Use a large pair of channel locks to turn the dipstick tube. Its just press fit into the block and you can rotate it either direction.
>
QUOTE (Ted95 @ Dec 18, 2013 - 1:25 PM) *
>The kit looks beautiful tho hooked up and deffinetly looks quality. I'll be keeping an eye out for the revision setup.


Edit: *are you still using the 205 ecu at the moment?*


Yup, still running the stock ecu for now. We shall see how it goes! ATS doesn't think I'll have any problems.


>
QUOTE (njccmd2002 @ Dec 18, 2013 - 1:33 PM) *
>Cut a hole in the hood, bend the dipstick, ditch the pipe. Problem solved.


Haha wish I could! I still want the car to be driveable in the rain if I happen to get stuck in a storm or something. Otherwise I'm going to try to keep it dry.

I also need to fabricate a new heat shield because the factory one isn't going to fit. I'm looking forward to having it running though.

This weekend I'm installing the engle valve springs and bc retainers. I'm going to test fit the new cams as well, and pray to god that I don't have to re-shim the entire head!
Got a few more things done yesterday with the help of Brian, Bobby, Alyssa, and Meghan...
Still a LONG way to go!
Got the exhaust camshaft installed, but didn't get a chance to check the clearances. The new valve springs are a lot taller than the old ones, and the seat pressure feels like it's twice as strong. We still have 5 more valve springs to install, and found that one of the Camshaft Cap threads were stripped out when removing the cams, which is pretty annoying because nothing makes me more nervous than chasing threads in an aluminum head! Due to the tilt of the engine the intake side is next to impossible to service while it's in the car, but we will be able to knock it out without having to remove the head (most likely).

Still on the list of crap to do...
Pull dash to remove passenger side airbag, and re-assemble.
Work with ATS to reformat downpipe and oil feed/drain lines.
Fabricate wastegate relocation pipe, and fresh dump tube.
Purchase an MR2 Turbo gasket set (3rd gen gaskets will not work on the 3071r because it isn't twin scroll)
Assemble turbo kit once completed and fabricate charge piping.
Weld and Install new Tial BOV, and new Water Meth Bung.
Fix any damaged wiring in front end to install factory radiator and fans, turn signals, and fog lights
Repair damaged headlights and re-install.
Re-install ECU and fuel pump resistor
Repair alternator ground strap
Re-install Starter Ground
Bolt all body panels back on
Re-install timing belt and adjust camshafts (gsc shafts do not have the cut out to line up with factory match marks...pain in the A$$)
Go over everything one last time...
Start engine, drain oil, fill oil, warm engine up, drain oil, add more oil, vacuum leak check.
Clean car.


I think that's about it...so much left to do, and it's all slow-going one step at a time kind of Bull$hit. GAAAAH I hope it's all worth it. I want power and reliability, and I assure you...This $hit IS NOT CHEAP. I'm worried about taking a tap to the head, and getting the timing perfect...I just hope it starts up the first time I turn the key!


you can see how much taller the engle valve springs are


Here you can see the difference between the titanium retainer v.s. stock.


Here's what you see when you take spring and retainer out next to a factory installed one.


And...This is what an installed one looks like.

This post has been edited by bsamps4: Dec 23, 2013 - 7:34 AM
Springs look sweet Ben, big difference from stock. Hopefully you can get those thread straightened out safely lol nerve racking..

Does ATS not have a downpipe setup for the celica? Hopefully they can keep a jig for what they make for you cause I plan to get a kit like that in the future.

st205 powered ss3 coupe
Youll have a good amount of time during the winter to button it all up! Hopefully it will be done come springtime! Tell Brian to get the lead out

1995 GT::::Diffusing the Situationエキサイティングカーレーシングチーム!march2010 COTM:6GCfeature2014:january2015-2016-2018 COTM
It's slow going work for sure. Just keep running into snags! I'm sure ATS is going to save the plans for a Celica setup!
Got some more work done. Little stuff, but still a step in the right direction. Had to re-locate the wastegate so that the dump tube can shoot straight down, and the hood can close. Behold!


Did u throw away the wrecked old gt4 bumper?

Learned a lot in 10 years...I hardly log in anymore, last loginToday Sept 6 2019, and I was forced just to clarify a post. LOLIf you PM me and I dont respond, dont fret or cry. Im alive, better post your questions in the thread below, maybe I log back in2grfe Swapped...Why I chose the 2GR, before you ask read here...A great civilization is not conquered from without until it has destroyed itself from within.@llamaraxing in Instagram is the best way to find me. I hardly log here anymore.