Over 1M Posts • 84K Topics • 9K Authors

Stef's 7A-FE Rebuild - 6G Celicas Forums

Topic #51960 186 posts Started by hurley97
to find the size of the main bearings...
IPB Image

for the crankshaft...
IPB Image

there are 5 numbers engraved on the corner of the block (top and bottom)....
IPB Image

that correspond to 5 numbers engraved on the crankshaft itself...
IPB Image


you add the number on the crank to the corresponding number on the block.
no number means 0. so the 01 on the crank pictured combines with the 2 printed on the block to come up with a #3 bearing.

7A-FTE:It's not about the money.Our Beams Swap.I <3 Dustin---07/16/06
that's looks amazing, makes we wonder why i didn't pick up to being a mechanic, regretting it now, but that's looks awesome
I cleaned and painted the block yesterday...
IPB Image

and we honed the cylinders. I don't have a picture of the tool we used but it looks like a bunch of wire bristles with balls on the end attached to a drill. you have to break the glaze on the cylinder walls in a crosshatch kind of pattern so the oil sticks better...
IPB Image

and today we just re-ringed the pistons..
IPB Image

there are two thin rings that go above and below the oil control rings in the bottom groove and the top two are the compression rings. you want to place the openings in the rings on alternating sides and always right above the wrist pin since that takes the least stress. so in the picture the opening in the ring under the oil control ring is facing back, the one on top is facing forward, the first compression ring facing back (there is a "2R" written on it that should be facing up), and the top ring facing front. they fit very loose like that so as to make a tighter seal with the cylinder wall when installed.
IPB Image


we can't do much else until the main bearings come in (probably Monday) since we need them to put the bottom end back together. we want to finish the bottom completely before starting on the head, just to keep things organized.

This post has been edited by hurley97: Sep 13, 2007 - 6:10 PM

7A-FTE:It's not about the money.Our Beams Swap.I <3 Dustin---07/16/06
if your not gonna get the pauters and want a little extra strength id shotpeen the rods while they are out. its cheap and it gives a little bit of strength to them

-Brian
reminds me of rebuilding a cummins engine, same process but cummins is like 10x bigger!
this has to be the most interesting thread ever!
keep up the good work!

2015 Subaru WRX. World Rally Blue/Black2001 Honda S2000. Spa Yellow/Black
I personally would check all parts with a micrometer and
make sure crank, rods, oil pump meet all specs.
Thats kinda my thing though. wink.gif The thrust bearing journal
looks a little scuffed at least in the one pic.

JDM guy made me do it.
Steff this thread is awesome! keep it up biggrin.gif
>
QUOTE(lagos @ Sep 13, 2007 - 12:39 AM) [snapback]595641[/snapback]
>
stef, i dont know how crazy you want to go with this build up, but if you are really planning to turbo, i would upgrade the pistons, rods, and headgasket, and do the cam regrinds, as well as replacing any rubber seal/gasket. then you would have a strong and nice flowing motor thats ready for the abuse of a turbocharger.

from what I hear the pistons and rods will more than stand up to the abuse of a turbo (I'll save that for when I rebuild the engine thats in my car since it'll be much worse and probably need a re-bore anyway), the head gasket is already metal, I will be replacing any and all seals/ bearings I possbily can, this is going to be like a brand new engine when it goes in, I do want to smooth out the head some to make it flow better, right now I'm thinking about the bigger cams.

WebCams has done a grind for the 7A before and it would cost about $575 and about 3 weeks. Reasons I'm not sure about them right now is 1, they cost more than the rebuild parts 2, I'm not sure if I want this engine to sit at work for another couple weeks and 3, I really don't know how they will affect the car since they tell me it has only been done twice before. Also, what I kind of want to do is dyno the stock re-built 7A, then with just the cams, then the turbo. still thinking about it...

7A-FTE:It's not about the money.Our Beams Swap.I <3 Dustin---07/16/06
Steff i love this i feel like im in class smile.gif Your pictures and descriptions are amazing!

I wish i had someone around to learn off of, this is a GREAT opportunity.

Buy my Celica $2,500 -http://www.6gc.net/forums/index.php?showtopic=76562&st=0
4ag(z)e head gaskets will work also (i do believE)
yes you probably could but the 7A headgasket is metal so I can just use that

7A-FTE:It's not about the money.Our Beams Swap.I <3 Dustin---07/16/06
Stef, good to see that you're on your way with the project. smile.gif

I think a pretty modest increase in the I/E duration of the camshafts wouldn't be a bad idea, as long as its not so agressive that it affects the off-boost performance alot. Maybe keep the same proportion as the stock camshafts, just increase their duration slightly to allow more compressed air in, more exhaust gasses out per cycle but with good drivability?

Between a rebuilt and ported top-end, camshafts, and perhaps using some uprated 4AGE/4AGZE valve springs with the proper shims to prevent any float from the reworked head when it sees boost, you would have an awesome setup.


Looks great so far Stef, I don't think you're going to need alot of our advice with the build. It looks like you have the best help you can get with the rebuild and you already have a solid start on the bottom end.


Best of luck, I'll see you on the dark side...of boost. biggrin.gif


3rd gen ST205 3SGTE - Alive and boosting.
>
QUOTE
>Between a rebuilt and ported top-end, camshafts, and perhaps using some uprated 4AGE/4AGZE valve springs with the proper shims to prevent any float from the reworked head when it sees boost, you would have an awesome setup

that would also allow you to rev a bit higher as well, as long as the stock rod bolts can take it. wink.gif
whoops manny posting as brennton on moms puter...lol
>
QUOTE
>as long as the stock rod bolts can take it. wink.gif


Haha. Lets put it to the test! biggrin.gif

3rd gen ST205 3SGTE - Alive and boosting.
>
QUOTE(Silver94CelicaOwner @ Sep 16, 2007 - 5:03 AM) [snapback]596416[/snapback]
>
>
QUOTE
>as long as the stock rod bolts can take it. wink.gif


Haha. Lets put it to the test! biggrin.gif


I always thought the stock rods on a 7A were weaker but has a bigger stroke.
>
QUOTE(Silver94CelicaOwner @ Sep 16, 2007 - 5:03 AM) [snapback]596416[/snapback]
>
>
QUOTE
>as long as the stock rod bolts can take it. wink.gif


Haha. Lets put it to the test! biggrin.gif

oh you know I will Corey tongue.gif


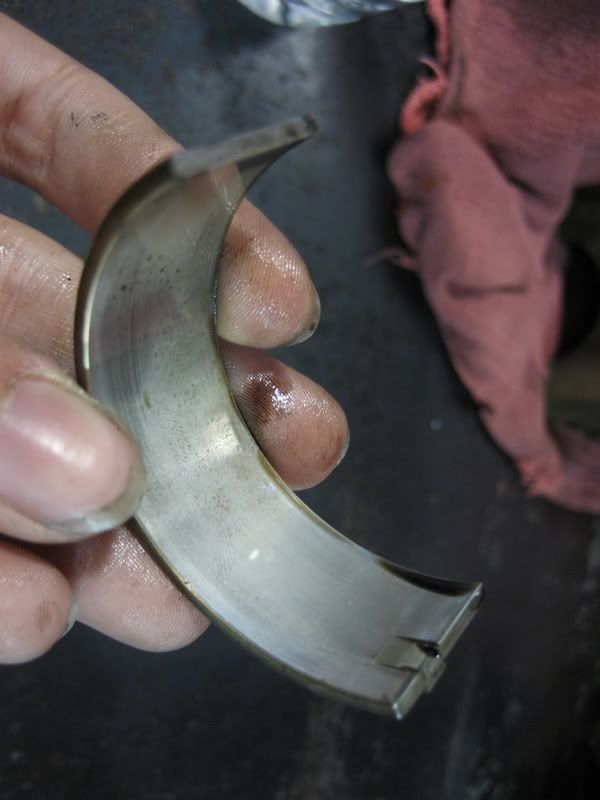
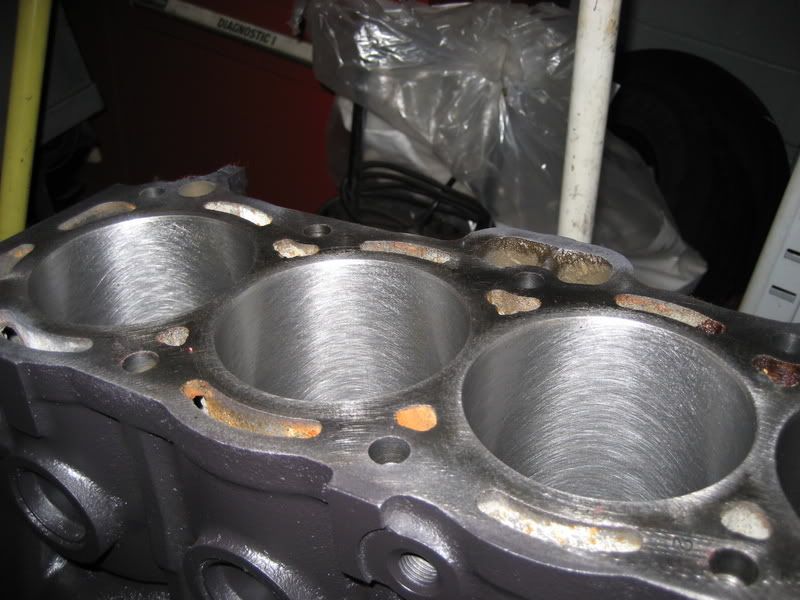
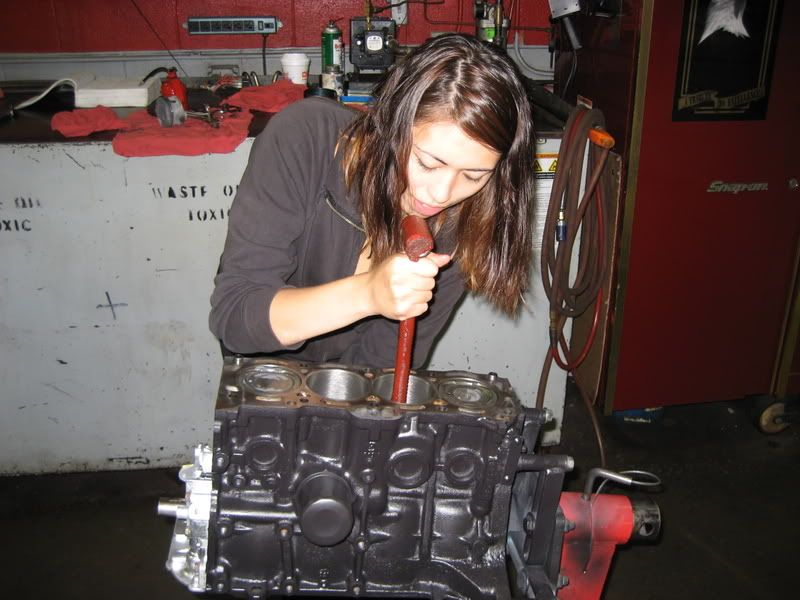
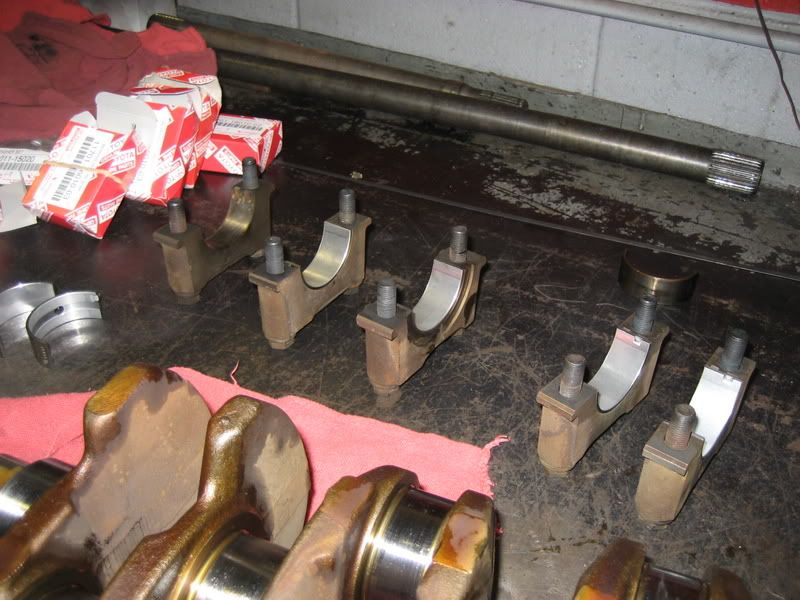
Finally! the main bearings came in and we got back to work...

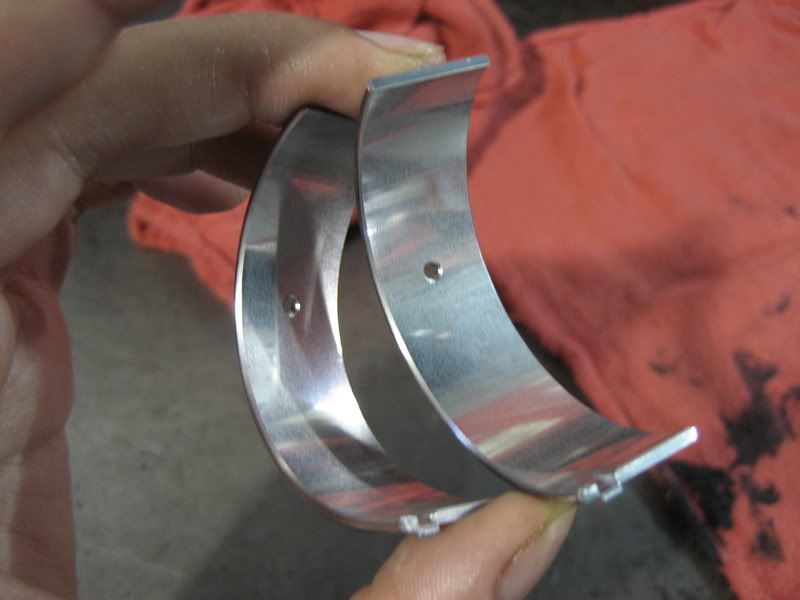
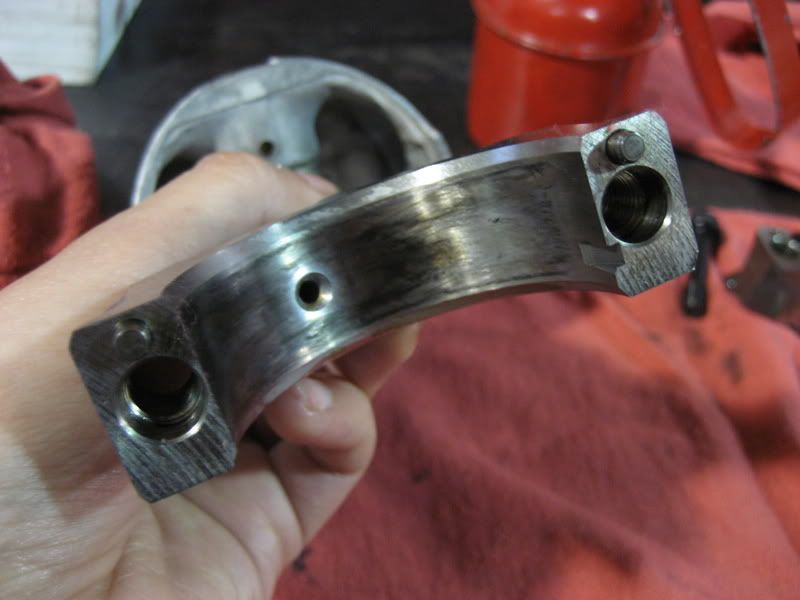
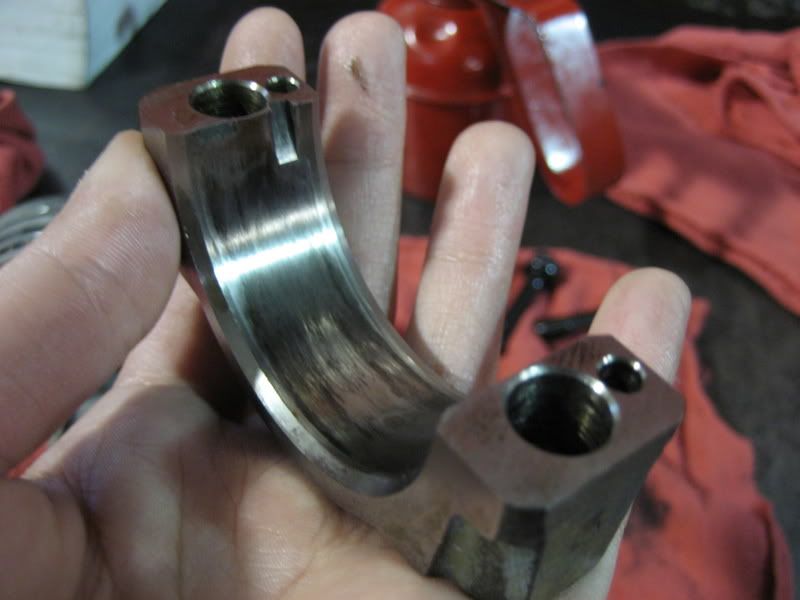
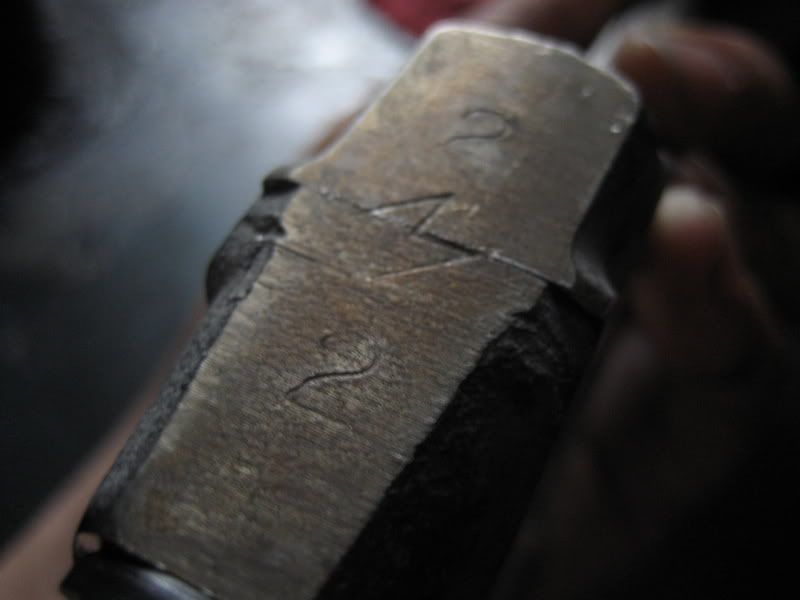
There are two sides to each main bearing, one is smooth and the other has a groove and a hole in it.
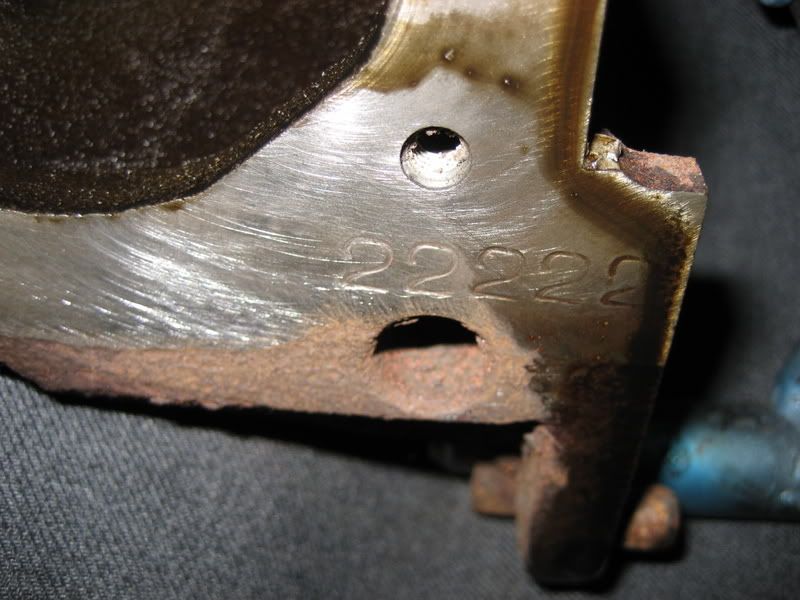
remember these bearings corresponded to the number ont he crankshaft + the number on the block, I had four #3 bearings and one number 2, so here you have to make sure you put the bearings where they belong.

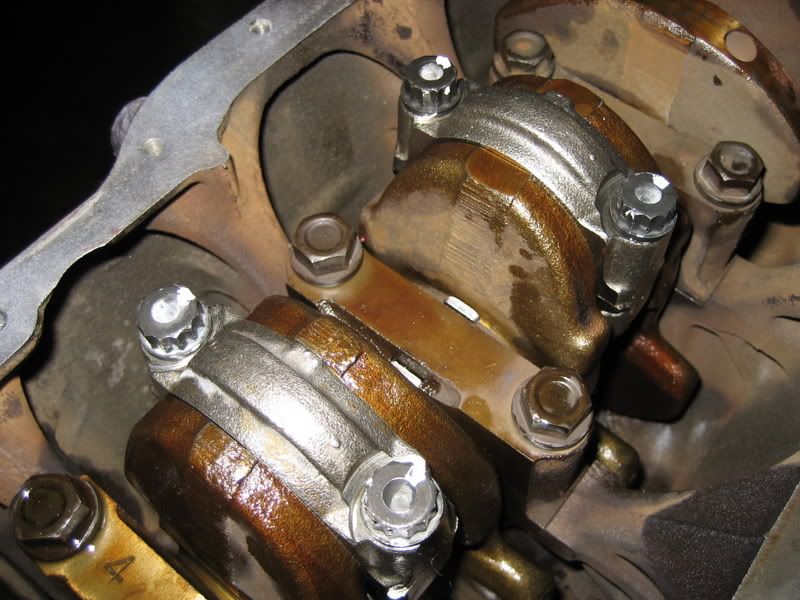
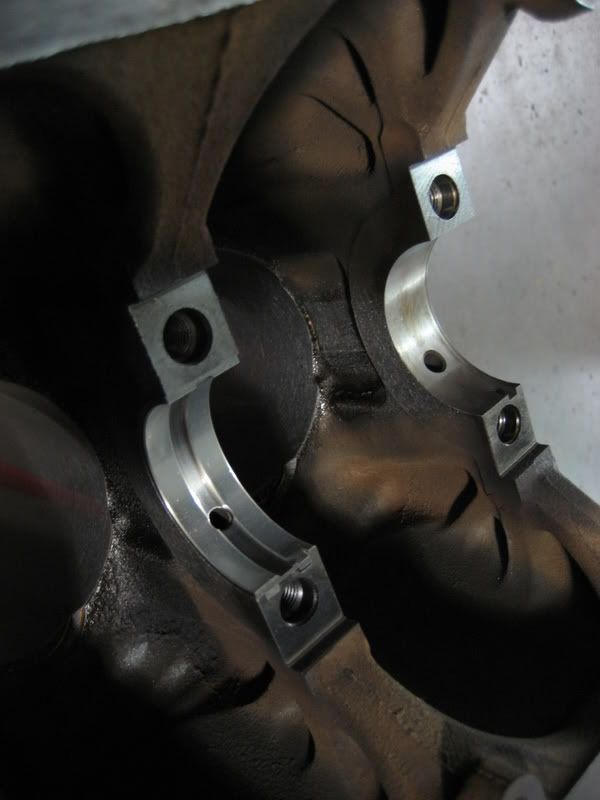
the smooth half goes on the caps that hold the crankshaft in, there are little notches in the bearing that match up with a notch on the cap, you can see them on the two caps all the way to the right in the pic...
IPB Image

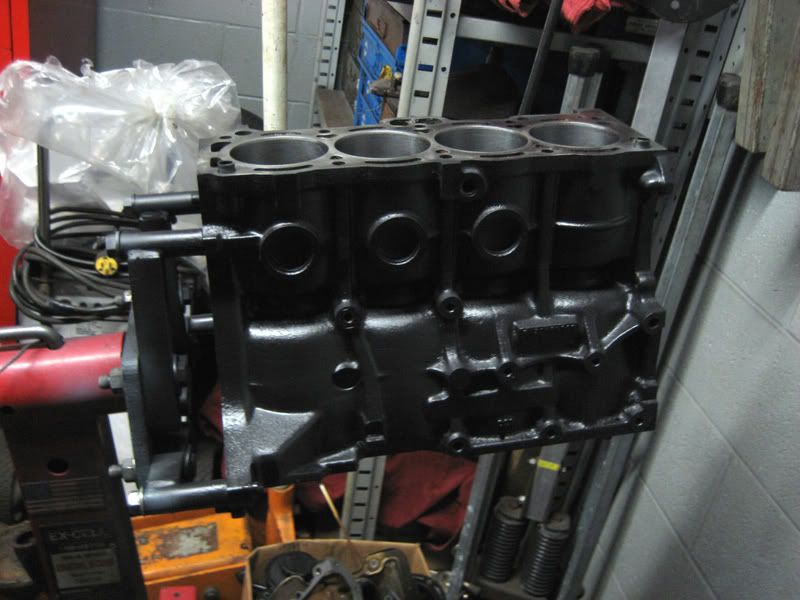
the other side of the bearing goes on the block itself and lines up with the journal hole and the same kind of notch as on the cap...
IPB Image


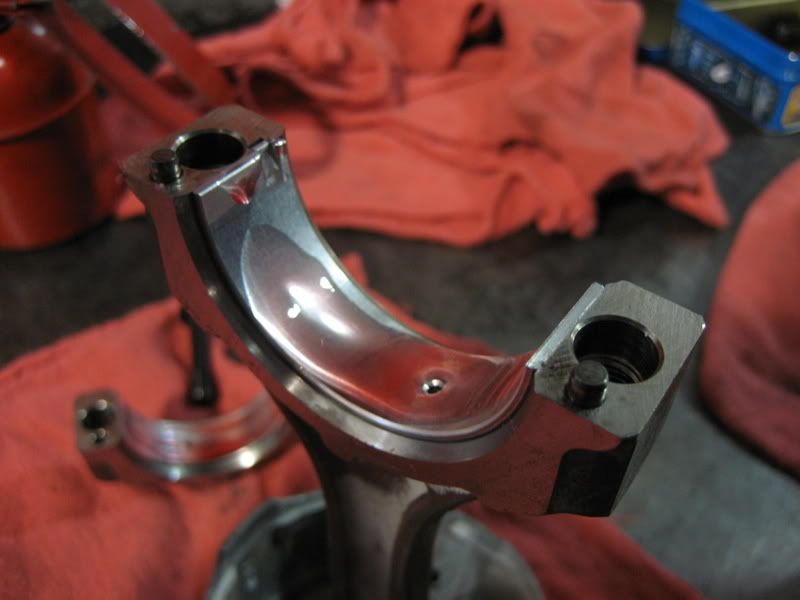
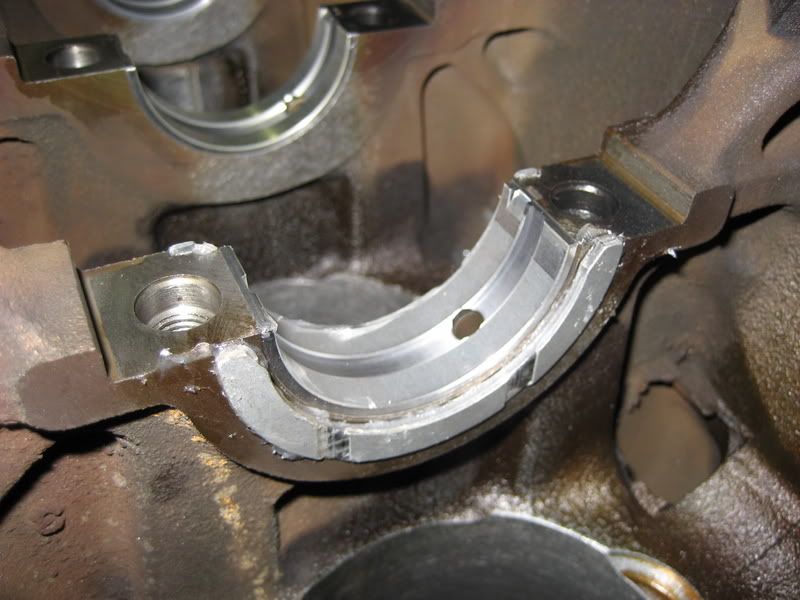
the middle bearing seat also contains the thrust washers. there are four of them in the set, two with little tabs and two without. there are also two side to each of them, one side is smooth and the other has some sort of material on it (sort of like a brake pad).

the two without the tabs go on the block, we put some vasaline on the smooth side and stuck it to the indentations provided with the material side facing outward...
IPB Image

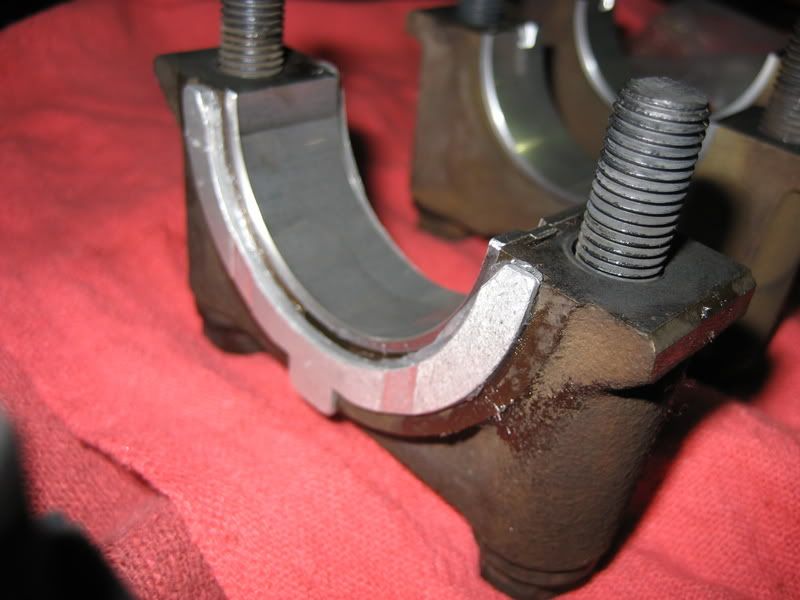
the two with the tabs go on the cap in the same orientation, vasaline on it and smooth side in...
IPB Image

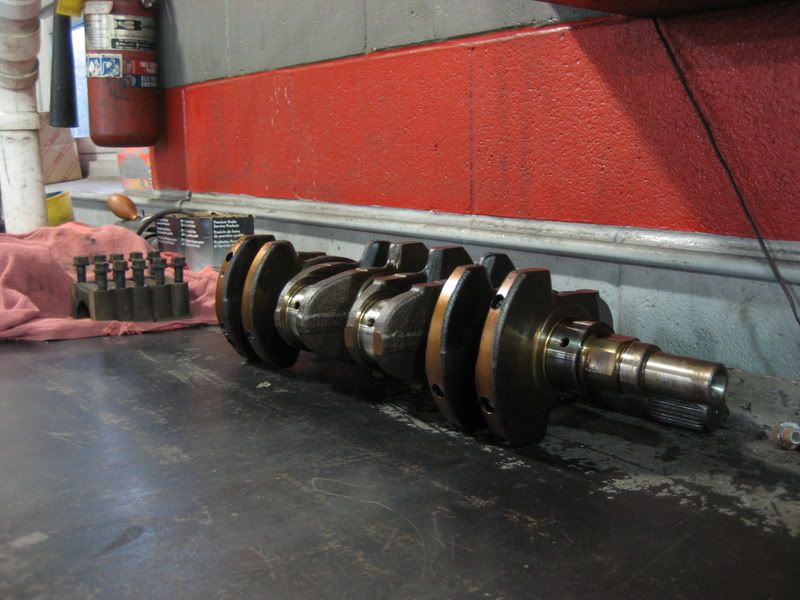
then we oiled up all the bearings and placed the crankshaft back in place.
IPB Image

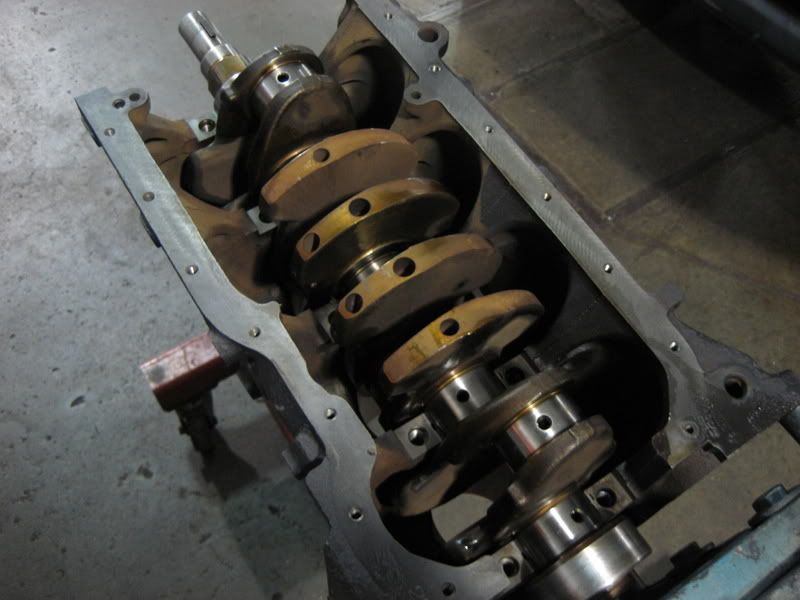
then oiled up the bearings on the caps and put some oil on the bolt threads as well before putting the caps on and torquing them down to 44 ft/lbs


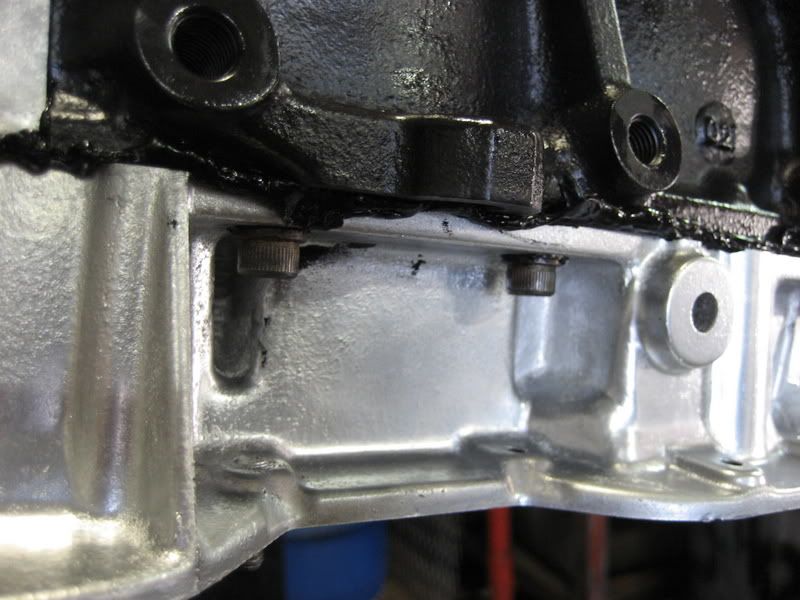
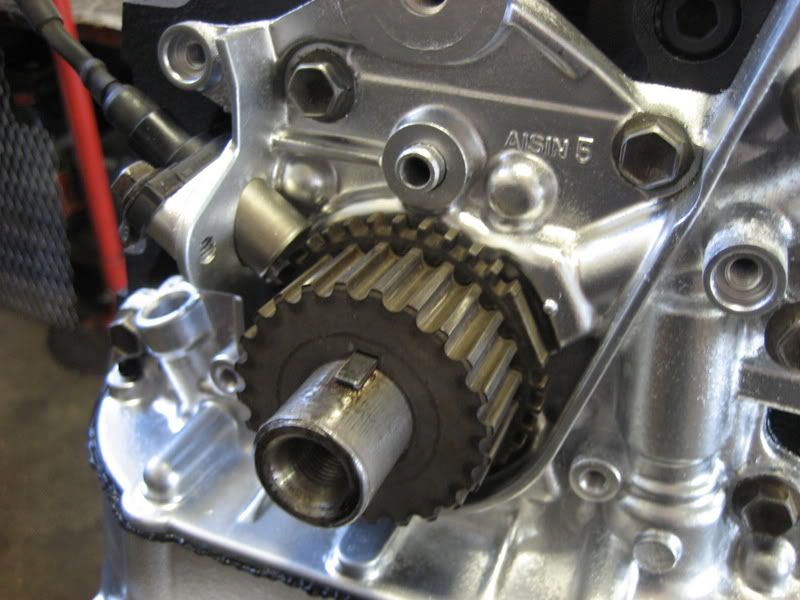
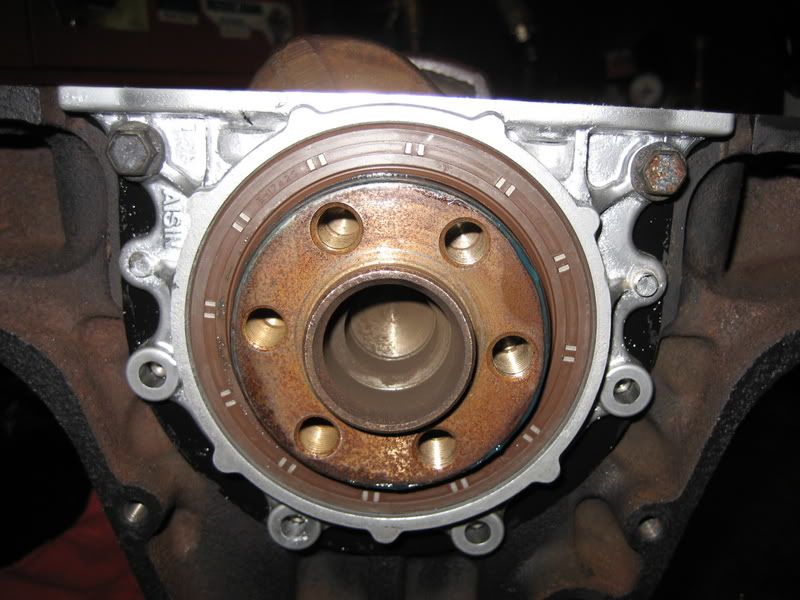
next was the rear main seal and the crankshaft seal. hammered the seals flush with the housing, put some FIPG (Form In Place Gasket) on each side of the regular gasket, lubed up the inner part of each seal, then put them in place and bolted them in.
IPB Image


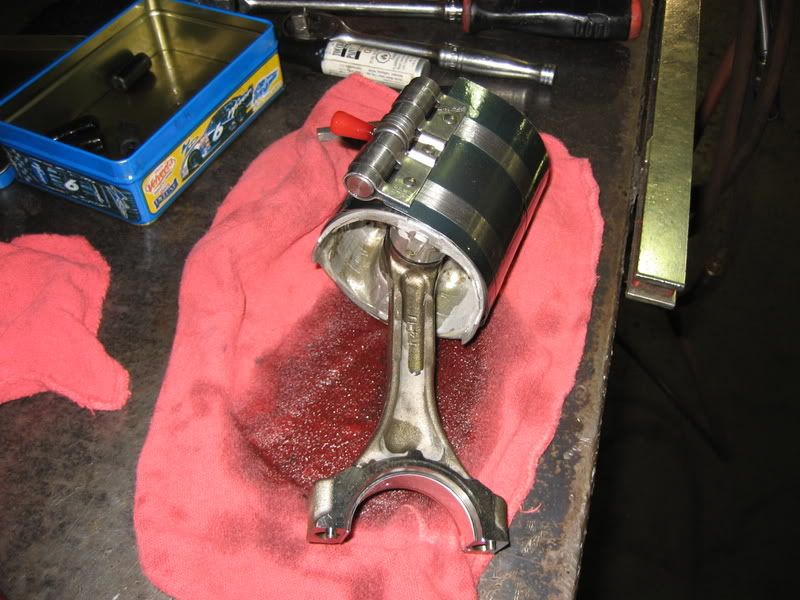
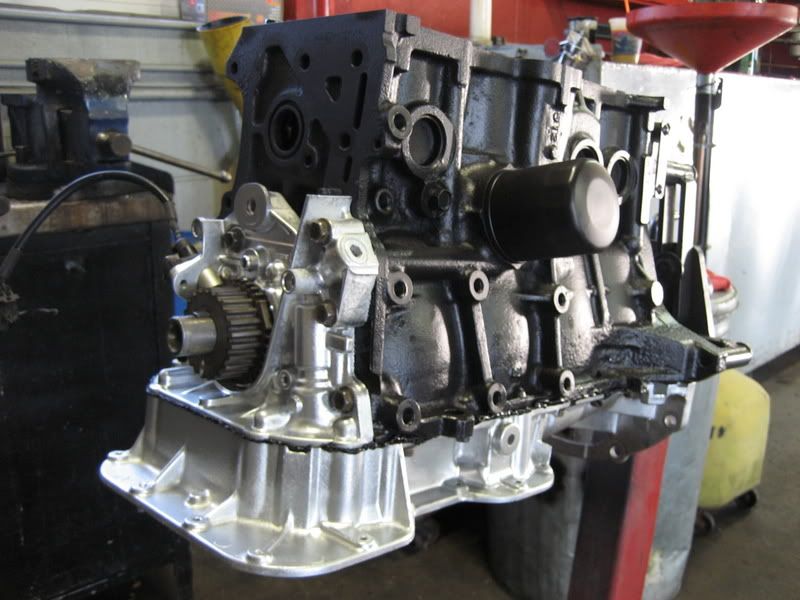
And that was it for today. Pistons and top part of the oil pan are going in tomorrow morning and that will pretty much be all for the bottom end. smile.gif

7A-FTE:It's not about the money.Our Beams Swap.I <3 Dustin---07/16/06
wink.gif made sure it all turned good and smooth after the caps were on?

2000 Celica GTS 'slowest gts evar'1998 Mazda 626 FS-DE/CD4-E
wow are you keeping all the receipts and costs tallied? i want to know how much it is as i have a 7a in my garage that needs some tlc

nice job so far btw
Looking good. thumbsup.gif

I will return one day.
Looks great. I love threads like this. thumbsup.gif

New Toyota project coming soon...
>
QUOTE(Coomer @ Sep 19, 2007 - 11:54 PM) [snapback]597505[/snapback]
>
Looks great. I love threads like this. thumbsup.gif

X infiniti

wow this truely is the most interesting thing right now!

2015 Subaru WRX. World Rally Blue/Black2001 Honda S2000. Spa Yellow/Black
sorry for the delay on the progress report... that CSP meet was kind of crazy... wink.gif


now for putting the pistons in...
the rod bearings come in sets of 2 and both sides are the same
IPB Image

on the pistn rod itself there is a hole that matches up with the hole in the bearing, and just like the main bearings there is the little notch that matched up as well...
IPB Image

on the cap end there is not holes so you just use the little notch to place it in the right orientation...
IPB Image

then oil up both sides of the bearings
IPB Image

now if you remember from before the compression and oil control rings stick out a lot
IPB Image

so you need to use a ring compressor to push them in, the pistons need to be dunked in oil before this step...
IPB Image

now at this point you want to put in two pistons at a time (either 1 & 4 or 2 & 3) and you are going to want to push them all the way down so make sure the part of the crank the rod sits on is all the way down and straight. then we cleaned off the cylinder walls a little in case anything had gotten in there from it sitting for a while.

double check to make sure the right piston is going into the right cylinder using the stamped numbers on them...
IPB Image

so with the ring comrpessor still on the piston you place the rod end into the cylinder and use the end of a hammer or something to gently tap the piston down into place. once its out of the ring compressor you put that aside and finish tapping it down while you kind of guide the rod end onto the crankshaft
IPB Image

the caps are held on by stretch bolts that need to be torqued to 44 ft/lbs then tightened another 90 degrees. so once they are torqued you mark them so you know where to stop after doing the 90 degree turn...
IPB Image


the cast part of the oil pan is easy, put a crap load of FIPG on and tap it a little with a hammer so it sits properly.
there are a bunch of allen head bolts and some normal ones that go on the inside
IPB Image

put the little gear and the crank postion sensor back on...
IPB Image

and thats how it sits right now..
IPB Image

IPB Image

7A-FTE:It's not about the money.Our Beams Swap.I <3 Dustin---07/16/06
Looking good, nice work.....you impress me smile.gif

facebookWRC st205
wow. this thread amazes me.
rebuilding doesn't seem too hard now..

QUOTE"And, as always, your friendship, help, and dedication to the advancement of Texas Celica dominance is GREATLY appreciated. Thanks bro." -DEATH1994 GT:V6 swap, 5speed E53 W/ LSD, All Power, now RED1995 ST:SOLD @273k miles, Auto, all power, CarPC, White1994 ST:Totaled, 5spd, all power, RedRIP 07/09/09 @ 241,8101994 Lexus LS400:This is my new DD
IPB Image

HOT!

not trying to be an internet mechanic here, but why aren't you using assembly lube? motor oil is ok for most stuff, but i would worry that most of it will just drip down into the pan, an you'll have little protection the first time you crank it up.

This post has been edited by lagos: Sep 23, 2007 - 9:40 PM

15PSI - 30MPG - Megasquirt Tuned
for deisels we use gear oil to lube the bearings
motor oil works fine for putting pistons in, its what myself and most other people i know normally use.