
oh yea ill get you those lol my b
Twisted's st205 swap - 6G Celicas Forums
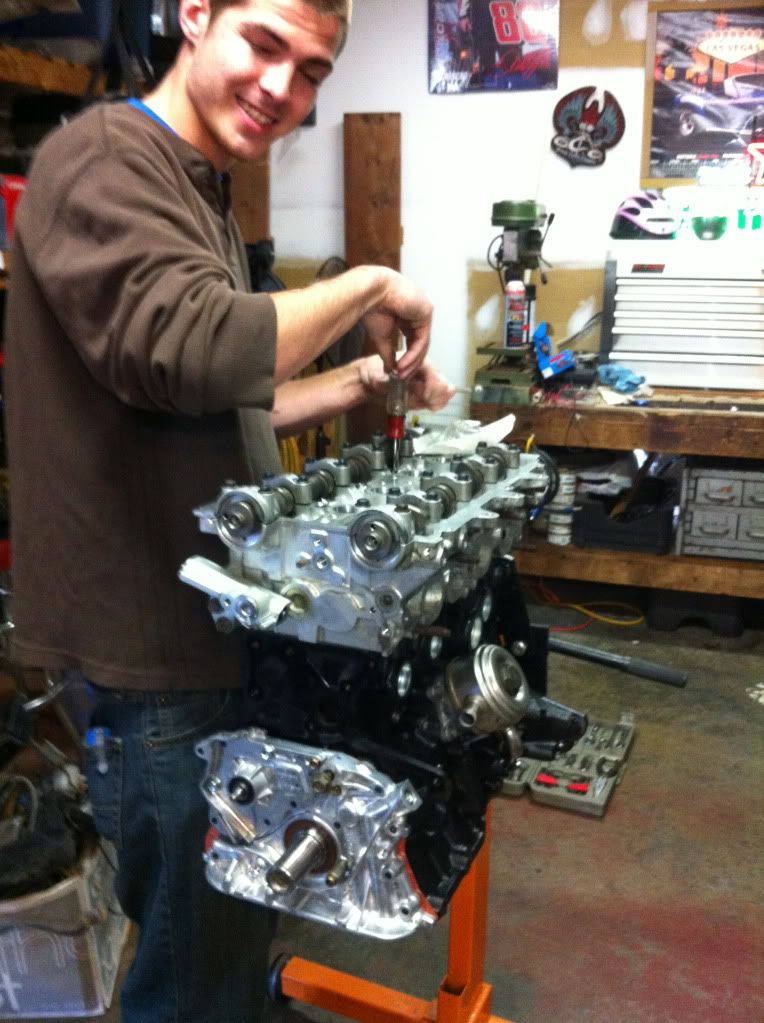
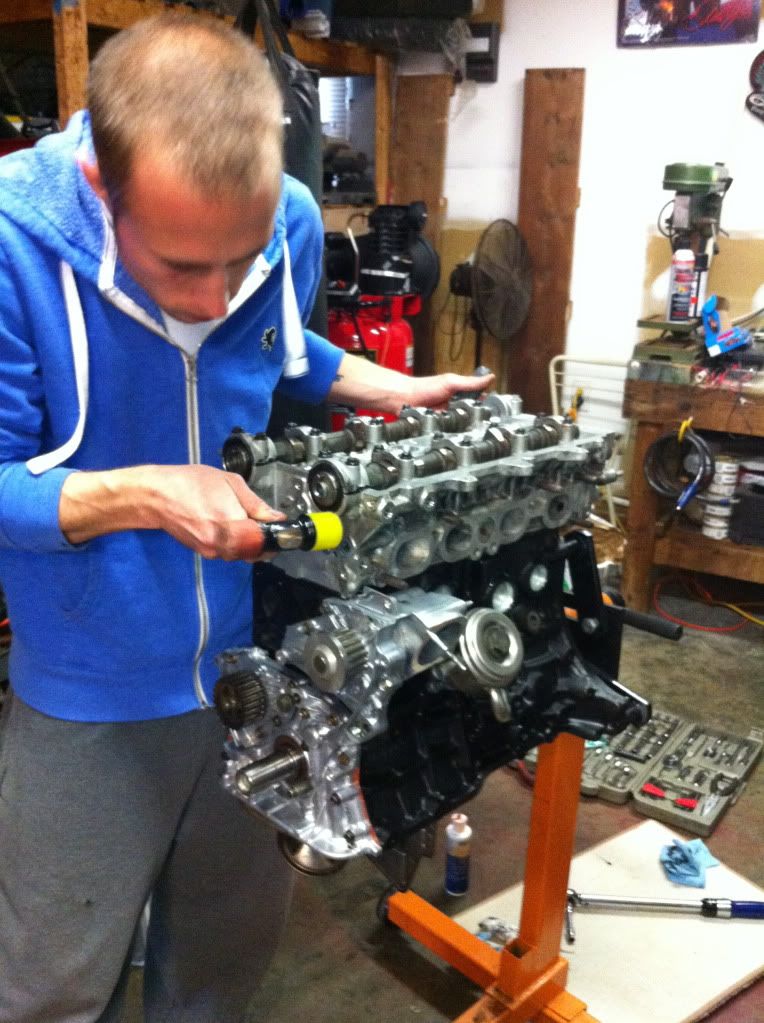
Great stuff today! Alex, Sam and Ben were over and we managed to get a lot together. Cams, gears, oil and water pump. All the seals and gaskets and oil pan. Looks freaking awesome. We had to shave out a couple notches to have a good seal because of the arp's but everything worked out in the end. Oh yea, couldn't find the oil pump bolts for about an hour but finally after 2 trips to the storage unit and false "yea these are them", we found em. They had been their the whole time and didnt say anything.


Jealous of your quick progress.
Side face! Epic.
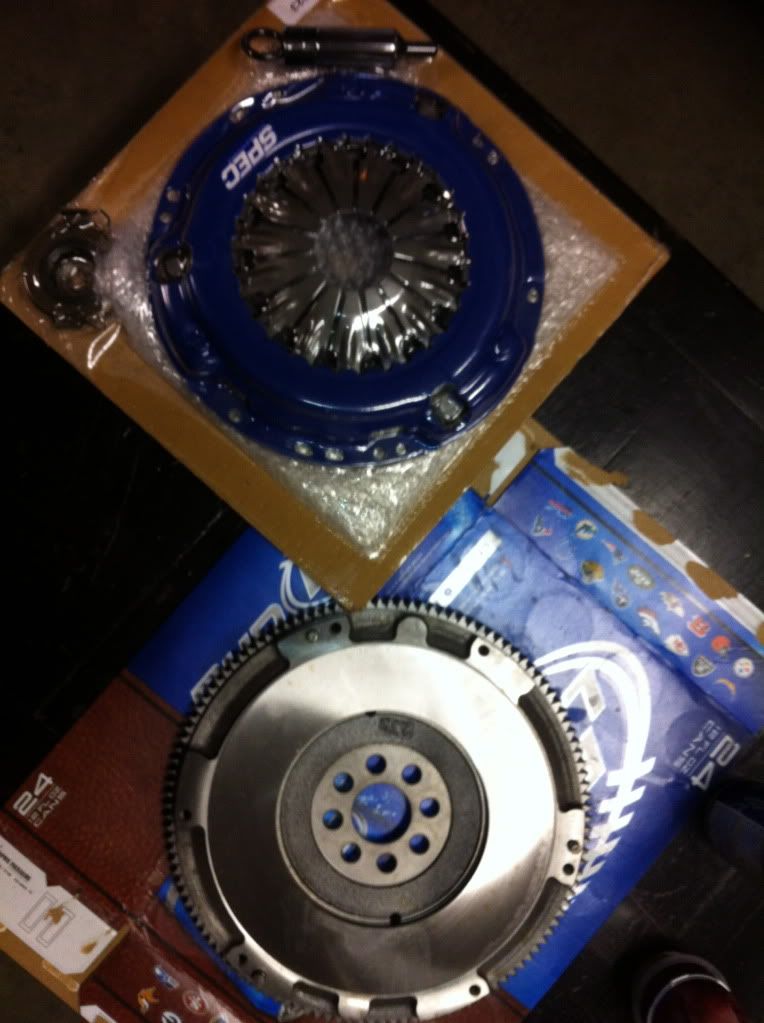
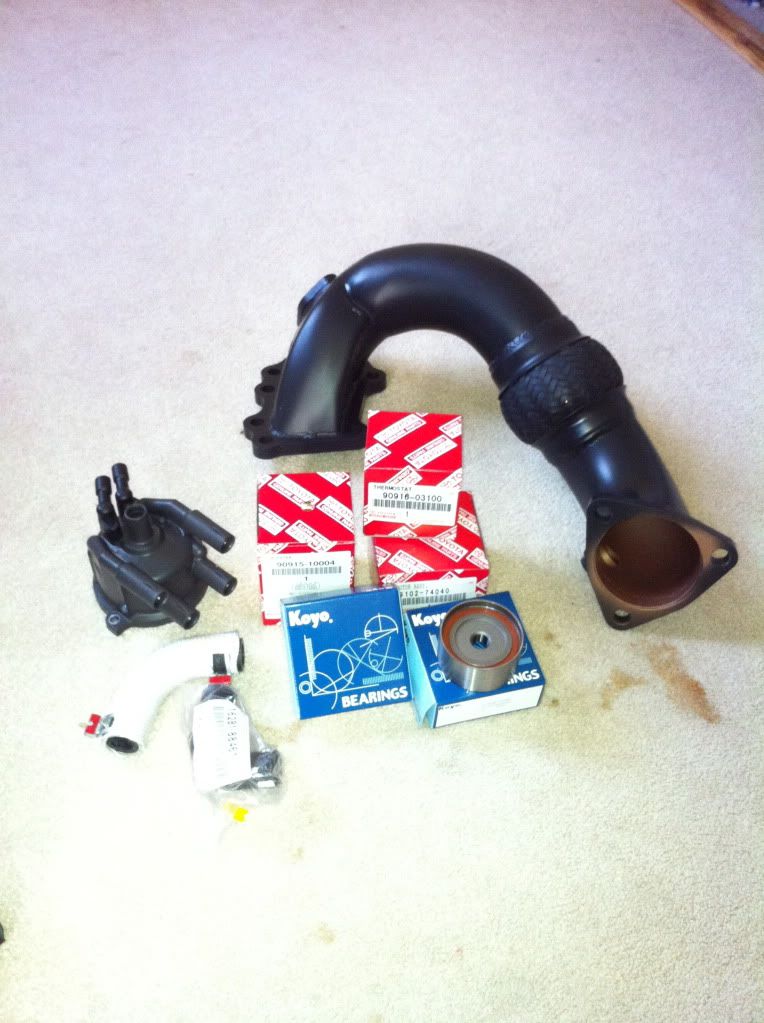
No progress on the engine quite yet. We've been waiting for some goodies  . Picked up the flywheel from the machine shop yesterday and the Spec Stage 3 just arrived, Both look freakin awesome. Also got the Berk 3'' and a cap, rotor, seal to rebuild the dizzy. Also, 2 new idler bearings, other hose from hell, and oil filter. Lotek triple a-pillar gauges will be here in 2-3 weeks ( mold broke so it will be a while till they make another mold)
Still need spark plugs, spark plug wires and axles and that should pretty much be it. Might have to drive around with just a down pipe for a couple weeks till i save up some more cash but no matter.
Took the injectors out, but, being that I've never messed with injectors Im hesitant to clean them any more than a good wipe down. Just not trying to F anything up.. especially because were this far into it. But got the fuel rail and water bypass pipe and intake manifold all cleaned up. Im sure I could install them but i think I Might as well take advantage of the guys' expertise and have them at least supervise (if thats the word you wanna call it) . Could you imagine if something happened during start-up because of me trying to go beyond my abilities. Def not gonna happen but I've said it before and Ill say it again lol, Im no mechanic, i love everything mechanical and certainly have a passion fast cars, but I think you have to earn the title of mechanic or handy man and Im def not there. No better way to learn though thats for sure.
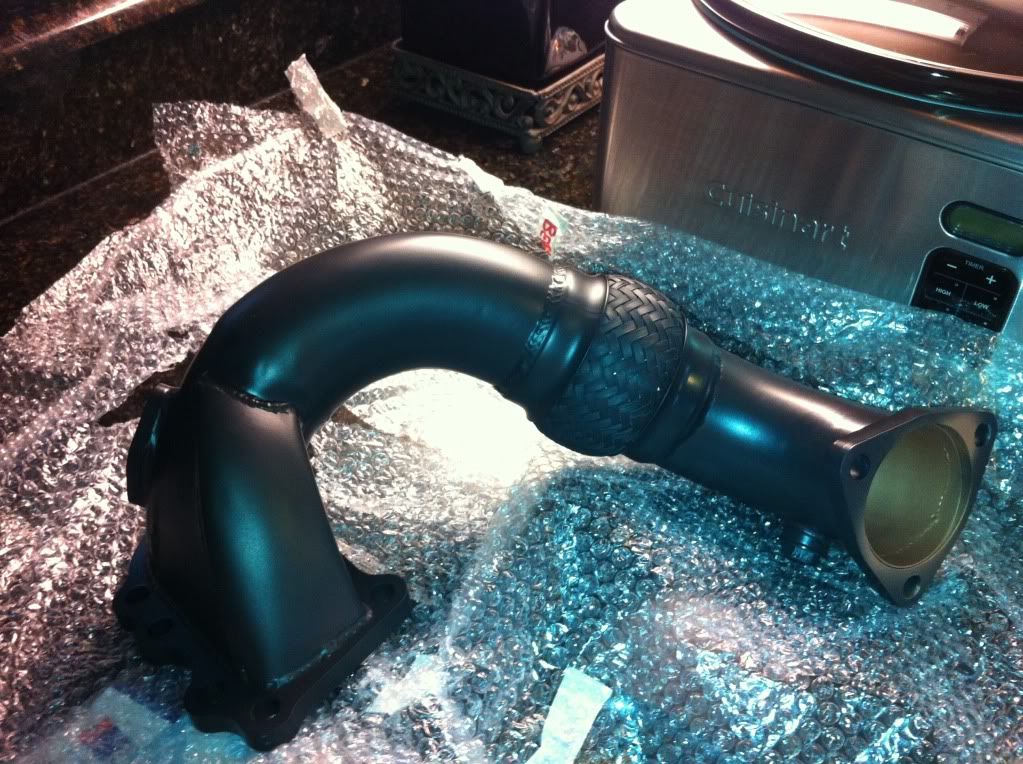
Anyway here are the goods...
The Berk 3''
The flywheel and Stage 3
The GT-500..

. Picked up the flywheel from the machine shop yesterday and the Spec Stage 3 just arrived, Both look freakin awesome. Also got the Berk 3'' and a cap, rotor, seal to rebuild the dizzy. Also, 2 new idler bearings, other hose from hell, and oil filter. Lotek triple a-pillar gauges will be here in 2-3 weeks ( mold broke so it will be a while till they make another mold) Still need spark plugs, spark plug wires and axles and that should pretty much be it. Might have to drive around with just a down pipe for a couple weeks till i save up some more cash but no matter.
Took the injectors out, but, being that I've never messed with injectors Im hesitant to clean them any more than a good wipe down
. Just not trying to F anything up.. especially because were this far into it. But got the fuel rail and water bypass pipe and intake manifold all cleaned up. Im sure I could install them but i think I Might as well take advantage of the guys' expertise and have them at least supervise (if thats the word you wanna call it) . Could you imagine if something happened during start-up because of me trying to go beyond my abilities. Def not gonna happen but I've said it before and Ill say it again lol, Im no mechanic, i love everything mechanical and certainly have a passion fast cars, but I think you have to earn the title of mechanic or handy man and Im def not there. No better way to learn though thats for sure. Anyway here are the goods...
The Berk 3''
The flywheel and Stage 3
The GT-500..
It is time padiwan
The way you shall lead
Very excited to finish this build i am. Btw would get an exhaust on there especially with winter sinking in. I know with na motors when you let off the gas air is actually sucked up the exhaust, too short and the colder air will bend valves. Hopefully this isnt true with turbos but better safe then sorry.
good thinkin i never thought of that... well i hope i can use my old muffler on the 3'' exhaust system but i think the muffler inlet is less than 3''..does it matter?
I wanted to use it because, well A to save money and B i think it'll sound even better with the 3s on the other end.
I wanted to use it because, well A to save money and B i think it'll sound even better with the 3s on the other end.
Youll need to just go ahead and do 3in all the way back. On turbo setups you want zero back pressure. Ben is running a magnaflow just like you, only his is 3in. Trust me. Itll be worth it.
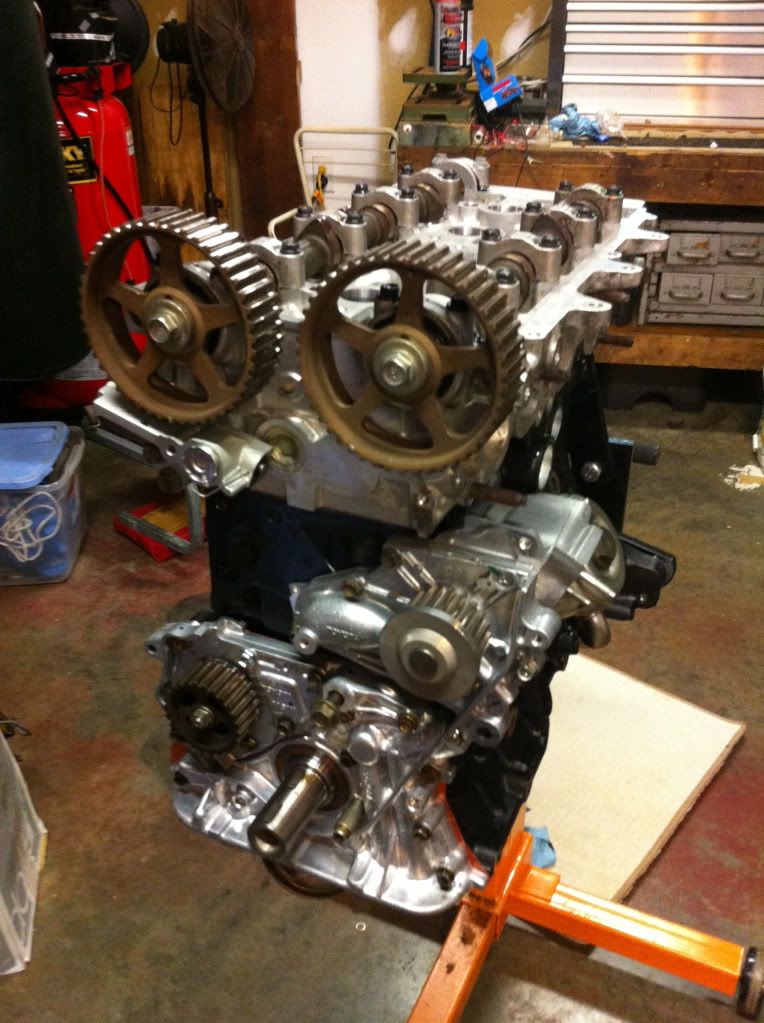
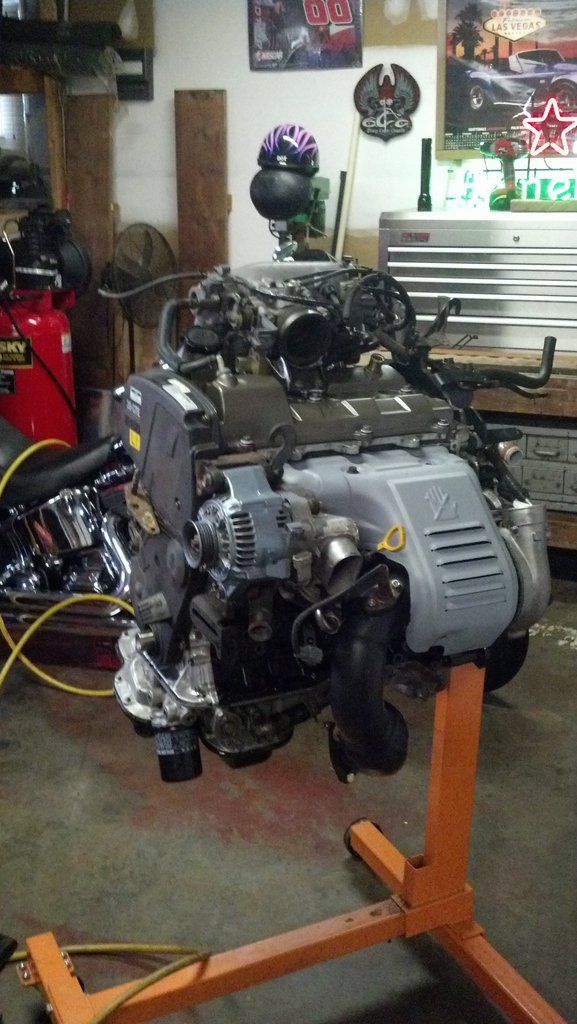
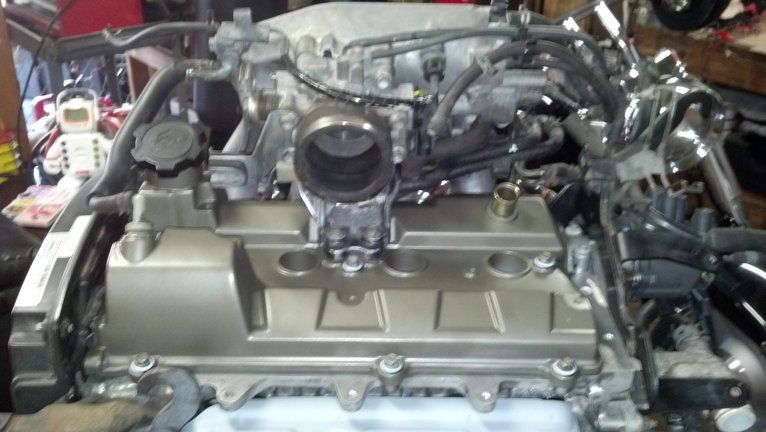
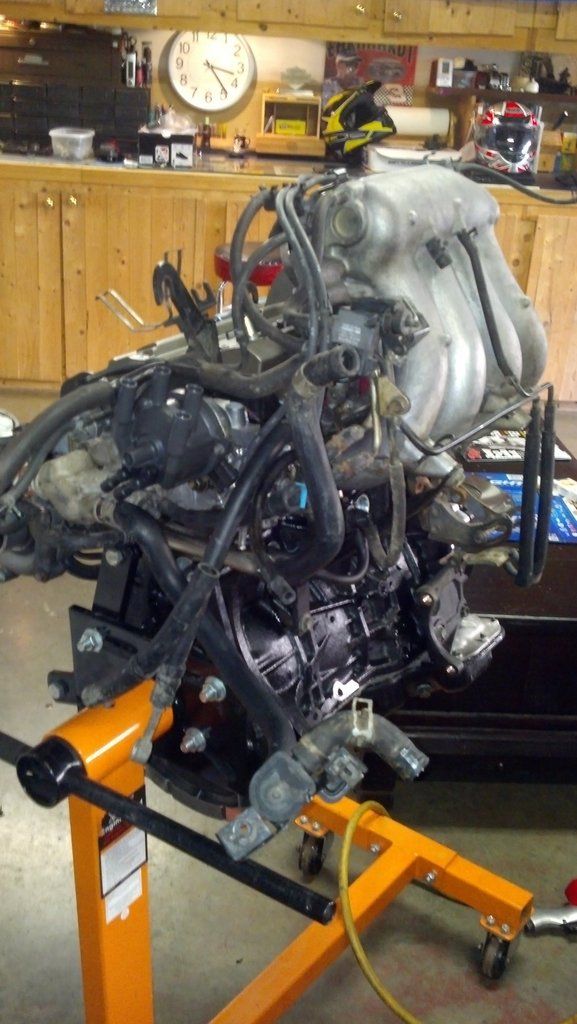
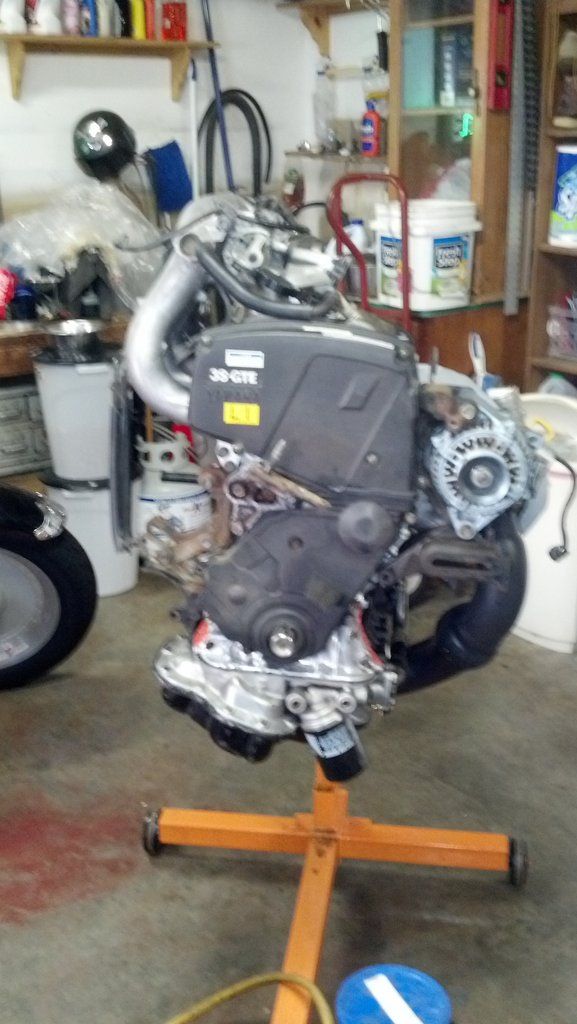
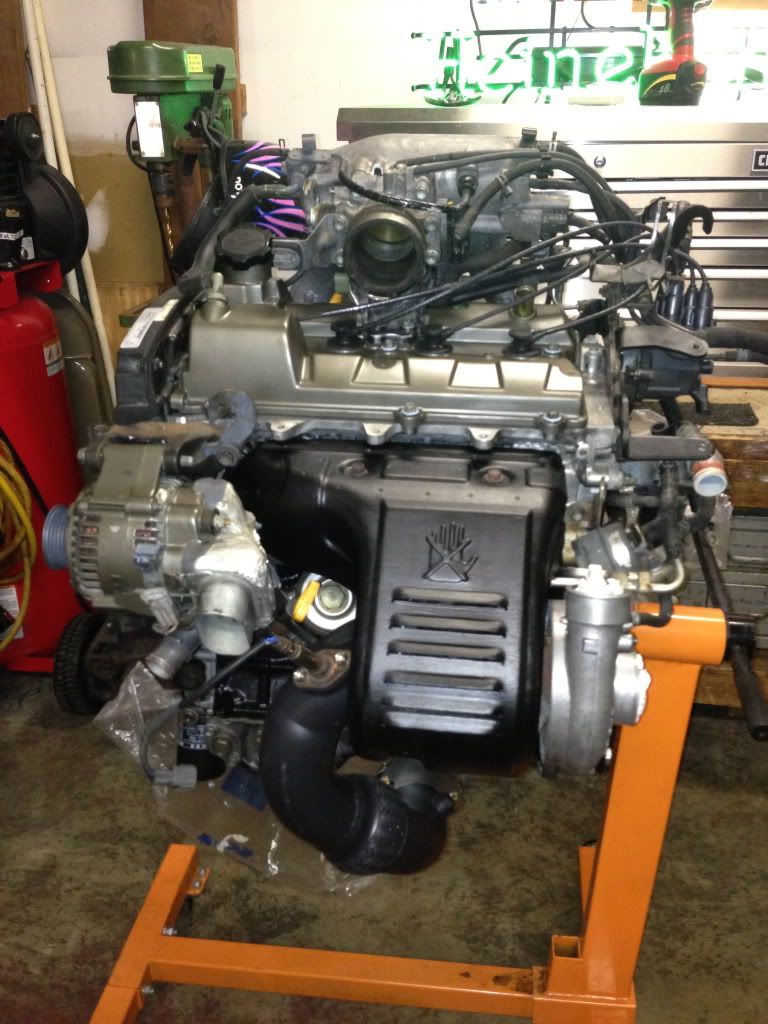
Got a lot done today. 90% finished with the engine at this point, and here are the pictures.
nice!
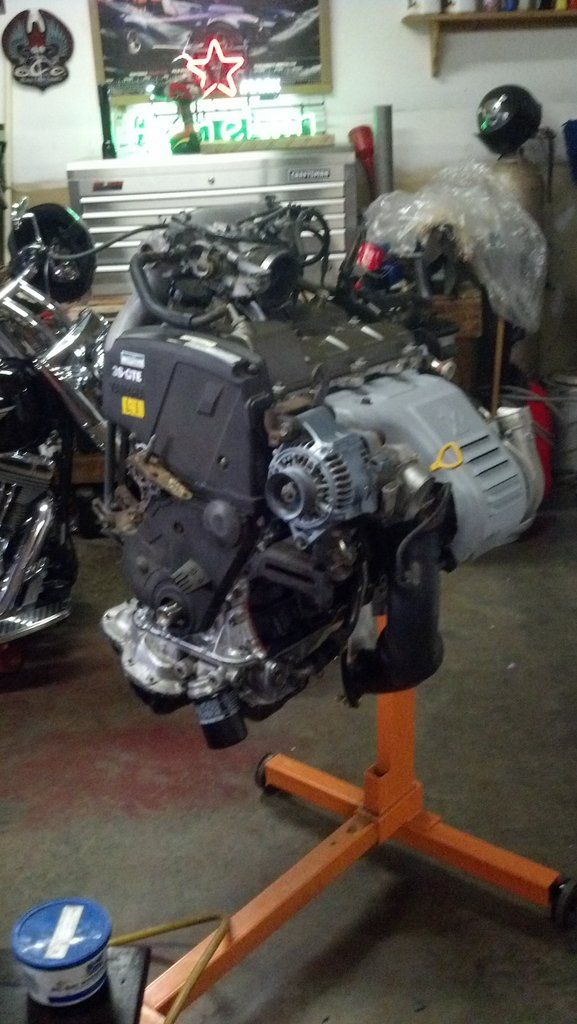
Coming along nicely motor looks great! and i must say i love... the GT500.. lol
st205 powered ss3 coupe
Thanks guys..its really going to be happening soon..and don't worry the heat shield will be painted a different color, probably silver...opinions are welcome!
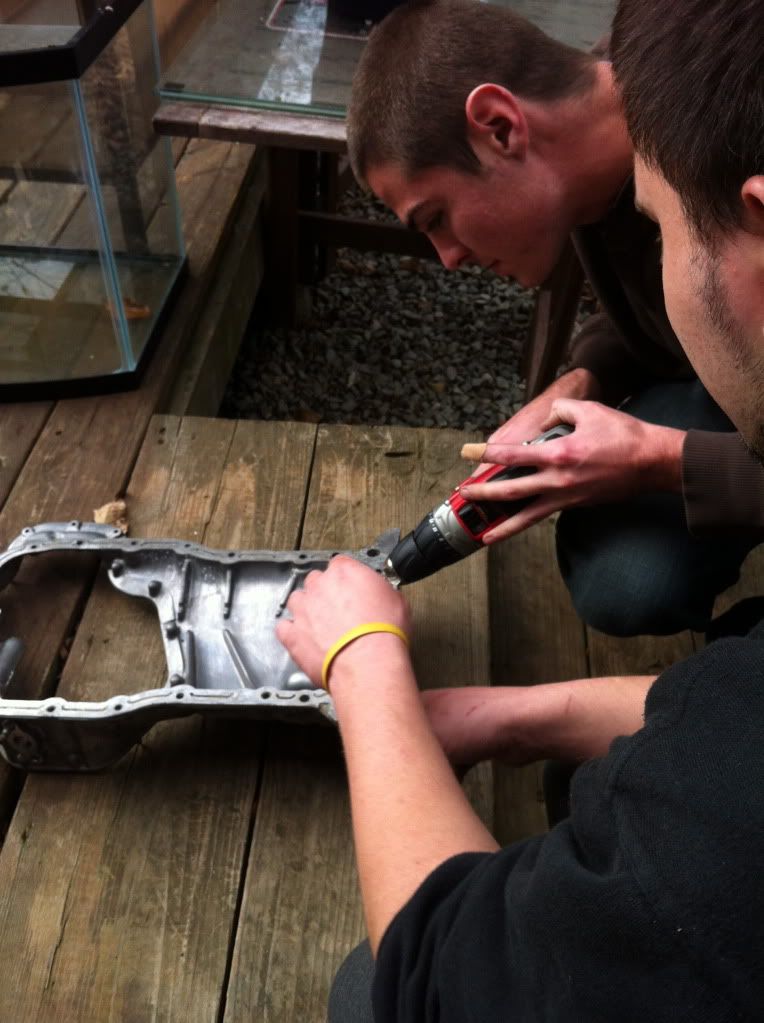
Ben and Sam came over and although I did a bad job of keeping all the nuts and bolts in one place got tons done....We did have a scare when Sam noticed that their was a valve stem seal in the gasket set which got us thinking that maybe the machine shop had Mis counted when he took them out of the gasket set when I dropped the head and block off, and that they forgot to install one.. I called them first thing this morning and he said he was certain that either Toyota sent an extra one with the set or that they used one that they had lying around..he mentioned that they have a system/ machine that they use with all heads they rebuild and assured me everything is put together right.
Has anyone ever received an extra valve stem seal or any seal for that matter in their gasket sets? I feel better after talking with the machine shop but still kinda curious..
Ben and Sam came over and although I did a bad job of keeping all the nuts and bolts in one place got tons done....We did have a scare when Sam noticed that their was a valve stem seal in the gasket set which got us thinking that maybe the machine shop had Mis counted when he took them out of the gasket set when I dropped the head and block off, and that they forgot to install one
.. I called them first thing this morning and he said he was certain that either Toyota sent an extra one with the set or that they used one that they had lying around..he mentioned that they have a system/ machine that they use with all heads they rebuild and assured me everything is put together right.Has anyone ever received an extra valve stem seal or any seal for that matter in their gasket sets? I feel better after talking with the machine shop but still kinda curious..
My rebuild set came with the exact amount of seals required so I would check. it's no big deal to take the valve cover and cams off. You can easily reuse the cover gasket because it hasn't been heat cycled yet. The motor is looking awesome so why leave anything to chance?
This post has been edited by enderswift: Dec 24, 2012 - 12:03 PM
This post has been edited by enderswift: Dec 24, 2012 - 12:03 PM
It definitley makes sense to go back and check Ender.
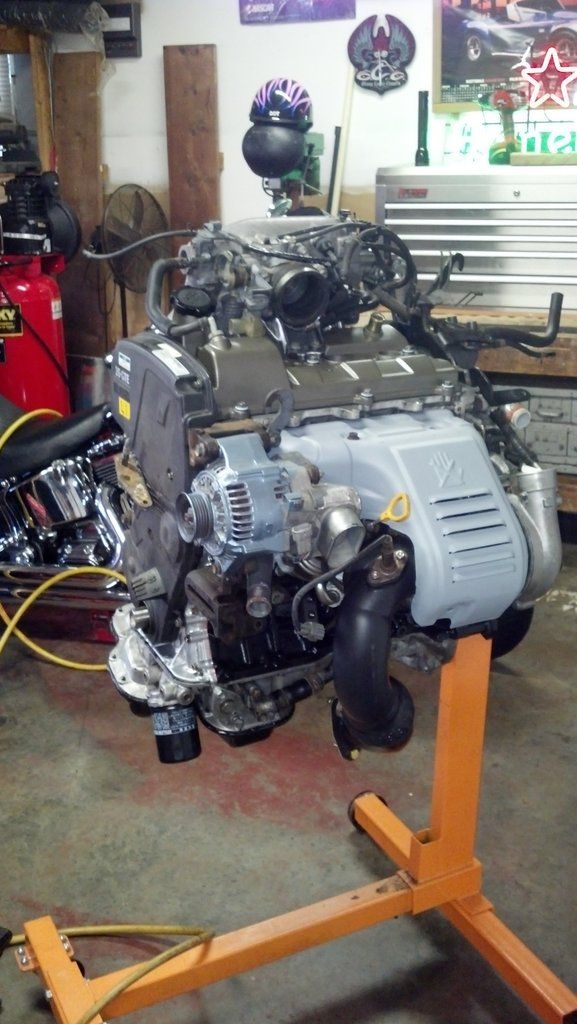
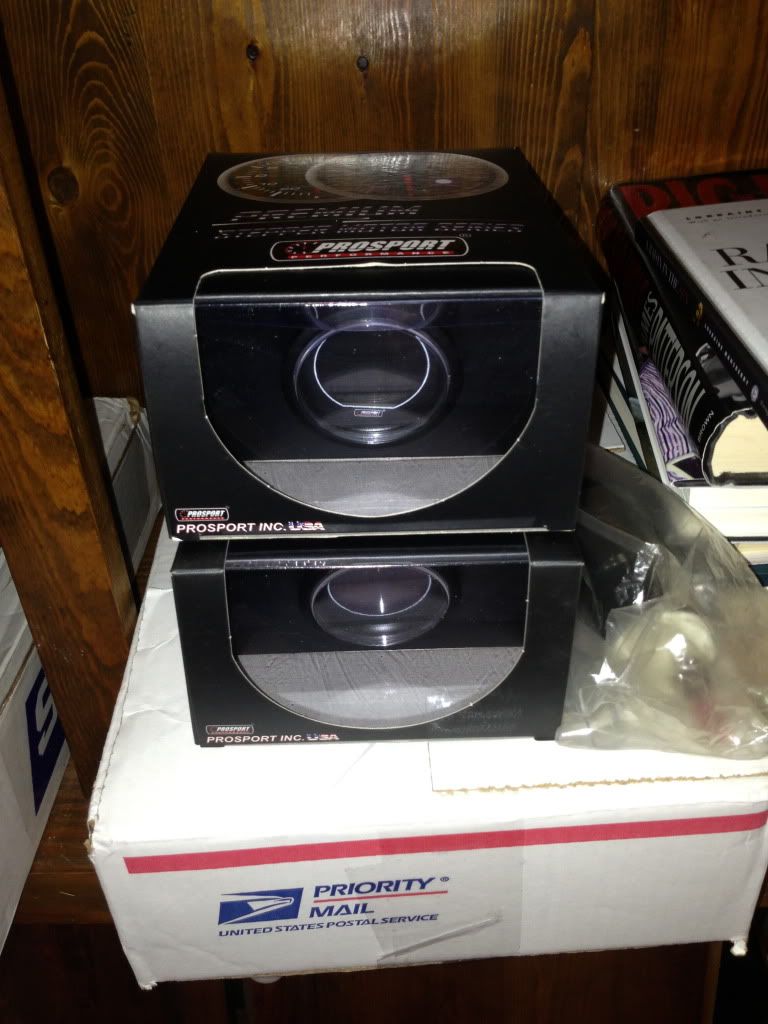
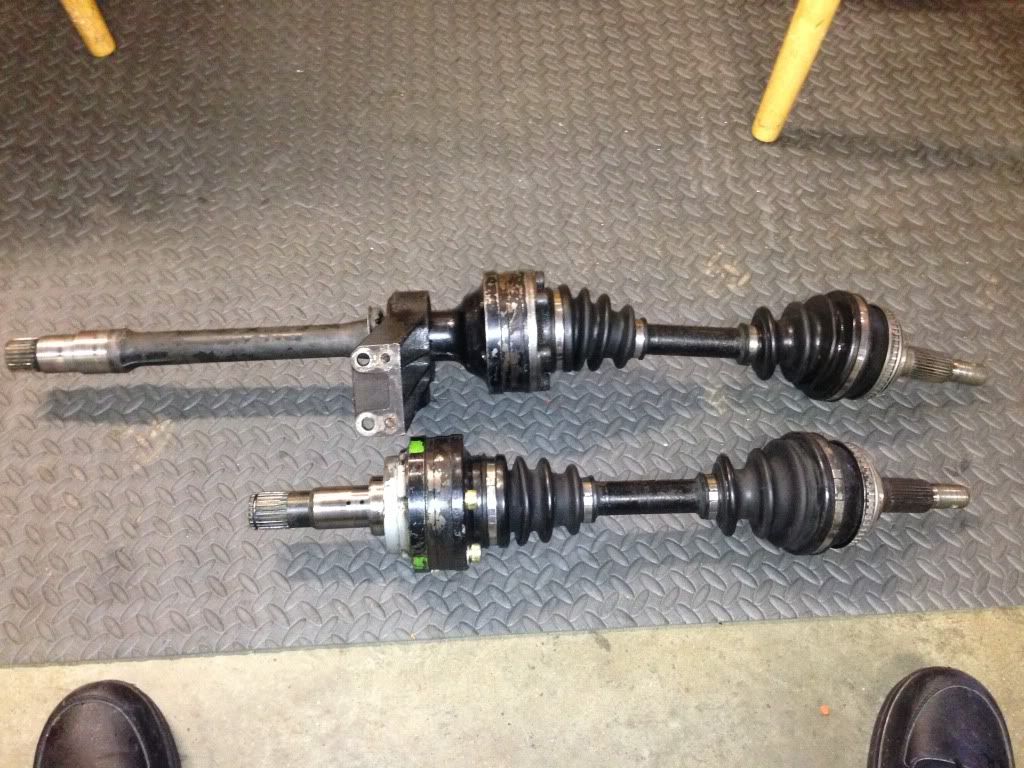
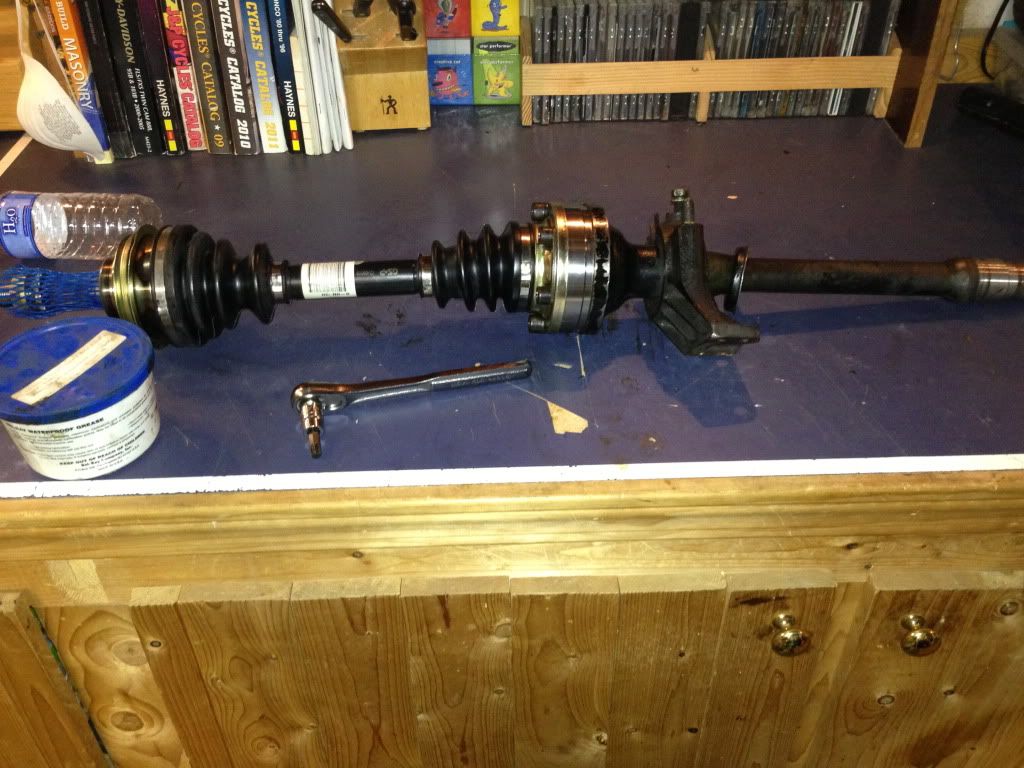
Meanwhile i received my mr2 axles for the hybrid set up; all trac axles are on the way and same with the st205 shifter cables. Also got lotek triple gauge pod and two of the gauges. There the prosport evo series red/blue wideband and boost for now; still need the oil pessure. Engine looks a little better too since i painted the heat shield and alternator.
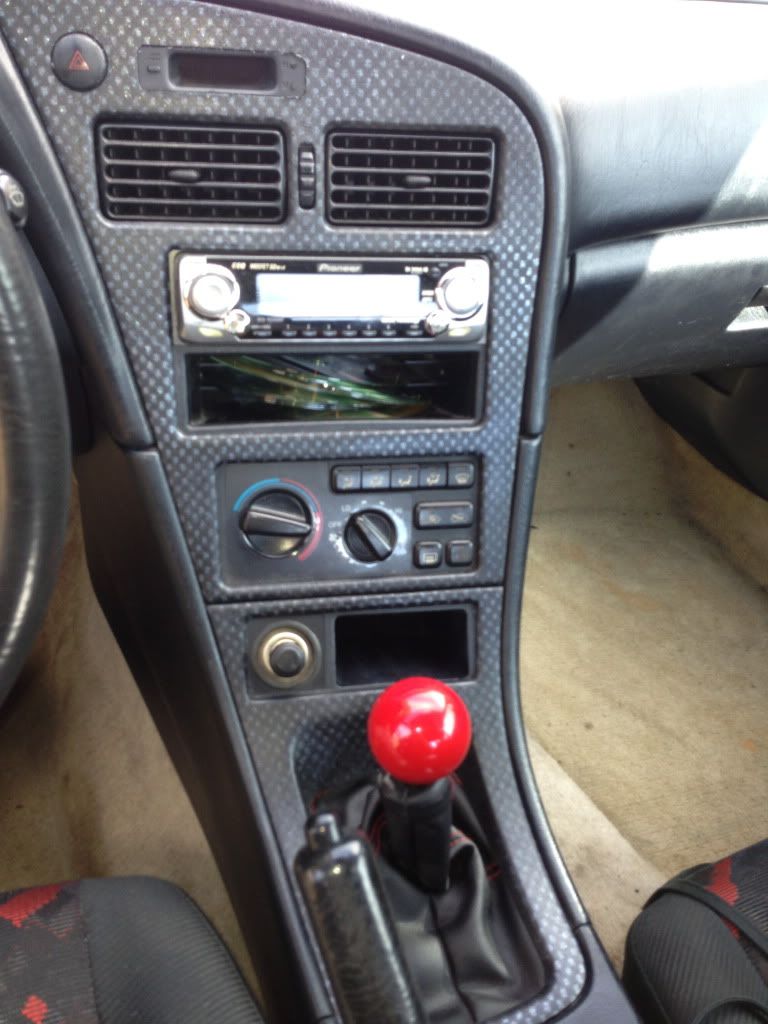
I ordered the plasti-dip carbon fiber paint kit from dipyourcar.com. The dude carbon fibered his ipad and it looked pretty sweet so Im gonna give it a go with the interior bits. Center Console, air vents, etc..It consists of like a three step paint job using a template for the carbon fiber design. I know some of you are like "eh" but I've always wanted a different interior and this doesn't cost that much to try it. I personally think plasti dip is pretty sweet even though its not the real deal.
prosport evo series
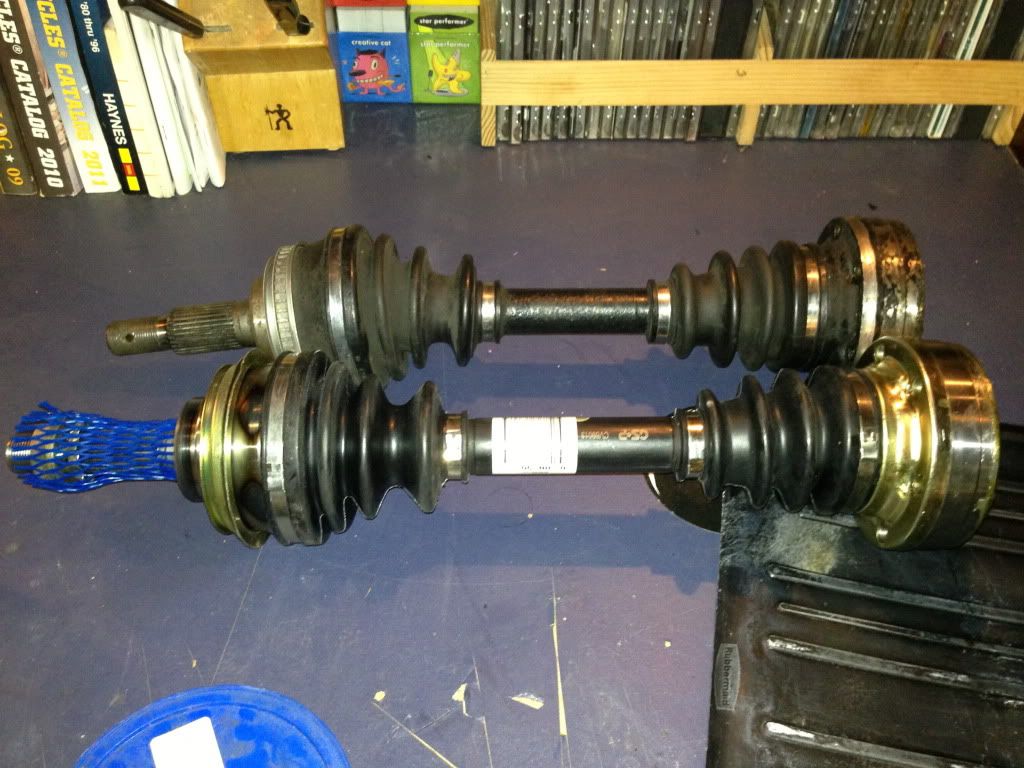
Mr2 axles
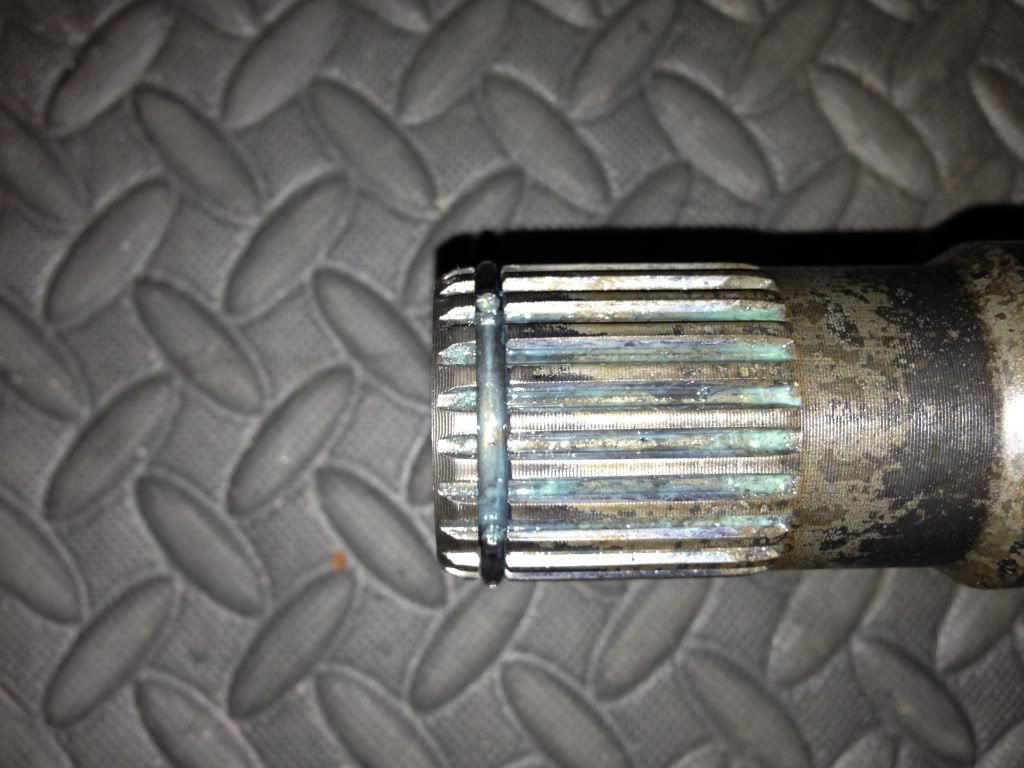
No snap ring? Wasn't sure if there was supposed to be one sense the other axle has one
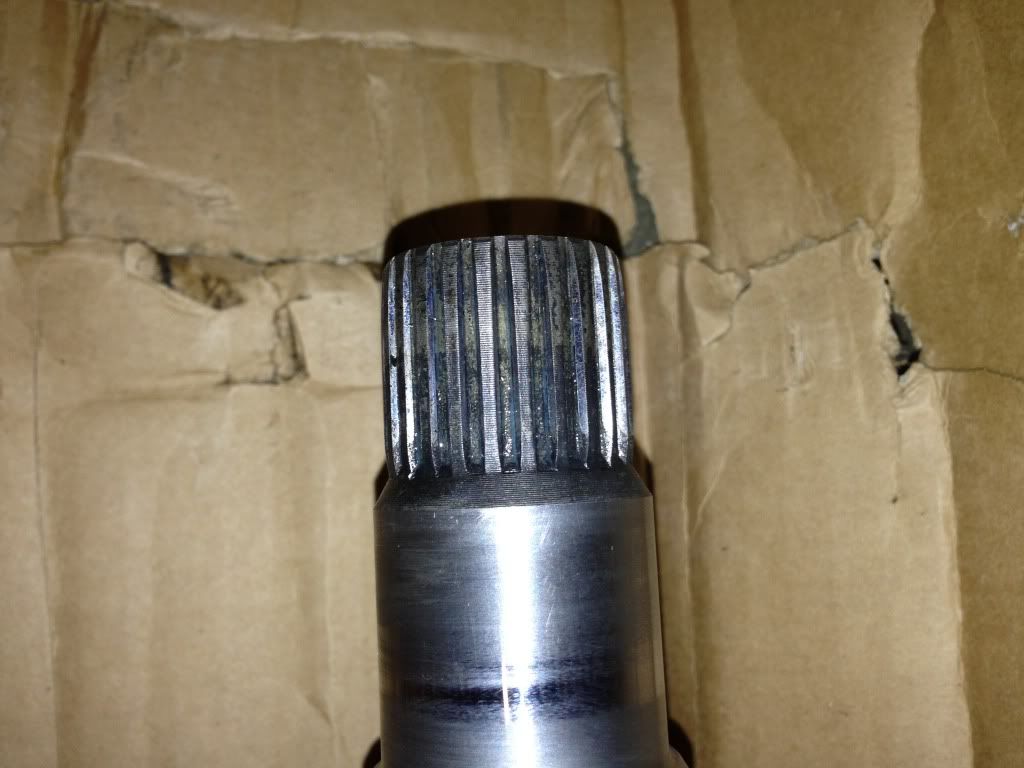
Snap ring..the smaller axle has a snap ring but is it broke or supposed to have a gap?
Looks better
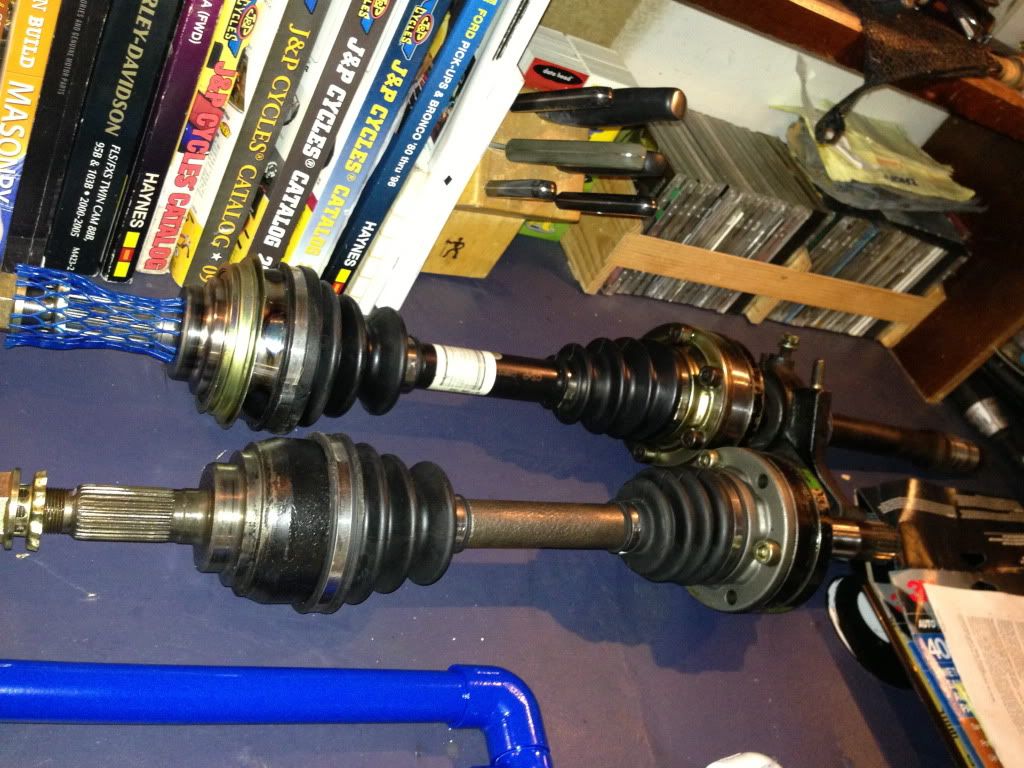
Ill probably post in another thread but I had questions about the Mr2 axles.
1)Is the Snap ring on the smaller axle supposed to be shaped like a C instead of connecting? or is this one broke? (see picture)
2)Are there only supposed to be a Snap ring on the transmission side on only that one axle instead of both left and right?
3)Does anyone have any tips on connecting the two sets of axles? I've looked and looked on this subject but theres really not a step by step procedure. Maybe its pretty self explanatory.
4)And also the spacer. It looks like there will be some left over parts I might be able to use for the spacer that is apparently needed on the passenger side no matter what.
And before people get fussy about bringing up old subjects and "not searching", I've been on this forum for like 5 years and its still hard for me to find things even tho this site is put together. Plus going into actual depth about the hybrid axles and spacer, I don't think has been covered much. Ill make a "How to" with Pictures having said that but first i need to know "How to" lol. Maybe its just a matter of removing the 6 bolts and connecting.
If i dont get any hits on this matter ill probably just post it in it's own thread. Sometimes people don't notice the questions in build threads; well atleast in my build thread lol.
Meanwhile i received my mr2 axles for the hybrid set up; all trac axles are on the way and same with the st205 shifter cables. Also got lotek triple gauge pod and two of the gauges. There the prosport evo series red/blue wideband and boost for now; still need the oil pessure. Engine looks a little better too since i painted the heat shield and alternator.
I ordered the plasti-dip carbon fiber paint kit from dipyourcar.com. The dude carbon fibered his ipad and it looked pretty sweet so Im gonna give it a go with the interior bits. Center Console, air vents, etc..It consists of like a three step paint job using a template for the carbon fiber design. I know some of you are like "eh" but I've always wanted a different interior and this doesn't cost that much to try it. I personally think plasti dip is pretty sweet even though its not the real deal.
prosport evo series
Mr2 axles
No snap ring? Wasn't sure if there was supposed to be one sense the other axle has one
Snap ring..the smaller axle has a snap ring but is it broke or supposed to have a gap?
Looks better
Ill probably post in another thread but I had questions about the Mr2 axles.
1)Is the Snap ring on the smaller axle supposed to be shaped like a C instead of connecting? or is this one broke? (see picture)
2)Are there only supposed to be a Snap ring on the transmission side on only that one axle instead of both left and right?
3)Does anyone have any tips on connecting the two sets of axles? I've looked and looked on this subject but theres really not a step by step procedure. Maybe its pretty self explanatory.
4)And also the spacer. It looks like there will be some left over parts I might be able to use for the spacer that is apparently needed on the passenger side no matter what.
And before people get fussy about bringing up old subjects and "not searching", I've been on this forum for like 5 years and its still hard for me to find things even tho this site is put together. Plus going into actual depth about the hybrid axles and spacer, I don't think has been covered much. Ill make a "How to" with Pictures having said that but first i need to know "How to" lol. Maybe its just a matter of removing the 6 bolts and connecting.
If i dont get any hits on this matter ill probably just post it in it's own thread. Sometimes people don't notice the questions in build threads; well atleast in my build thread lol.
1) The ring on the transmission side looks normal to me.
2) The engine side axle has that carrier bracket and the axle is secured in place by that. By either its own ring or a couple bolts.
2) The engine side axle has that carrier bracket and the axle is secured in place by that. By either its own ring or a couple bolts.
right on. Thanks.
1. it normal - "C" shaped
2. just one, the pass side is held in with the carrier and bracket.
3. It's not difficult, just don't take the balls out. There is a vid on youtube I watched a while back about how to get the balls back in if you mess it up. Add more grease and they bolt together.
4. I was bale to bring a part of the unused axle to a machine shop and they cut it off for my spacer.
Look at my 205 thread (link in sig) for pics.
I hate it when noobs don't search lol
lol
2. just one, the pass side is held in with the carrier and bracket.
3. It's not difficult, just don't take the balls out. There is a vid on youtube I watched a while back about how to get the balls back in if you mess it up. Add more grease and they bolt together.
4. I was bale to bring a part of the unused axle to a machine shop and they cut it off for my spacer.
Look at my 205 thread (link in sig) for pics.
I hate it when noobs don't search
lol
my st205 swapandour Beams swap
Well than this is good. You guys answered all my questions, theres no bad news just yet, and although i was called a noob, the famous batman has let us all know that he once needed help from a video on how to get his balls back in place. Lovely...lovely lovely.
well salvage yard just called and said that the all trace axles they thought they had are missing. This is the second place to do this to me. And they said they couldn't find any, any where else. Weird.
Ended up picking up a 91 camry axle from advanced auto and managed to get the passenger side axle done.
It measures a little more than 38'' inches from end to end. I don't know if anyone has any notes on hand they might have kept when they were doing their hybrid axles but i'd like to know if 38'' inches is long enough to not need a spacer on the pass. side. Probably be a good idea to get one fabricated anyway.
Here is the mr2 outer and 91 camry outer axles side by side ( mr2 on top). It's really not that much longer.
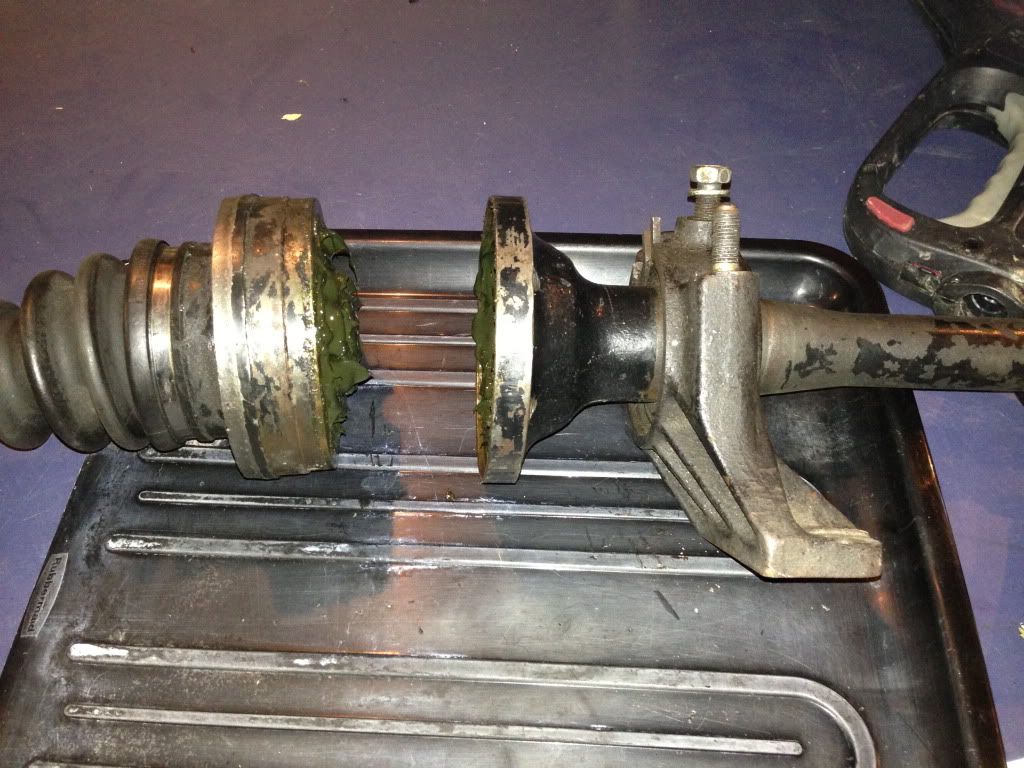
6 bolts and it comes apart
Finished pass. Side
these pictures are more for making sure i did it right than a "How to" lol.
Also my carbon fiber plasti dip set came in. Definitely not what i expected but hey at least it comes off.
It measures a little more than 38'' inches from end to end. I don't know if anyone has any notes on hand they might have kept when they were doing their hybrid axles but i'd like to know if 38'' inches is long enough to not need a spacer on the pass. side. Probably be a good idea to get one fabricated anyway.
Here is the mr2 outer and 91 camry outer axles side by side ( mr2 on top). It's really not that much longer.
6 bolts and it comes apart
Finished pass. Side
these pictures are more for making sure i did it right than a "How to" lol.
Also my carbon fiber plasti dip set came in. Definitely not what i expected but hey at least it comes off.
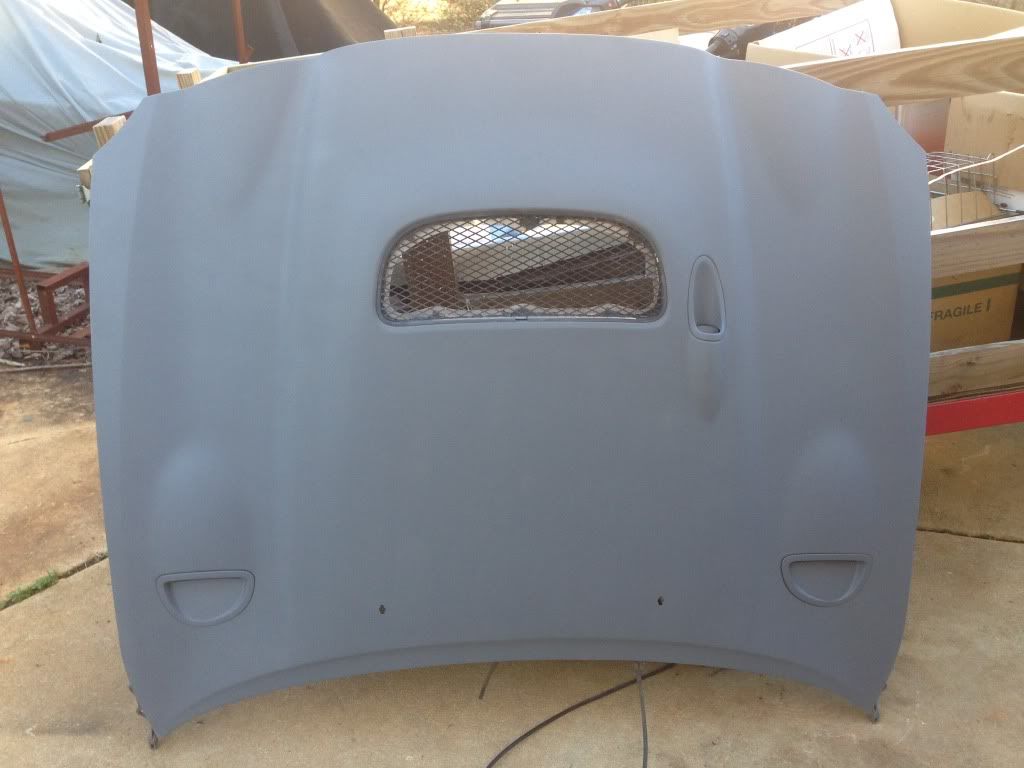
finished both axles. No spacer on pass. side. Ill get one fabricated just in case though. Also primed the hood. Next is the bumper but having trouble finding the paint that would work best on bumpers without cracking. Any suggestions?
91 camry v6 outers. Mr2 inners. Using e153 from a 99 v6 camry.
91 camry v6 outers. Mr2 inners. Using e153 from a 99 v6 camry.
test fit the pass side axle into the tranny.
I had a problem with mine and had to have the axle trimmed at a machine shop.
I had a problem with mine and had to have the axle trimmed at a machine shop.
my st205 swapandour Beams swap
ok will do. thanks
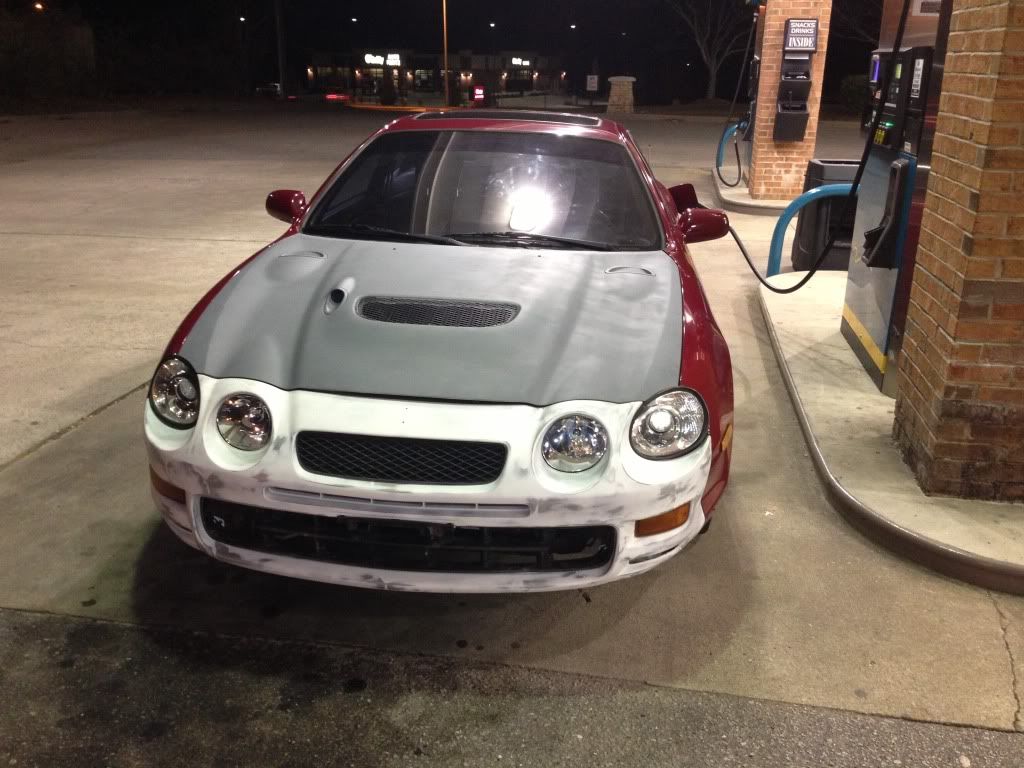
well managed to get the gt four front end put on. Took me a few hours and some investments in new tools but it looks great.
i bought an angle grinder and cut the lower "cell" of the stock crash bar. The only complicated part is putting the stock 96 fog brackets back on but then i realized i didn't need them, so that was good.
Modified the stock hood latch by "grinding" and "punching" out the bolt that holds the latch itself and replacing it with the longer gt four latch and putting a thicker bolt through it. Shuts and opens just like it was stock. I don't have any type of welding equipment nor do i know how to weld so that wasn't an option for me. I used the thread on here that shows "how to extend your hood latch without welding".
Theres still a tiny tiny gap between the hood and bumper and the front end's not painted yet. Im just going to use several washers to shim the bumper and rubber spacer thing to get rid of the gap and get Maaco to paint the front end next week. They do a good job and Im really not trying to f it up. I got a couple fenders i can practice painting first.
Soon Im going to have to make up an official check list before we swap the engine in to make sure Im not struggling to find parts when it comes time.
i bought an angle grinder and cut the lower "cell" of the stock crash bar. The only complicated part is putting the stock 96 fog brackets back on but then i realized i didn't need them, so that was good.
Modified the stock hood latch by "grinding" and "punching" out the bolt that holds the latch itself and replacing it with the longer gt four latch and putting a thicker bolt through it. Shuts and opens just like it was stock. I don't have any type of welding equipment nor do i know how to weld so that wasn't an option for me. I used the thread on here that shows "how to extend your hood latch without welding".
Theres still a tiny tiny gap between the hood and bumper and the front end's not painted yet. Im just going to use several washers to shim the bumper and rubber spacer thing to get rid of the gap and get Maaco to paint the front end next week. They do a good job and Im really not trying to f it up. I got a couple fenders i can practice painting first
. Soon Im going to have to make up an official check list before we swap the engine in to make sure Im not struggling to find parts when it comes time.
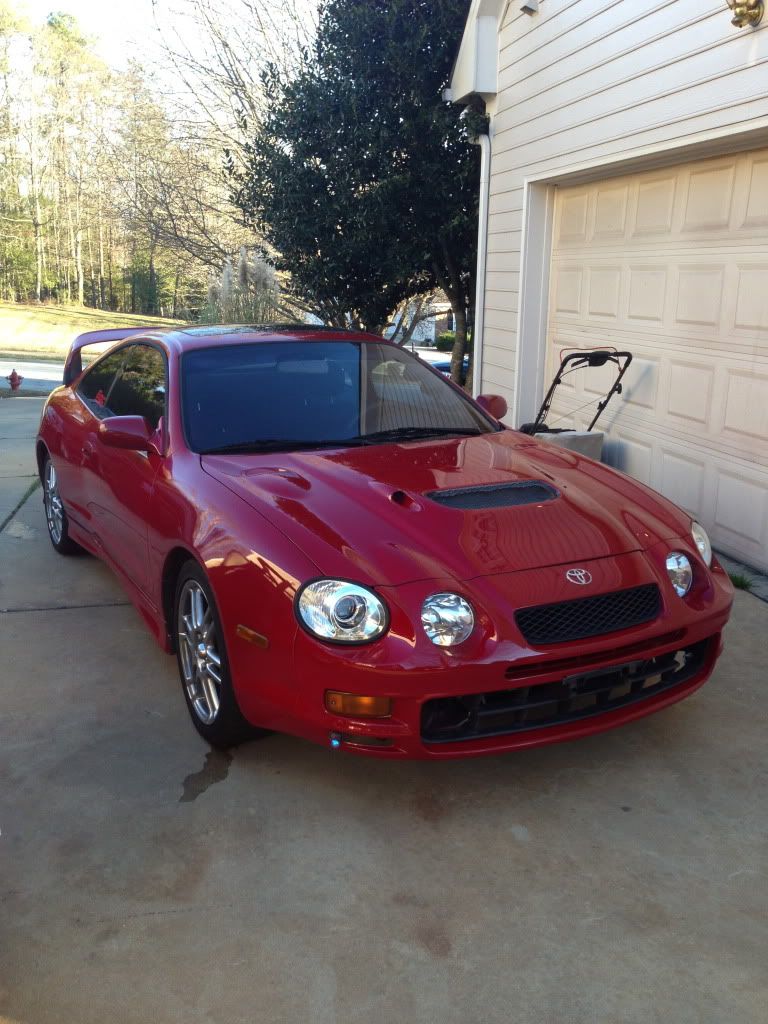
MAACO PAINT CAME OUT GREAAT!!
still need to put the splitters and fog lights on.
Now All thats left is dropping the engine in. hint hint
still need to put the splitters and fog lights on.
Now All thats left is dropping the engine in.
hint hint
Paint looks great! ^^
I painted my old Celi at my dad's Maaco. It's the quality of the prep work that makes the difference!
I painted my old Celi at my dad's Maaco. It's the quality of the prep work that makes the difference!
SPYRO|DARKSPYRO|CYRIL
>
You said it perfect man, the car came out great but a real good paint job all comes down to the prep work, as well as a good painter but even a great painter cant hide bad body work.
car looks great man!
QUOTE (Malek @ Feb 17, 2013 - 7:29 PM) 
>Paint looks great! ^^
I painted my old Celi at my dad's Maaco. It's the quality of the prep work that makes the difference!
I painted my old Celi at my dad's Maaco. It's the quality of the prep work that makes the difference!
You said it perfect man, the car came out great but a real good paint job all comes down to the prep work, as well as a good painter but even a great painter cant hide bad body work.
car looks great man!
st205 powered ss3 coupe
thanks guys i cant stop looking at it lol